2530 Centerville Turnpike S, Chesapeake, VA 23322

How Summer Storms Affect Your Foundation

How Summer Storms Affect Your Foundation

Summer in Hampton Roads means heat, humidity, and storms that can drop two or three inches of rain in under an hour. Most homeowners watch the weather, wait for it to pass, and move on. But what’s happening under and around your house during those storms, and in the days after, is worth paying attention to. Foundations in this region take a beating from the seasonal weather cycle, and the damage tends to be cumulative rather than dramatic. You won’t usually see a storm crack your foundation in one shot. You’ll see the effects of five years of storms that nobody addressed.

What Summer Storms Actually Do to the Soil Around Your Foundation

The soil in Chesapeake and the surrounding area is the starting point for most storm-related foundation issues. A significant portion of it is clay-heavy, and clay behaves in ways that put real stress on foundations over time. When rain saturates clay soil, it expands. When it dries out, it contracts and pulls away. That cycle happens every season, and every cycle puts some amount of movement and pressure on whatever is sitting in or on that soil.

During a heavy summer storm, saturated soil becomes heavy and exerts lateral pressure against foundation walls. This is hydrostatic pressure, and it’s not trivial. Water weighs about 62 pounds per cubic foot, and when the soil around your foundation is holding that water against your walls, the force adds up quickly. Over time, that pressure is what causes foundation walls to crack, bow inward, and in serious cases, fail structurally.

The flip side happens when things dry out. After the storm passes and a dry stretch follows, that same clay soil shrinks back. If it shrinks unevenly, which it usually does, the foundation loses support in some spots and not others. That differential movement is what produces the diagonal cracks in brick and drywall that are so common in older Hampton Roads homes. The USGS has documented ongoing land subsidence in the Hampton Roads region, which compounds the natural movement already happening from soil expansion and contraction.

Drainage Problems That Make It Worse

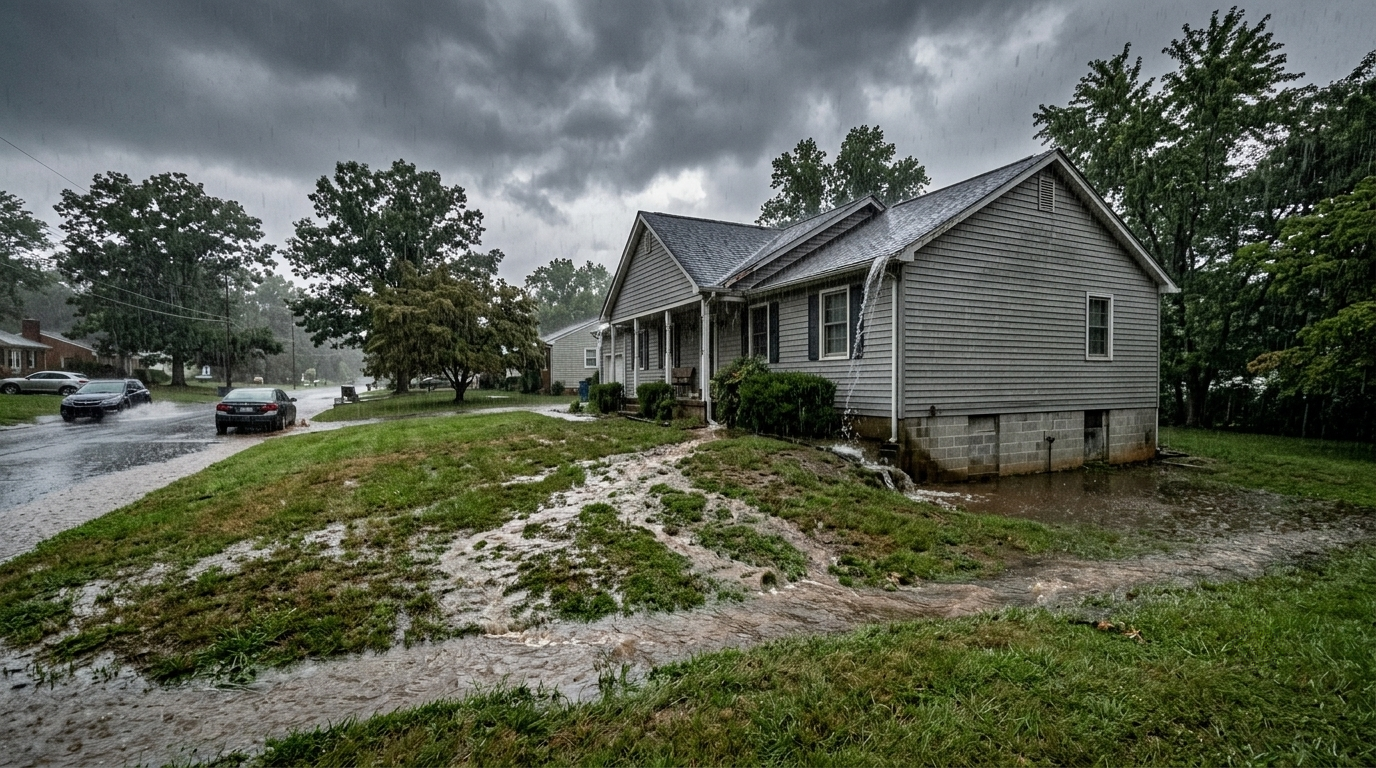
A well-drained yard handles storm water before it ever becomes a foundation problem. The issue is that a lot of homes in this area, especially older ones, have grading or drainage situations that work against them. If the ground slopes toward the house, water from a heavy storm funnels directly toward the foundation. If gutters are dumping runoff at the base of the wall rather than carrying it away, every storm is adding water to the soil right where you don’t want it.

Clogged or undersized gutters are a surprisingly common contributor to foundation issues. When gutters overflow, water pours down the exterior wall and saturates the soil at the foundation line repeatedly. It’s easy to overlook because the damage is invisible and slow, but the soil right next to the footing is getting soaked storm after storm while the rest of the yard drains normally. Over a few years that adds up.

French drains and proper perimeter grading are what address this at the source. A French drain intercepts water before it reaches the foundation and redirects it away from the house. It’s not the most exciting solution, but it’s one of the more effective ones for homes dealing with repeated storm-related water intrusion. Combined with downspout extensions that carry water at least six feet from the foundation, the drainage situation around a home can usually be improved significantly without major work. You can read more about foundation drainage and stabilization services and how they apply to storm-related issues.

What to Look For After a Major Storm

You don’t need to be a contractor to do a useful post-storm check. There are a few things worth looking at after any storm that brought significant rainfall.

Walk the perimeter of the house and look for pooling water, especially near the foundation. Note any areas where water seems to be sitting longer than the rest of the yard. Check your gutters and downspouts to make sure they’re clear and directing water away from the house. Look at the foundation walls themselves for any new cracking or for efflorescence, the white chalky mineral deposits that show up where water has been moving through concrete or block repeatedly.

Inside, pay attention to doors and windows that suddenly feel harder to operate than they did before the storm. A door that racked slightly, meaning the frame shifted just enough that the door no longer closes cleanly, can indicate foundation movement. Check the basement or crawl space for water intrusion, new cracks in the walls, or any change in how the space looks or smells. A musty odor that wasn’t there before a storm is often the first sign that water got in somewhere.

None of these signs on their own necessarily mean something catastrophic is happening. But patterns matter. If you’re noticing the same things after every major storm, or if something that was minor last summer is visibly worse this year, that’s worth having looked at. FEMA’s coastal construction guidance specifically identifies drainage management and soil behavior as central concerns for foundations in coastal plain environments like Hampton Roads, not secondary considerations.

When Storm Damage Becomes a Foundation Repair Problem

The line between “keep an eye on it” and “get this fixed” comes down to whether the symptoms are active and progressing. Stable cracks that have been the same for years are usually just evidence of past settling. Cracks that are widening, walls that are visibly bowing, or floors that have changed noticeably over a season are signs of ongoing movement that isn’t going to stop on its own.

Repeated storm flooding in a crawl space is in the same category. One flood that dries up quickly is different from a crawl space that holds water for days after every major rain. The second situation means the framing is getting repeatedly wetted and dried, which is exactly the cycle that leads to rot, mold, and eventually structural damage to the floor system. A proper crawl space encapsulation with drainage addresses this at the source rather than just cleaning up after each event.

For foundation walls dealing with cracking or movement from hydrostatic pressure, the repair approach depends on severity. Minor cracking with no active movement can often be monitored. Bowing walls or cracks that are widening need stabilization before the next storm season adds more pressure to an already stressed wall. Waiting on those tends to make the eventual repair more involved and more expensive.

If you’ve had a rough storm season and want to know where your foundation and crawl space actually stand, a free inspection is the most straightforward way to find out. At Hawk we’ll get under the house, check the foundation, and give you a straight read on what we find. Schedule yours here.

Frequently Asked Questions

Can a single storm cause serious foundation damage?

It’s possible but not common. Most foundation damage from storms is cumulative, the result of repeated wetting and drying cycles over several seasons rather than one catastrophic event. A major storm can accelerate existing issues or make underlying problems visible for the first time, but it rarely creates a serious structural problem in a foundation that was otherwise in good shape. The exception would be extreme flooding or erosion that removes soil support from beneath the footing, which is less common in most residential situations.

How do I know if my foundation cracks are from storm damage or something else?

Context and pattern help a lot here. Cracks that appeared or visibly widened after a wet season, especially diagonal cracks near corners of windows and doors or stair-step cracks in brick, are consistent with differential settlement driven by soil movement. Horizontal cracks in a basement or crawl space wall are more associated with lateral pressure from saturated soil. A professional inspection can usually tell you whether a crack is active, what’s causing it, and whether it needs repair or just monitoring. You can read more about what to watch for in our post on signs of foundation problems.

Should I fill foundation cracks myself after a storm?

Filling a crack without understanding why it appeared doesn’t fix anything, and it can actually make it harder to track whether the crack is still growing. Hydraulic cement or epoxy injection has its place as part of a proper repair, but slapping something in a crack to make it look better doesn’t address the soil or drainage conditions causing it. If a crack is new or has changed recently, get it looked at before doing anything to it.

How does storm season in Hampton Roads compare to other regions for foundation risk?

Hampton Roads is genuinely one of the more challenging environments for foundations in the mid-Atlantic. The combination of expansive clay soils, a water table that’s close to the surface in many neighborhoods, regular tropical storm activity, and high baseline humidity creates conditions that put consistent stress on foundations throughout the year. The storm season just intensifies a moisture environment that’s already working on homes year-round, which is why proactive drainage and crawl space management matters here more than it would in a drier or more geologically stable region.

Water in Your Crawl Space After Rain: What’s Happening and What to Do

Water in Your Crawl Space After Rain: What’s Happening and What to Do

If you’ve gotten under your house after a heavy storm and found water down there, or if you’re seeing the signs without actually looking, musty smells, floors that feel softer than usual, humidity that seems worse on the first floor, you’re not alone. Water in the crawl space after rain is one of the most common calls we get in Hampton Roads, and it makes sense why. This region gets hit hard in the summer. When a few inches of rain falls in a short window, a lot of it ends up exactly where you don’t want it.

The good news is that crawl space water intrusion is a solvable problem. The less good news is that it doesn’t solve itself, and the longer it sits, the more work it’s doing to the wood framing and air quality in your home.

Why Water Gets Into Crawl Spaces After Rain

Water finds its way into a crawl space through a few different routes, and understanding which one applies to your home matters for figuring out the right fix.

Surface water intrusion. This is the most straightforward cause. When rain falls faster than the soil around your home can absorb it, water pools against the foundation and eventually finds its way in through cracks, gaps around penetrations, or open crawl space vents. Homes with flat or poorly graded yards, where the ground slopes toward the house rather than away from it, are especially vulnerable. After a heavy summer storm, that water has nowhere to go except down and in.

Groundwater and hydrostatic pressure. Hampton Roads sits on coastal plain soil with a water table that in many neighborhoods is only a few feet below the surface. After significant rainfall, that water table rises. When it gets high enough, it pushes upward through the soil floor of the crawl space and through any cracks or gaps in the foundation walls. This is hydrostatic pressure, and it doesn’t require any visible entry point. The water just comes up through the ground. Homes in low-lying parts of Chesapeake, near the waterways in Norfolk, or in any neighborhood that tends to stay soggy after rain are dealing with this regularly. The USGS notes that surface water and groundwater are directly connected, meaning heavy rainfall above ground translates quickly to rising groundwater below it.

Condensation from humid outside air. This one doesn’t require a storm at all, but summer weather makes it worse. Traditional crawl space vents were designed to let outside air circulate under the house. In a climate like coastal Virginia’s, where summer air is hot and saturated with moisture, venting the crawl space just pumps humid air into a cooler space, where it condenses on the wood framing and the ground. After a storm, when outdoor humidity spikes even further, this effect gets worse. It’s a slow drip compared to flooding, but it contributes to the same moisture accumulation over time.

What That Water Is Doing While It Sits There

Water in a crawl space isn’t just an inconvenience. It’s actively working on the structure of your home the whole time it’s down there.

Wood framing, the floor joists, sill plates, and support beams, absorbs moisture from a wet environment even without direct contact. As relative humidity stays elevated, the wood stays damp, and damp wood is exactly the environment that wood-destroying fungi need to establish themselves. Rot doesn’t happen overnight, but a crawl space that floods repeatedly and never fully dries out is accumulating damage with each event. The EPA is clear that mold and wood decay require sustained moisture, and a wet crawl space after every summer storm qualifies as sustained.

Beyond the framing, standing water raises the humidity of the entire crawl space environment. Through the stack effect, where warm air rises through the home and draws air upward from the crawl space, that humid air ends up on your first floor and above. Musty smells, worsening allergies, and air that feels heavier than it should inside the house are all downstream effects of a crawl space that’s holding moisture. The crawl space and the living space above it aren’t as separate as most homeowners assume.

Repeated water intrusion also puts ongoing pressure on the foundation itself. Soil that’s saturated expands and exerts lateral pressure against foundation walls. Over many cycles of wetting and drying, that pressure contributes to cracking and wall movement. It’s a slow process, but it’s directional. Things don’t improve on their own.

What to Check After a Heavy Storm

If you’re comfortable getting into your crawl space, or if you have someone who can, here’s what’s worth looking at after a significant rain event.

Look for standing water first. Even a shallow layer across part of the crawl space floor is worth noting and addressing. Check the ground near the foundation walls and around any floor drain or sump pit if you have one. If water is pooling near the walls, that’s surface intrusion or hydrostatic pressure at work.

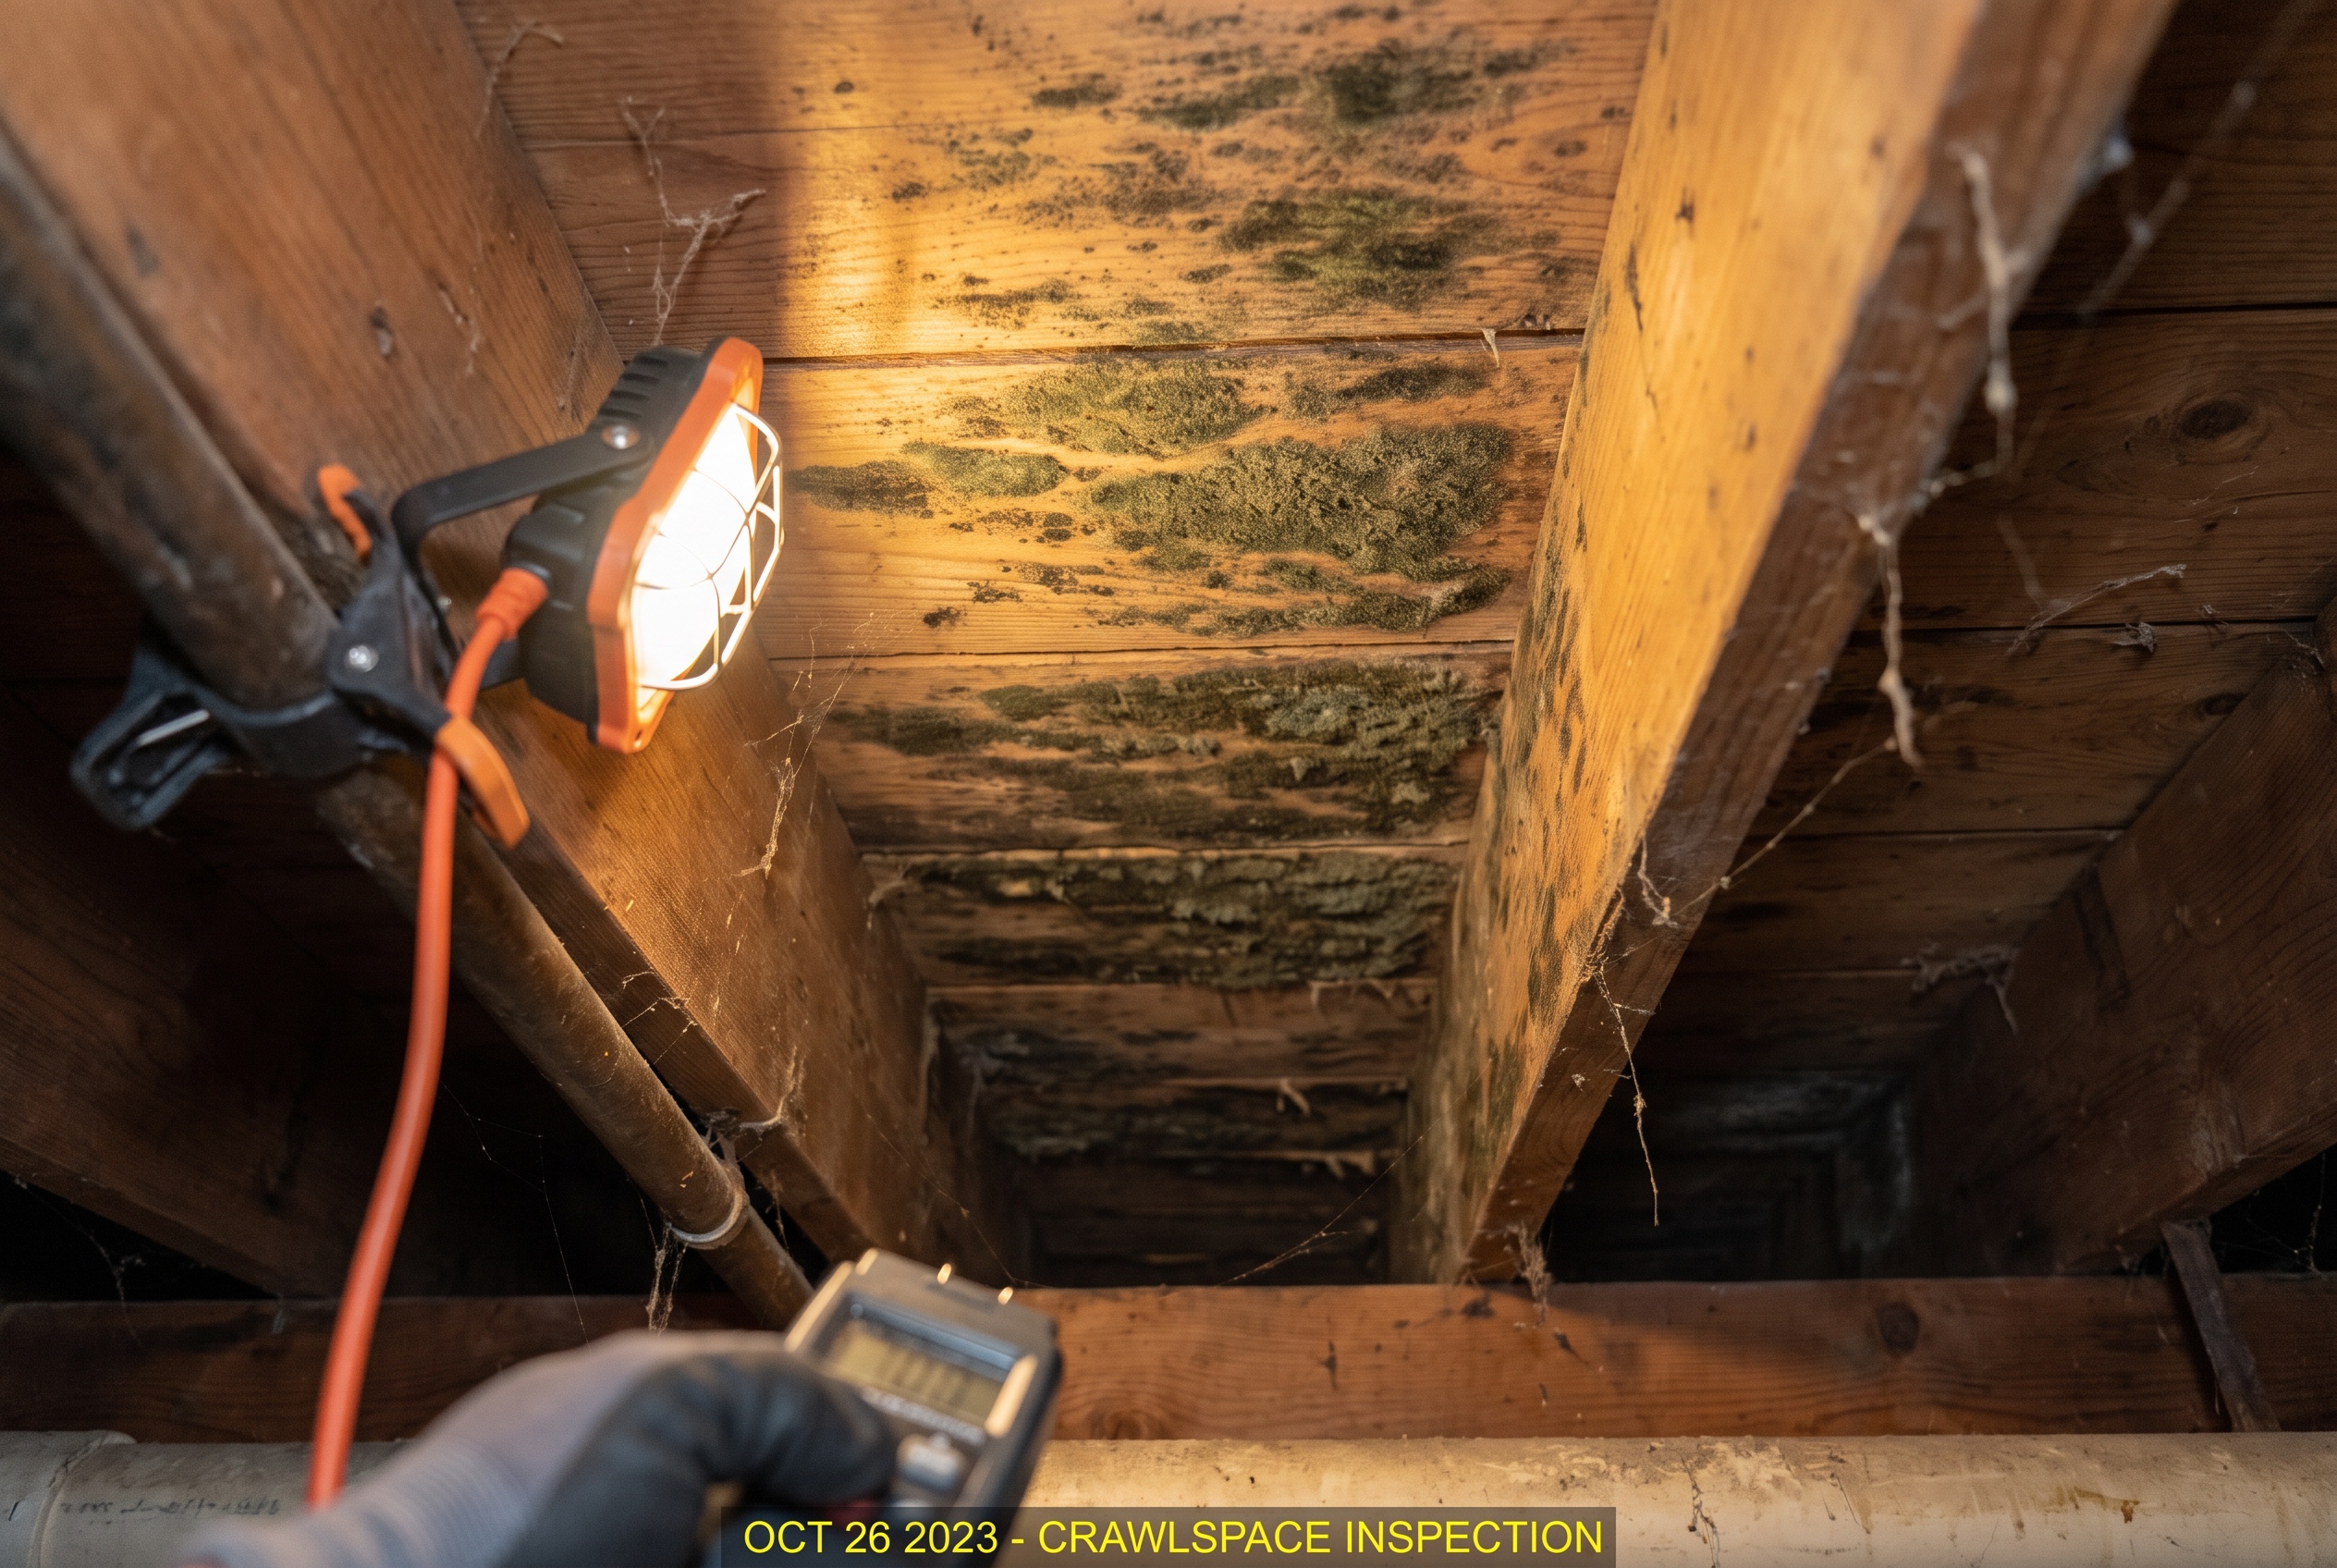
Look at the wood framing, specifically the sill plates along the top of the foundation walls and any floor joists you can see. Dark staining, soft spots, or visible mold growth indicate that moisture has been an ongoing issue, not just a one-storm problem. A screwdriver pushed into the wood with minimal resistance is a sign of rot.

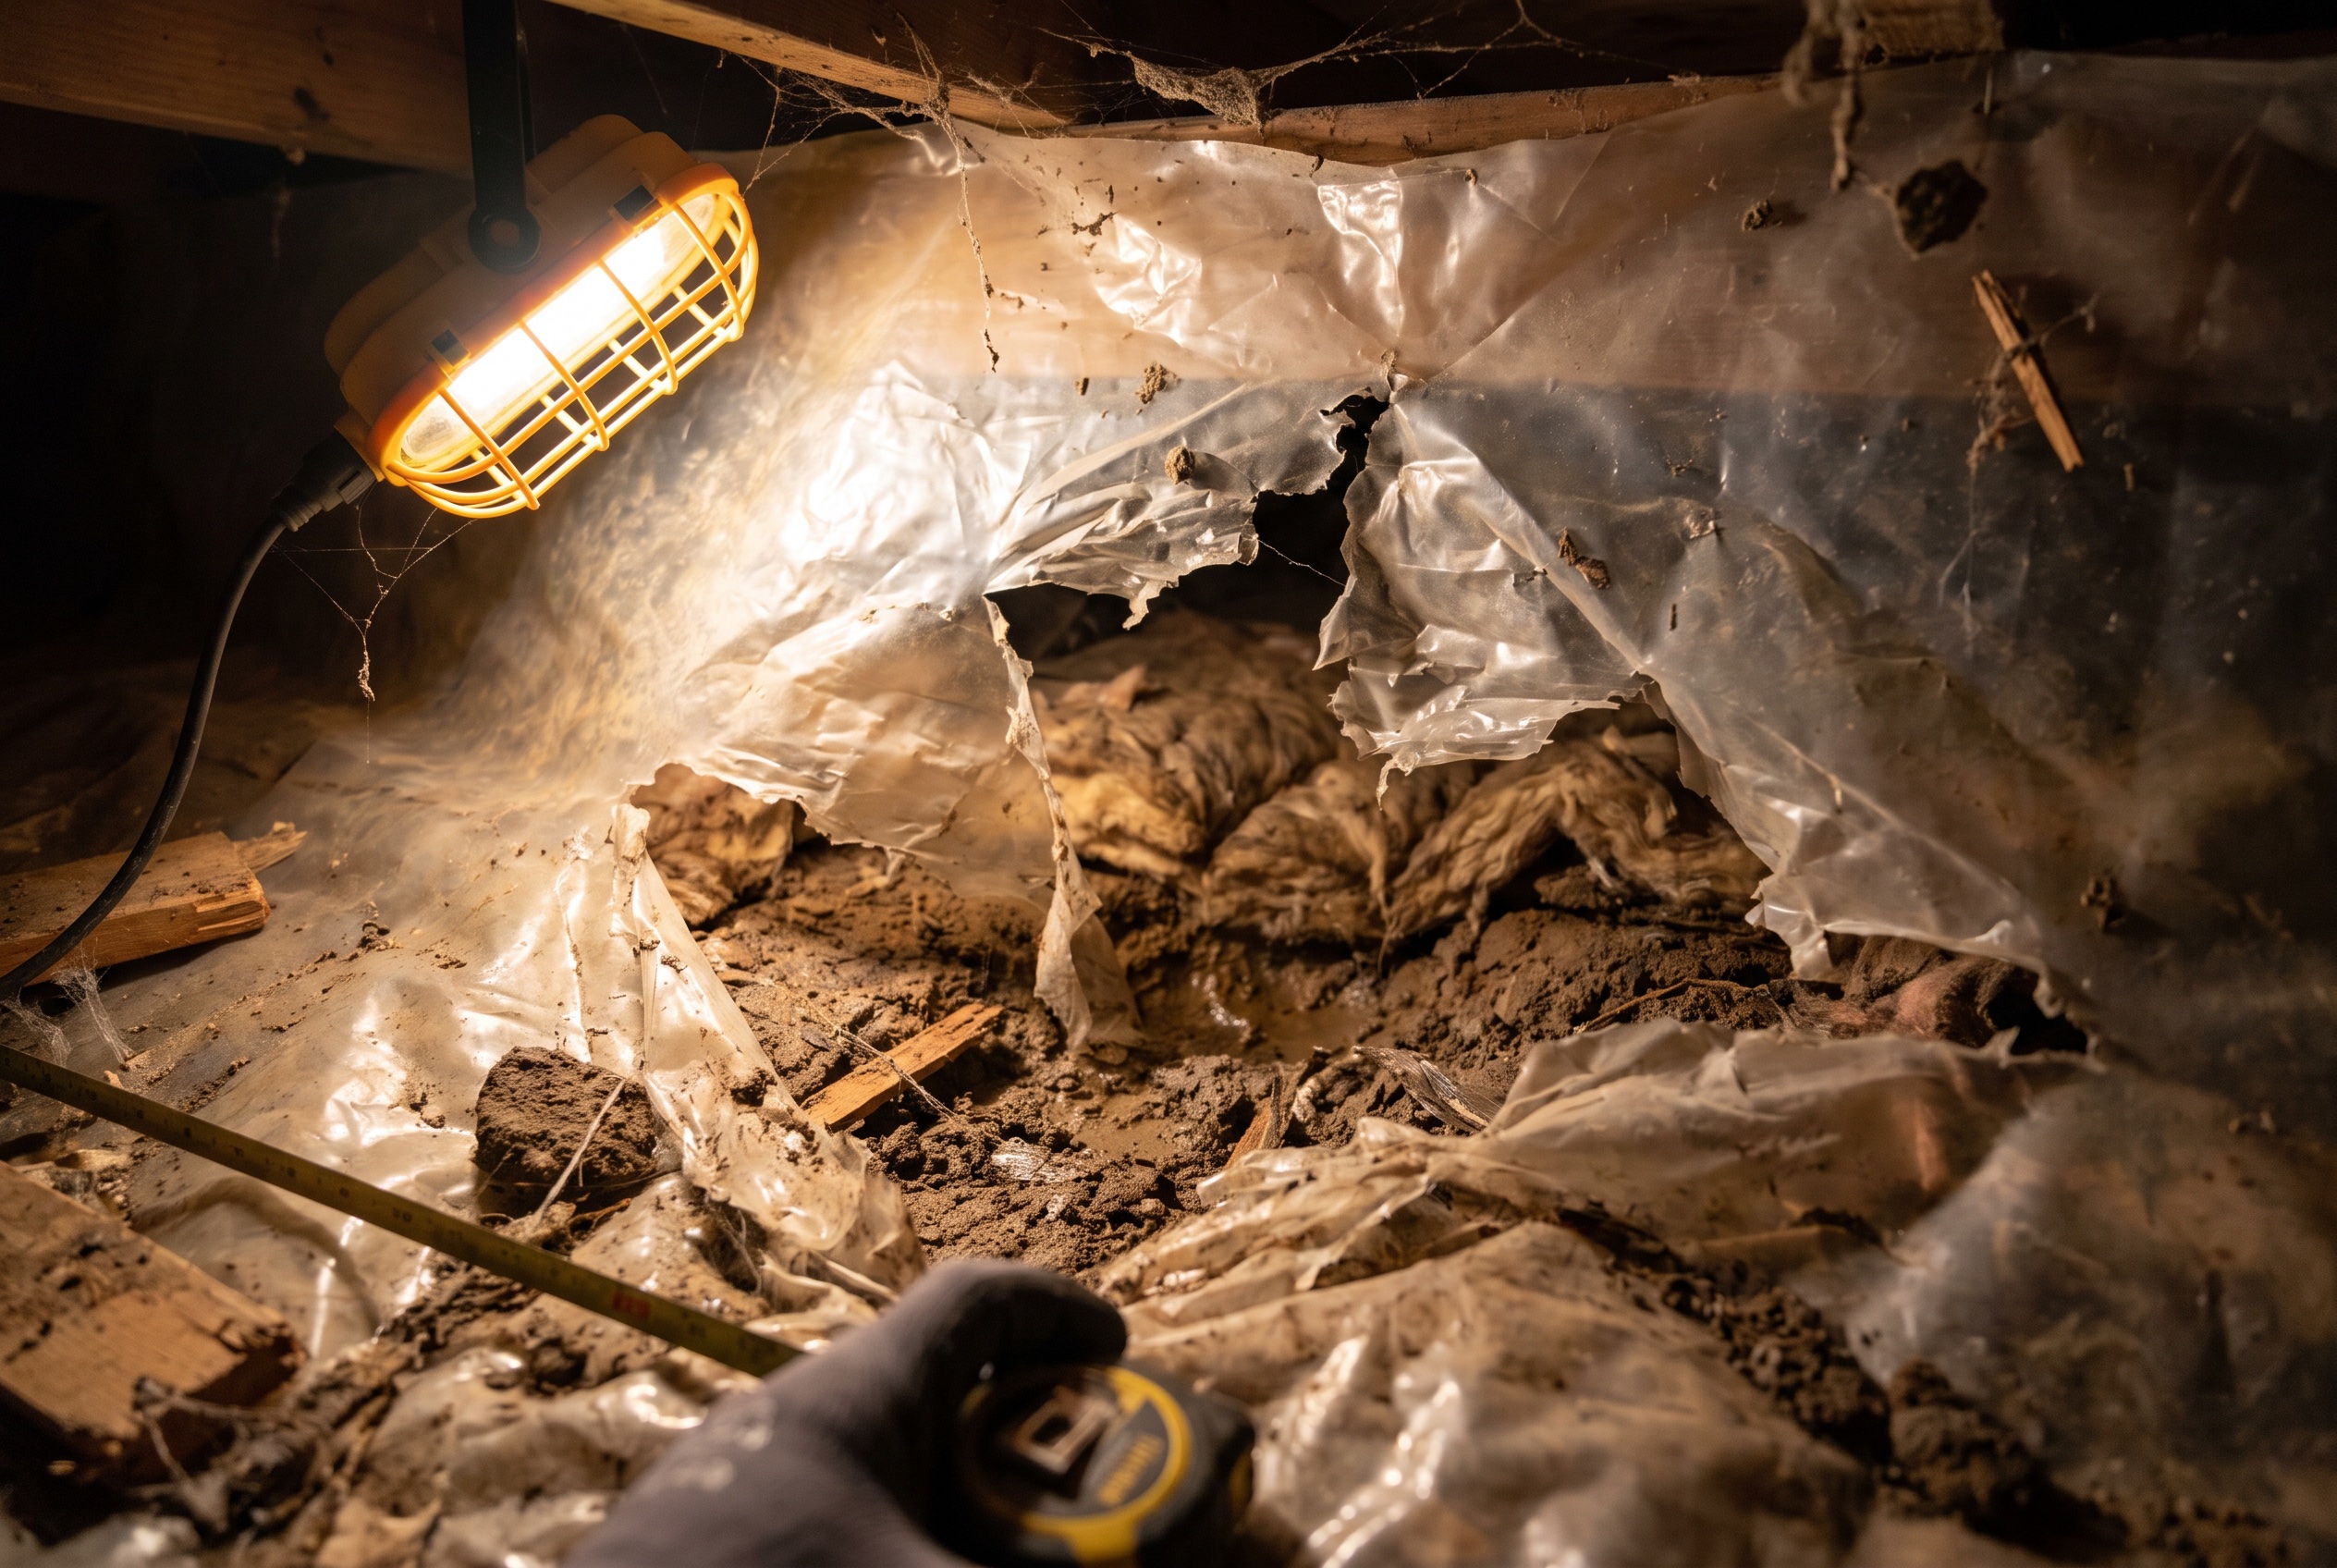
Check whether the existing vapor barrier, if there is one, is intact and in place. Old plastic sheeting tends to tear, bunch up, and separate from the walls over time. A barrier that’s partially covering the ground isn’t doing much.

Outside the house, walk the perimeter and look at how water is moving. Are there areas where it’s pooling against the foundation? Are the gutters and downspouts directing water away from the house, or is it dumping at the base of the wall? Grading and drainage at the surface level have a direct impact on what ends up in the crawl space.

How the Problem Gets Fixed

The right solution depends on where the water is coming from and what condition the crawl space is already in.

For surface water intrusion driven by poor grading or drainage, the fix often starts outside the house: regrading the yard to slope away from the foundation, extending downspout runs, and sometimes installing a French drain system around the perimeter to intercept water before it reaches the foundation. These are unglamorous solutions but effective ones when surface drainage is the root cause.

For groundwater pressure, a sump pump system is usually part of the answer. A properly sized sump pit with a reliable pump actively removes water that would otherwise accumulate under the house. In areas with a persistently high water table, a sump pump isn’t optional, it’s what keeps the crawl space dry between rain events.

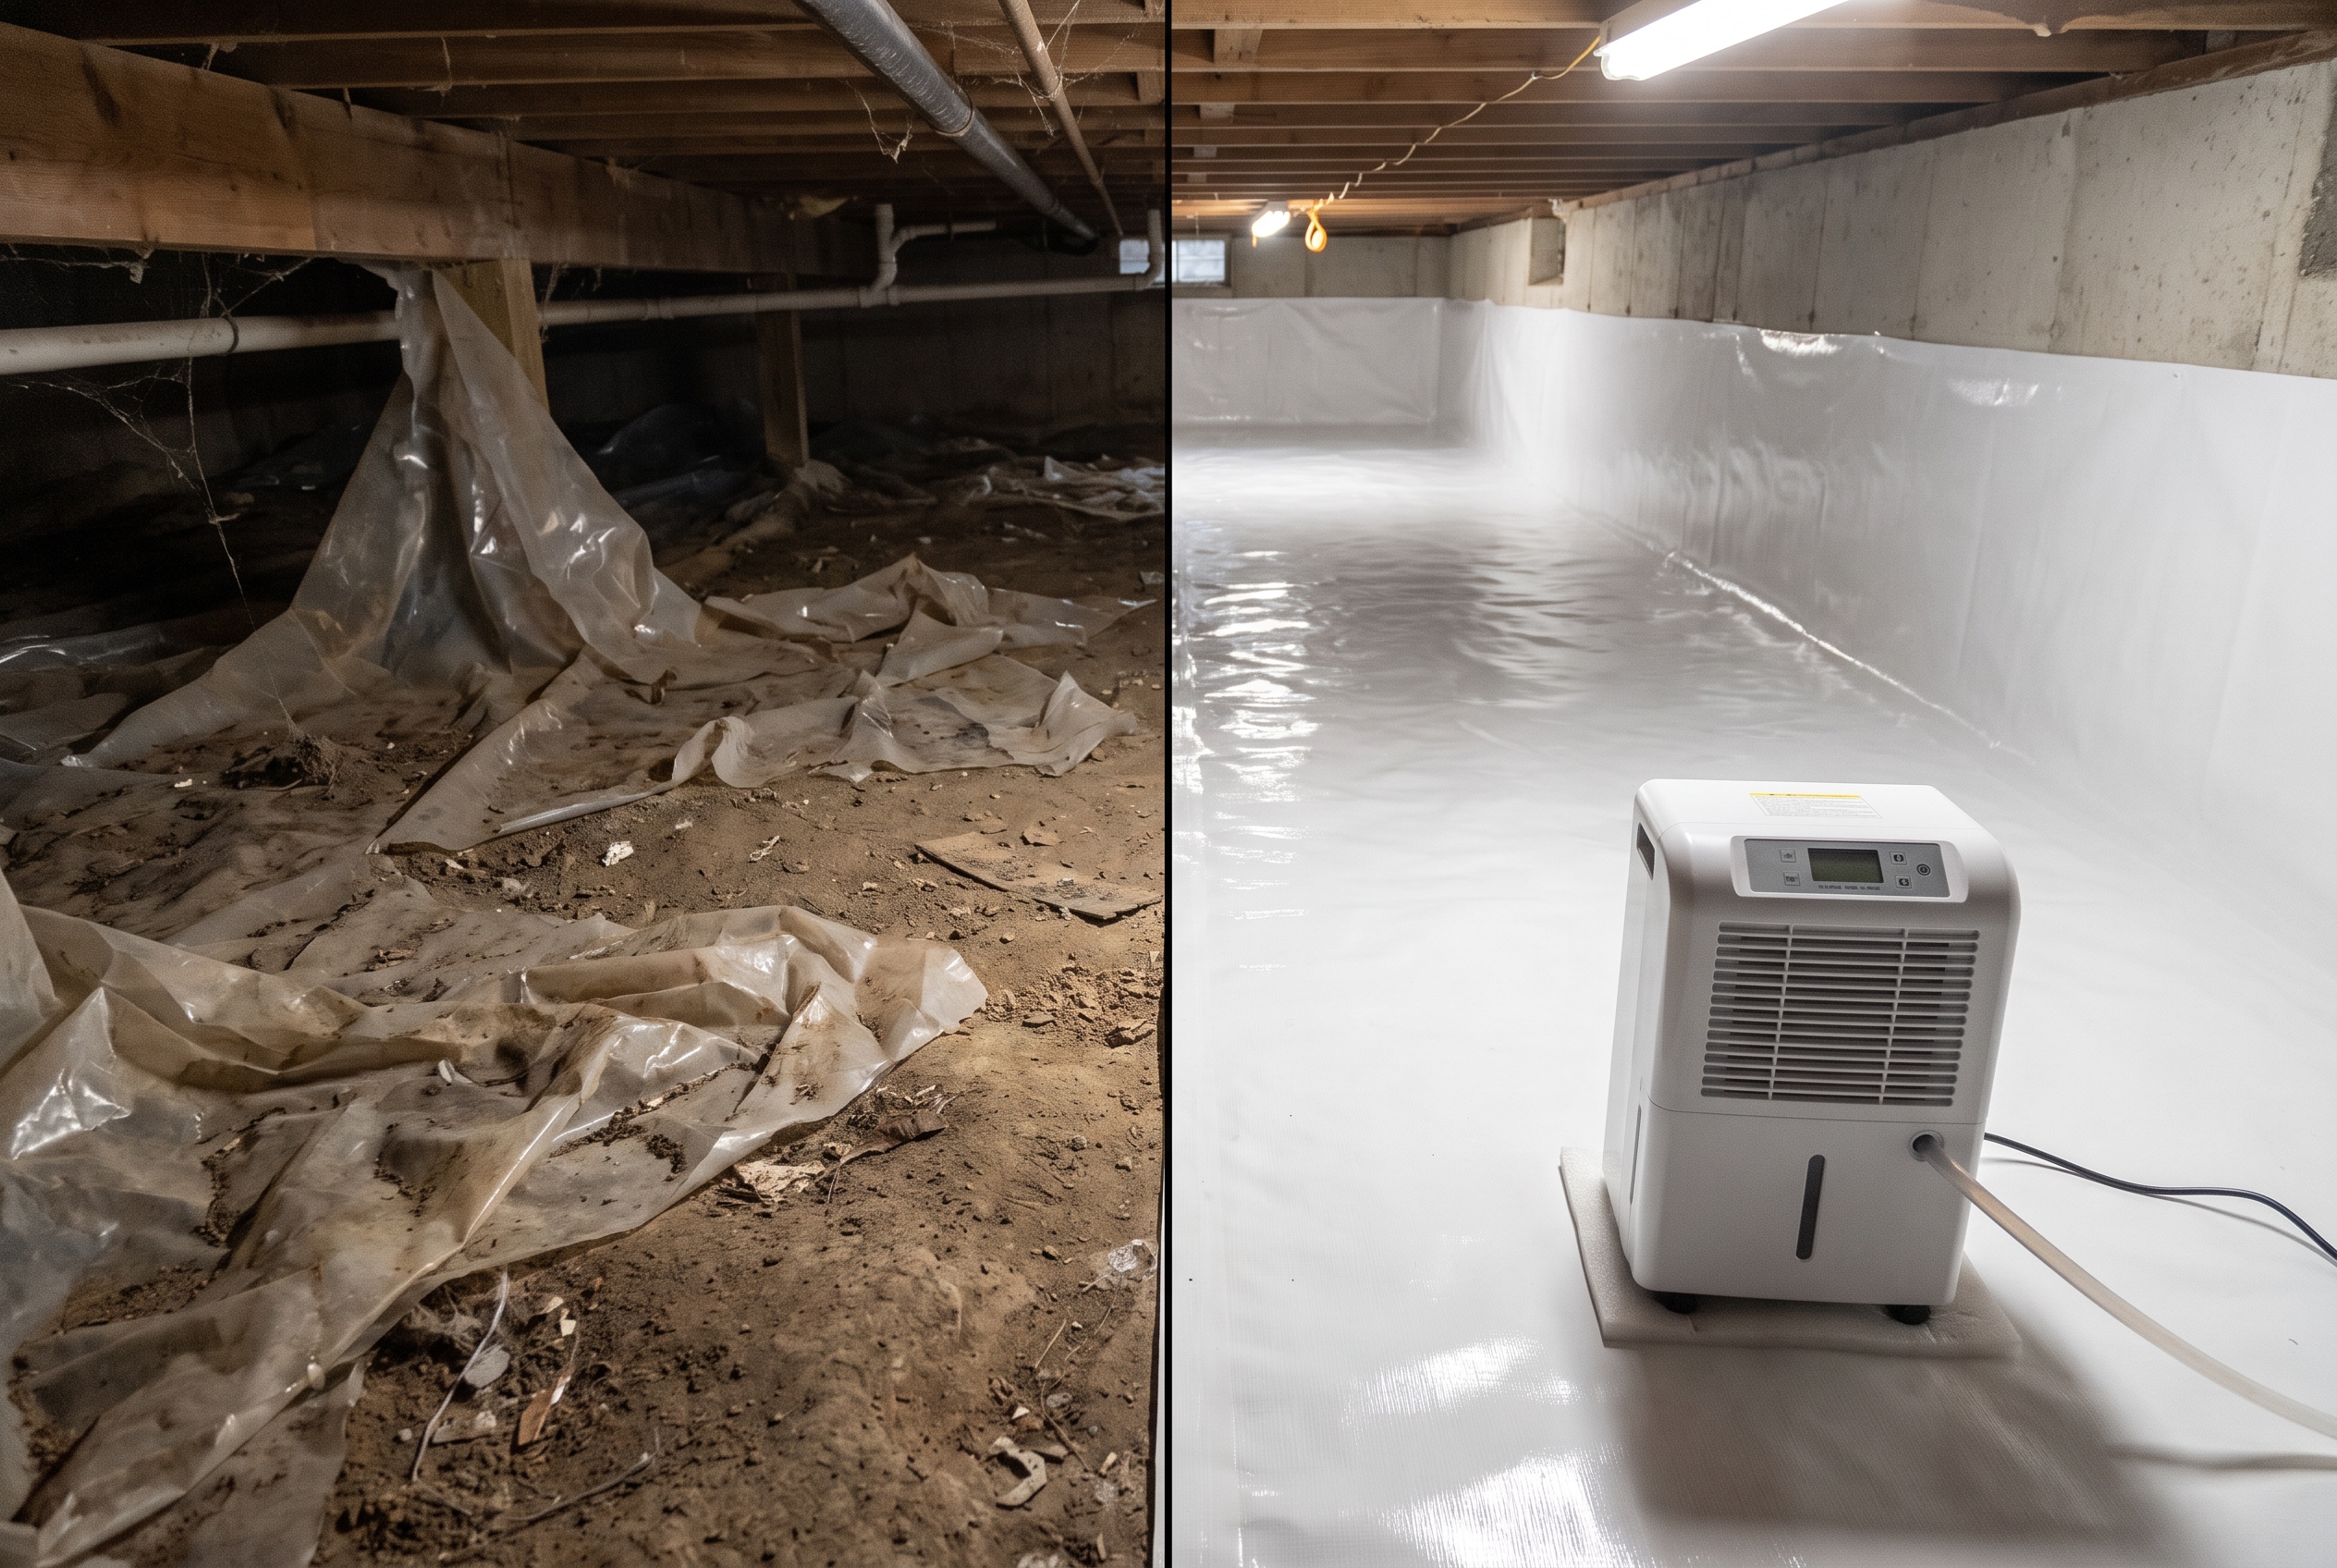
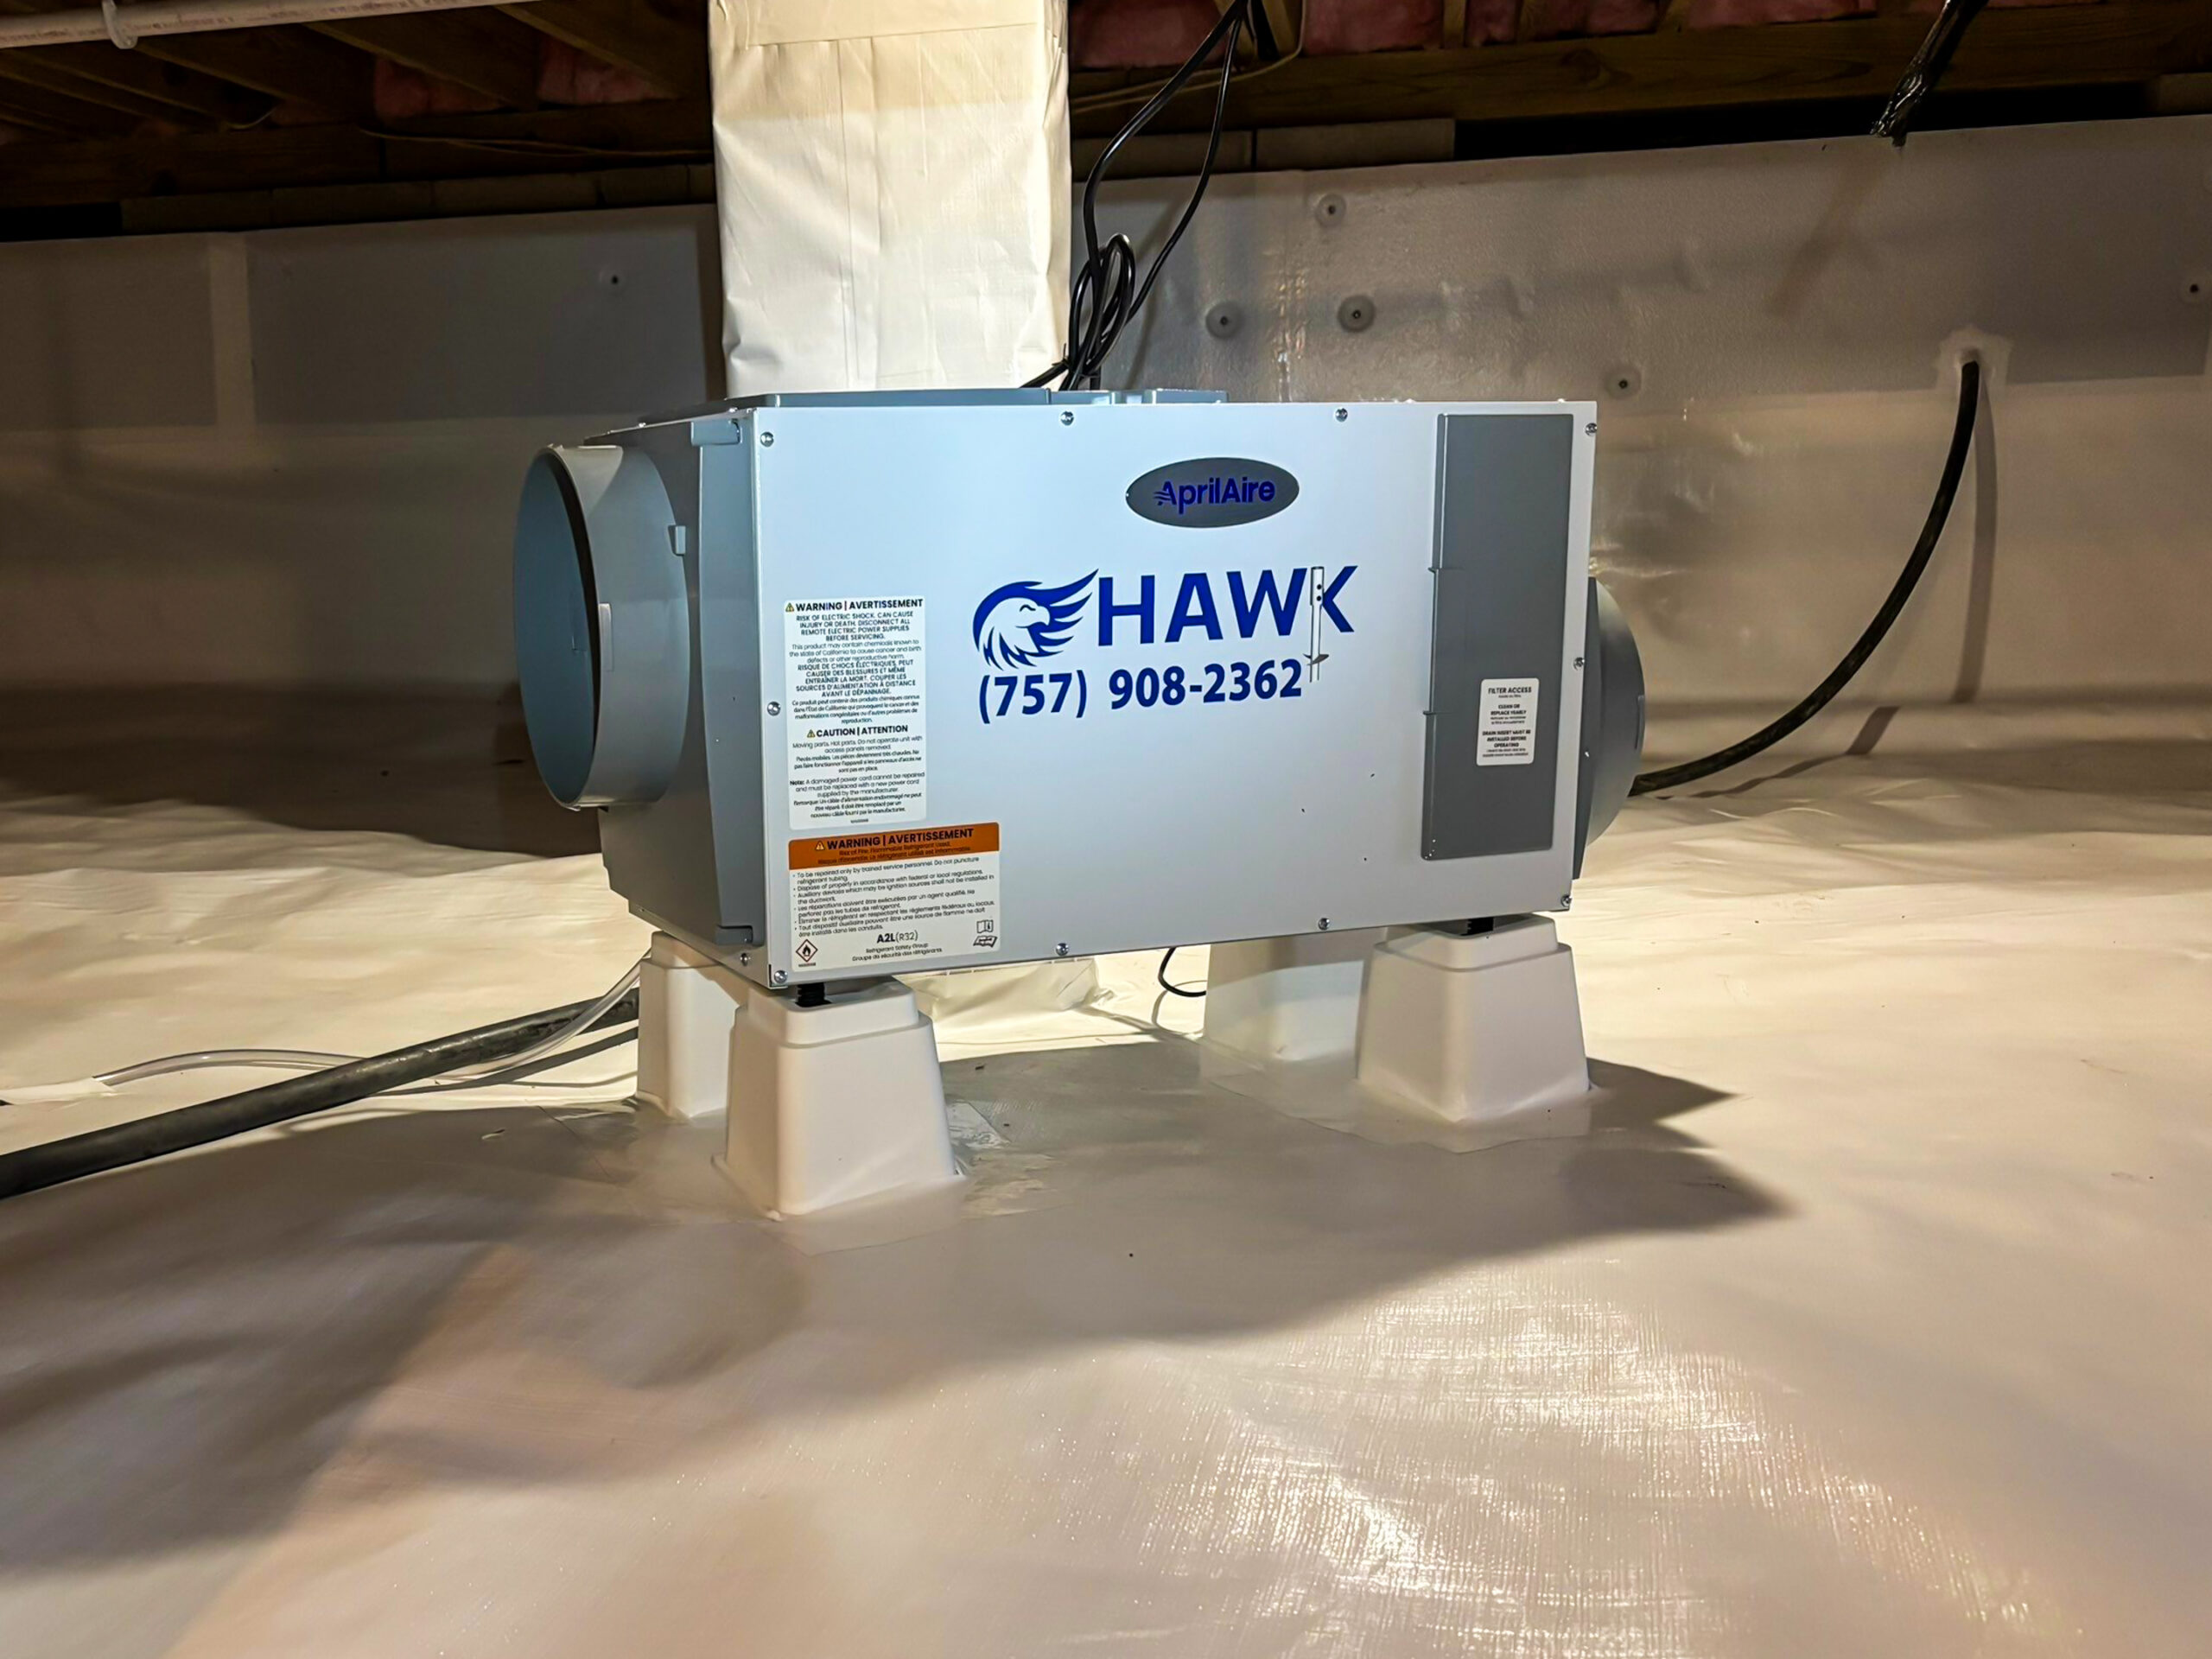
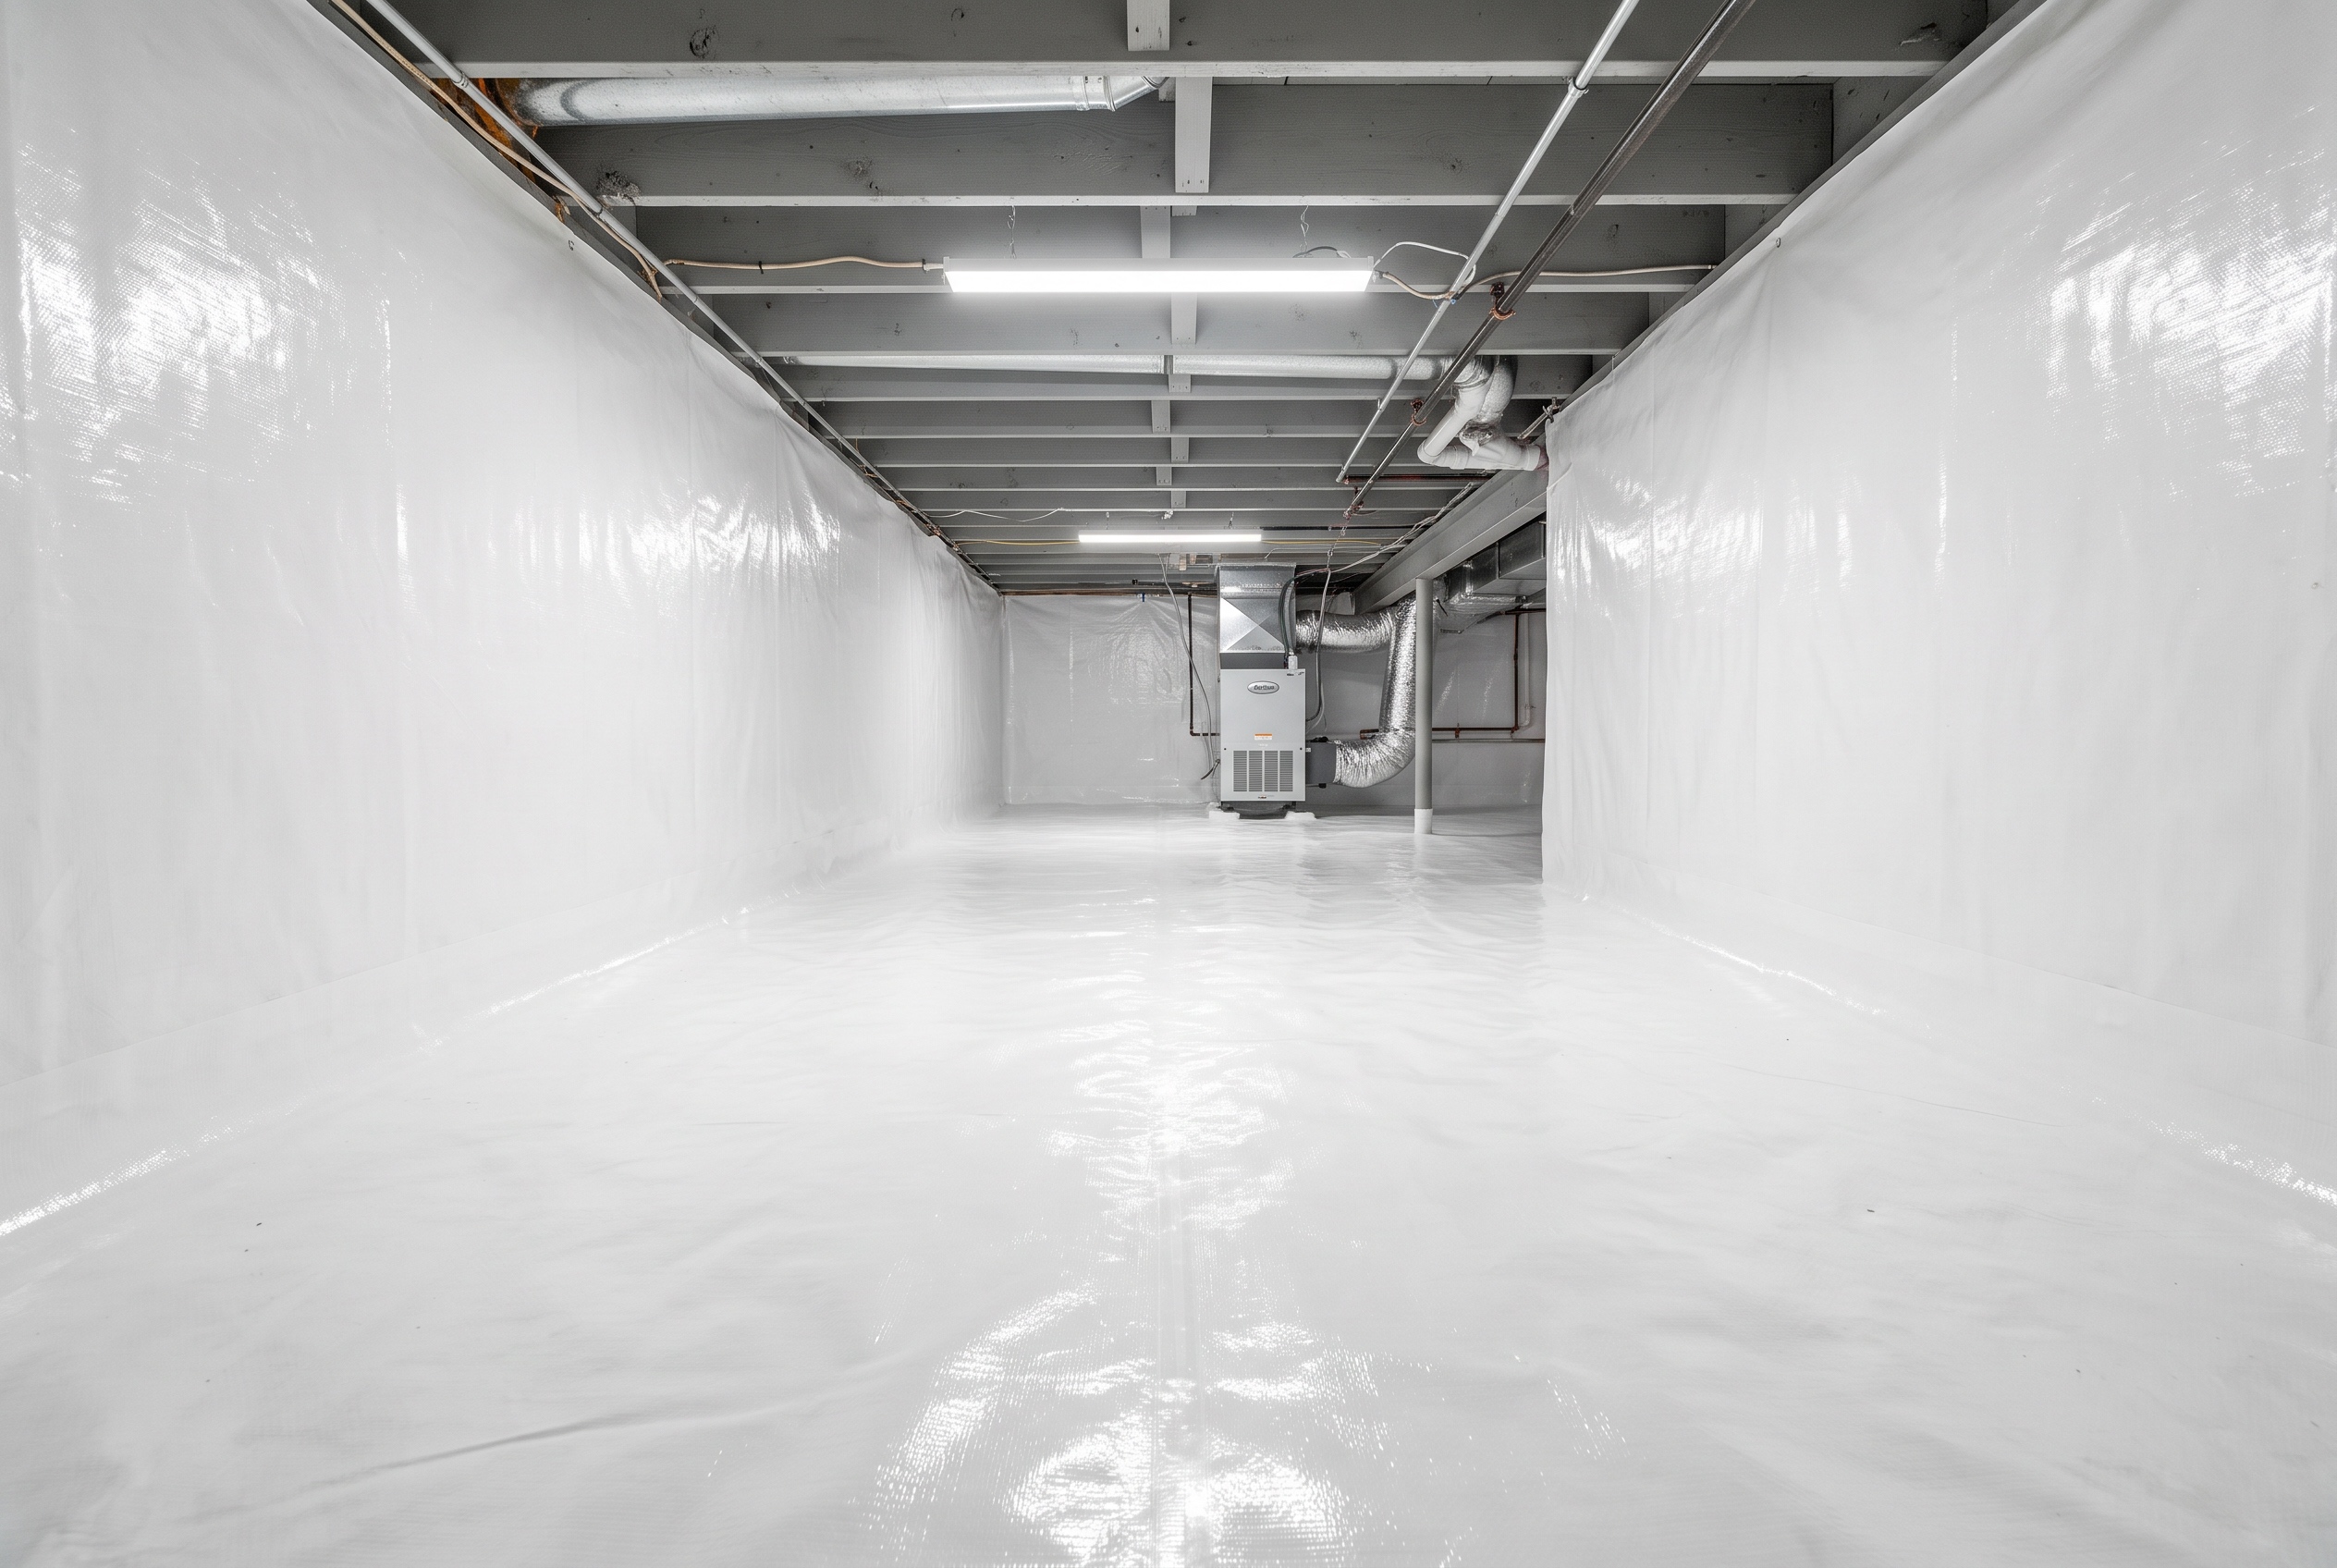
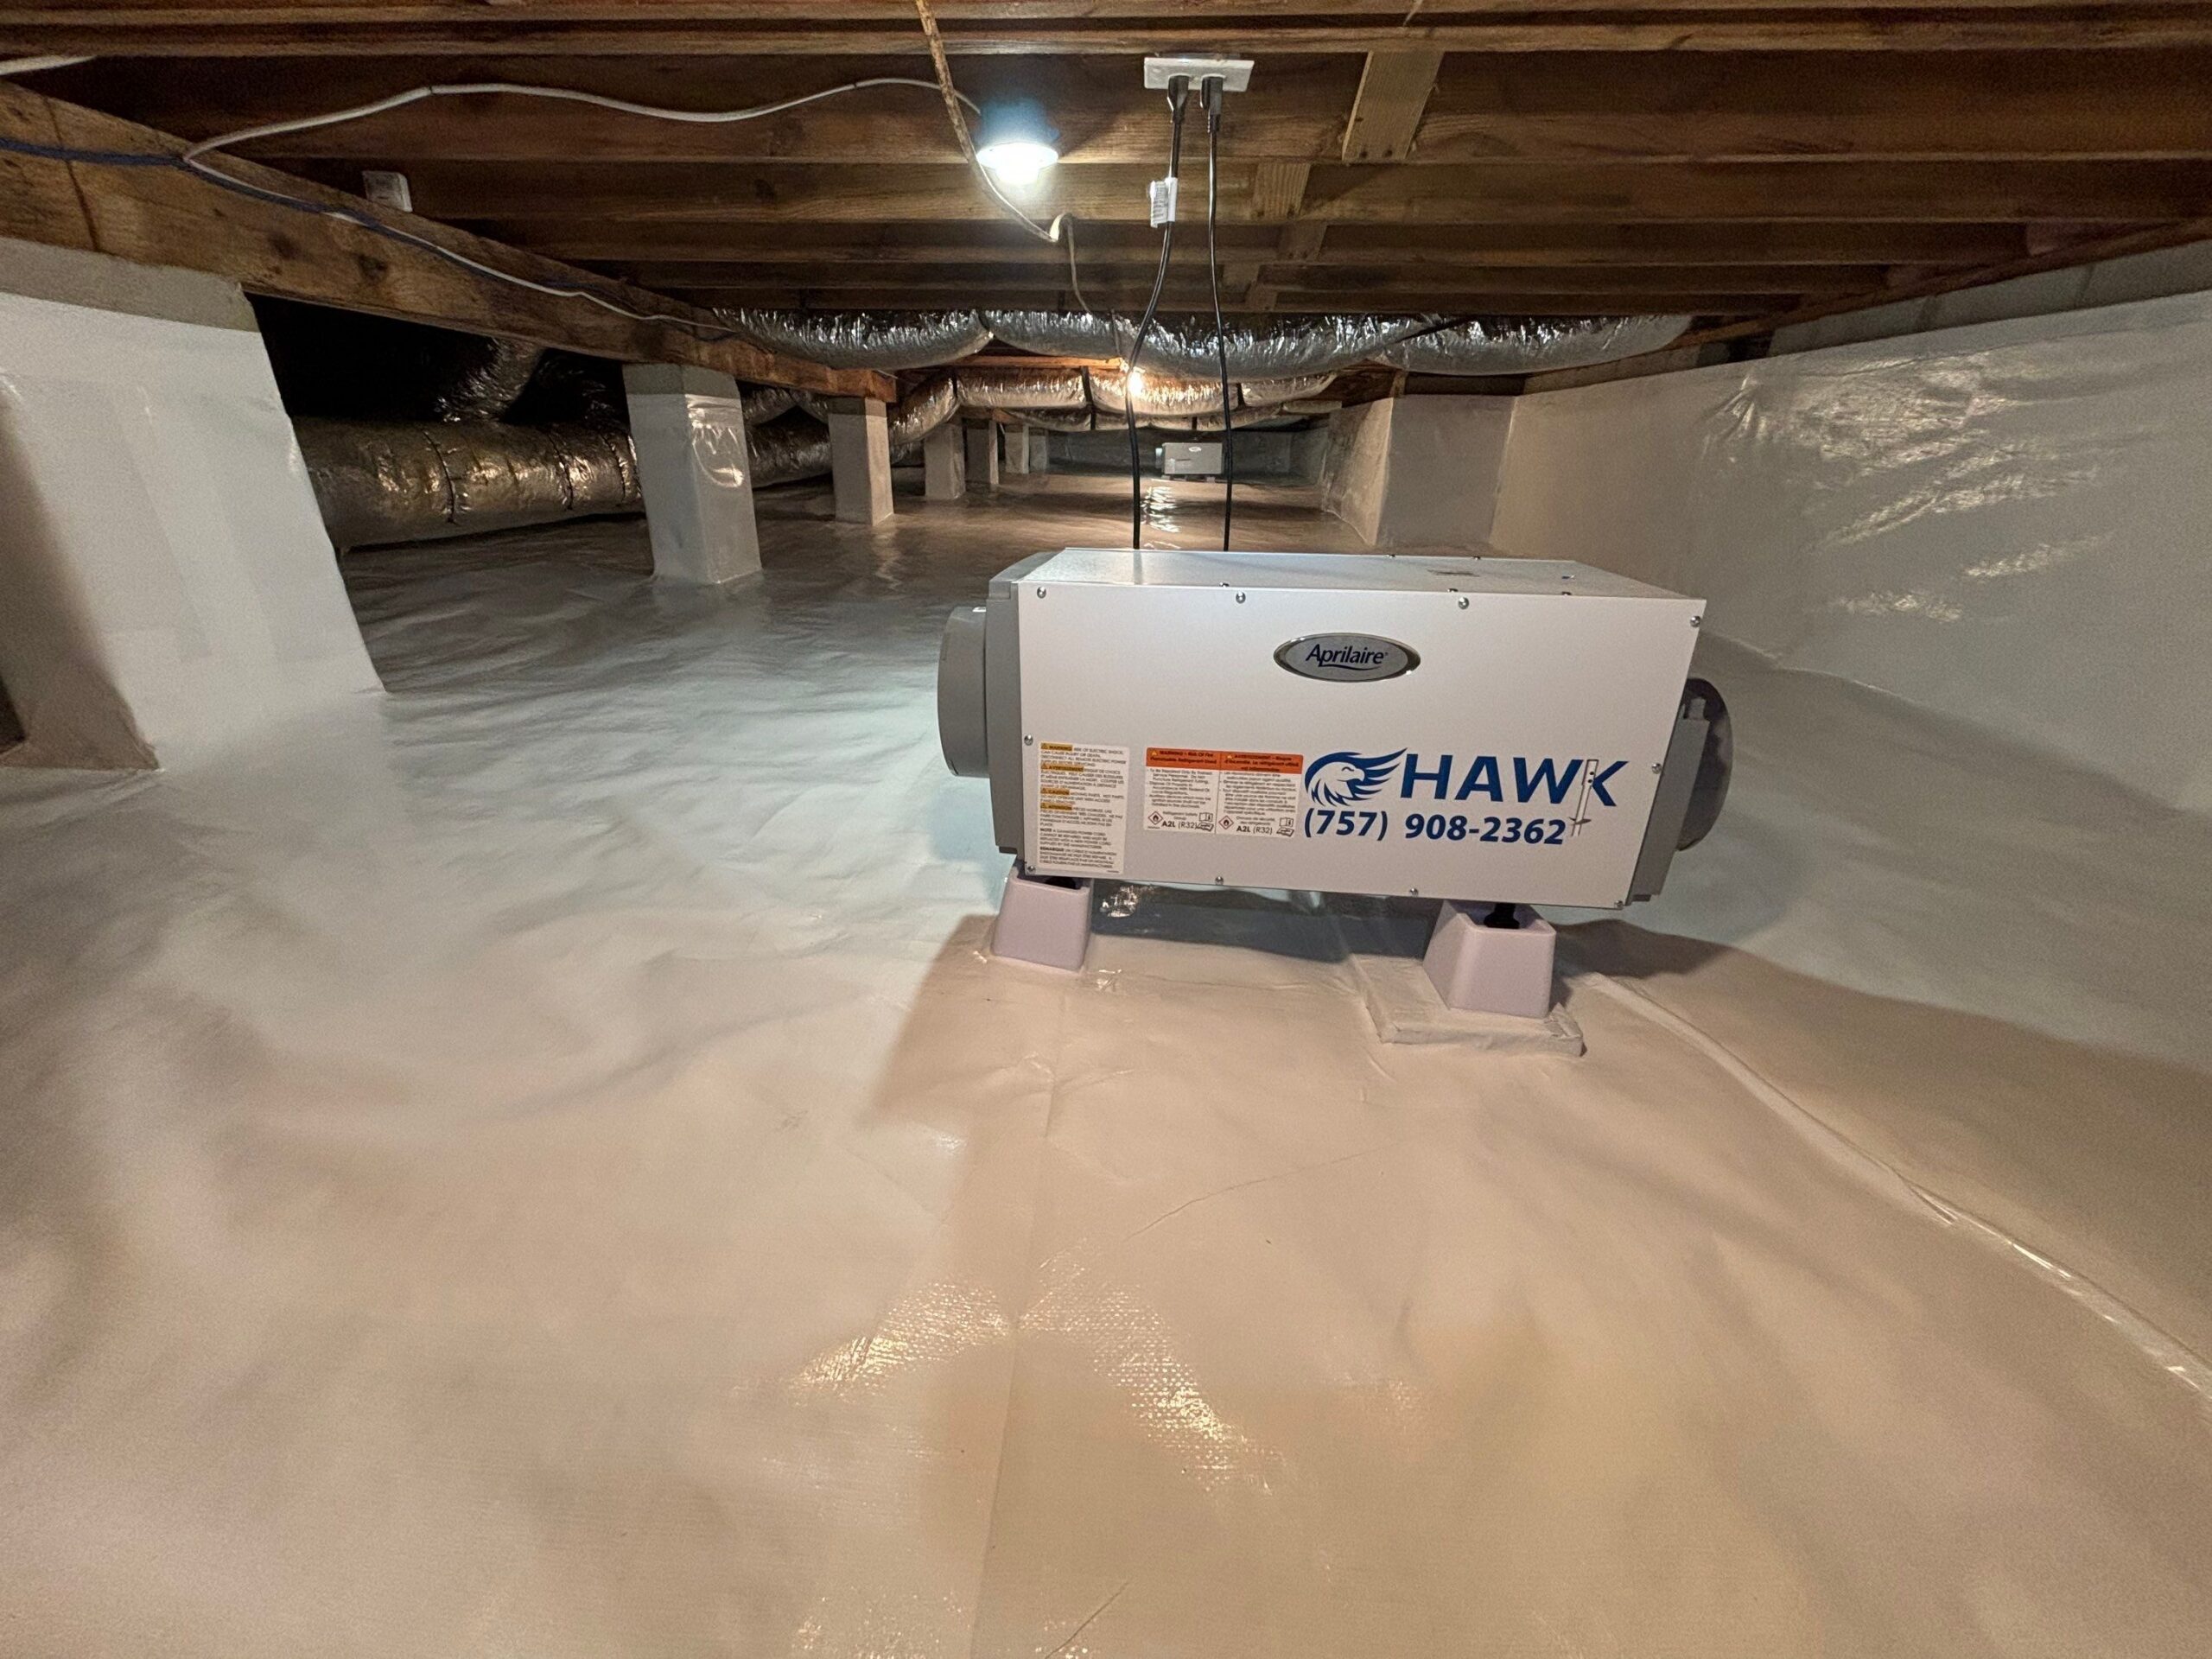
For the broader moisture environment, crawl space encapsulation is the most comprehensive solution. A full encapsulation seals the ground and walls with a heavy-duty liner, closes off the foundation vents, and pairs the barrier with a dehumidifier to actively control humidity. This addresses not just flooding events but the ongoing condensation and moisture vapor that accumulate between storms. Crawl space encapsulation is particularly well-suited to Hampton Roads conditions because it addresses all three moisture sources at once rather than just one of them.

If the water has already caused structural damage, rotted joists, compromised sill plates, or failing support posts, that framing work needs to happen alongside or before the moisture control. There’s no point in waterproofing a crawl space without addressing damaged framing, and there’s no point in replacing framing without fixing the moisture problem that damaged it. The two go together. You can read more about what crawl space structural repair involves when moisture damage has already reached the framing.

If you’ve had water in your crawl space after recent storms and want to know what you’re actually dealing with, we offer free inspections with no obligation. We’ll get under there, document the condition, and give you a clear picture of what’s going on and what it would take to fix it. Schedule your free inspection here.

Frequently Asked Questions

How much water in a crawl space is too much?

Any standing water after a storm is worth addressing. A thin layer that dries up within a day or two is less urgent than water that persists, but even occasional flooding contributes to cumulative moisture damage over time. If your crawl space floods every time it rains hard, that’s a drainage problem that’s actively working on your framing and foundation with each event.

Can I just run a dehumidifier in my crawl space instead of encapsulating it?

A dehumidifier helps with humidity but it doesn’t address water intrusion. If water is getting in through the ground or the walls after rain, a dehumidifier is working against an active source rather than maintaining a controlled environment. Encapsulation first, then dehumidification as part of the system, is the right order of operations. A dehumidifier in an unencapsulated crawl space is a bit like running the AC with the windows open.

Will homeowner’s insurance cover water damage in my crawl space?

It depends on the cause and your specific policy. Sudden water damage from a burst pipe may be covered. Gradual moisture damage, flooding from groundwater, or damage resulting from lack of maintenance typically isn’t. Most standard homeowner’s policies exclude flood damage, and groundwater intrusion generally falls into that category. It’s worth a call to your insurer to understand your coverage, but most crawl space moisture repairs are out-of-pocket expenses.

How do I know if the water in my crawl space is a new problem or something that’s been happening for a while?

The condition of the wood framing is usually the best indicator. Fresh water intrusion in a crawl space with clean, solid framing looks different from a crawl space that’s been dealing with moisture for years. Staining on the joists, visible mold or mildew, soft spots in the wood, and deteriorated or displaced vapor barrier material all suggest the problem predates the most recent storm. An inspection that includes probing the framing gives a much clearer picture of the timeline than surface observation alone.

Floor Joist Repair: What It Involves and When Your Home Needs It

Floor Joist Repair: What It Involves and When Your Home Needs It

If you’ve already had someone look at your crawl space, or you’ve gotten under there yourself, and the word “joists” came up, you’re past the point of wondering whether something is wrong. You’re trying to figure out how bad it is, what fixing it actually means, and what happens if you put it off. This post is aimed at that stage of the process.

Floor joist repair is more specific than general sagging floor work. The joists are the horizontal framing members that span between your foundation walls and support beams, and they carry the load of everything above them: the subfloor, the finish floor, the furniture, and the people walking around on it. When they’re compromised, the floor loses the support it needs, and the longer that goes unaddressed, the more the damage tends to spread.

What Damages Floor Joists in Coastal Virginia Homes

In Hampton Roads, the two most common culprits are moisture-driven wood decay and termite damage. Both are largely invisible until they’ve been developing for a while, and both are directly connected to crawl space conditions.

Wood rot and fungal decay. Wood rot isn’t caused by moisture directly. It’s caused by wood-destroying fungi that need sustained moisture to grow and spread. When a crawl space stays humid, whether because it’s unencapsulated, poorly vented, or dealing with groundwater intrusion, the framing above it stays damp. Over time that dampness creates exactly the environment those fungi need. The decay starts at the surface and works inward, progressively reducing the structural cross-section of the joist. A joist that looks intact from below might have lost a significant portion of its load-carrying capacity to internal decay.

Chesapeake and the surrounding area are particularly prone to this because of the region’s consistently high humidity and the high water table in many neighborhoods. Homes in low-lying areas near Deep Creek, Great Bridge, or coastal parts of Virginia Beach deal with moisture pressure that doesn’t let up seasonally the way it might in drier parts of the state.

Termite damage. Subterranean termites are common throughout Hampton Roads, and floor joists are a frequent target. They feed on wood from the inside out, hollowing out the interior while leaving the outer shell mostly intact. This is part of what makes termite damage so insidious in a crawl space context: a joist can look fine from a quick visual inspection while being structurally hollow. The EPA notes that termite damage in the U.S. causes billions of dollars in structural damage annually, much of it in crawl space framing that goes uninspected for years. By the time floors start showing symptoms, the damage is usually well established.

Improper modifications. This one is less common but worth mentioning. Notches and holes cut into joists for plumbing or electrical runs, done without following proper guidelines, can significantly weaken them. A joist notched too deeply at midspan loses a disproportionate amount of its bending strength. If previous work was done under the house without much care for the framing, that’s sometimes part of what an inspection turns up.

How to Tell If Your Floor Joists Need Attention

Some of these signs overlap with general sagging floor symptoms, but a few point more specifically toward joist-level damage rather than failing support posts or foundation issues.

Floors that feel soft or spongy in a specific area, particularly if the subfloor material itself feels like it has some give, often indicate joist damage in that zone. The subfloor is only as solid as the joists beneath it. A floor that bounces noticeably when you walk across it, especially in an older home that didn’t always feel that way, is worth investigating.

Visible damage during a crawl space inspection is the most direct indicator. Joists with dark staining, a soft or crumbling surface texture, obvious checking or splitting along the grain, or hollowed sections where termites have been active are all clear signs of compromised framing. A screwdriver test is a common field method: if a probe can be pushed into the wood with minimal resistance, the wood has lost structural integrity regardless of how it looks from the outside.

Squeaky floors that have gotten noticeably worse over time, as opposed to the occasional squeak that’s always been there, can also point to movement in the framing below. As joists weaken and deflect more under load, the connections between subfloor and framing start to work loose.

What Floor Joist Repair Actually Involves

The right approach depends on how much of the joist is damaged and how many joists are affected. There’s a spectrum of options, and a thorough inspection is what determines where on that spectrum your situation falls.

Sistering. When a joist has localized damage that doesn’t run its full length, sistering is often the preferred repair. A new joist of the same dimensions gets fastened alongside the damaged one, spanning the full length from bearing point to bearing point. The new joist carries the load the damaged one can no longer handle. This is a relatively efficient repair when the damage is limited and the surrounding framing is in decent shape. The key is that the sister joist has to make full contact at both ends where it bears on the beam or foundation wall, otherwise the repair doesn’t transfer load the way it needs to.

Full joist replacement. When a joist is damaged along most of its length, or when termite damage has hollowed out the core, sistering isn’t sufficient. The damaged joist has to be removed entirely and replaced with new material. This is more labor-intensive, especially in tight crawl spaces, but it’s the right call when the original framing is too far gone to be supplemented.

Replacing sill plates and rim joists. The sill plate is the piece of wood that sits directly on top of the foundation wall, and the rim joist runs along the perimeter of the floor system. Both are highly exposed to moisture and are common sites for rot and termite damage. When these members are compromised, they affect the entire floor system because every joist ultimately bears on them. Replacing sill plates and rim joists is detailed work but often necessary before the rest of the floor framing can be properly supported. You can see more about the full scope of crawl space structural repair services we provide.

Addressing the cause alongside the repair. This point is worth repeating because it’s where a lot of repairs fall short. New framing installed in a wet, uncontrolled crawl space is going to face the same conditions that damaged the original framing. A proper floor joist repair in a Hampton Roads home almost always needs to be paired with moisture remediation: crawl space encapsulation, improved drainage, a dehumidifier, or some combination. The structural work and the environmental work belong in the same project scope. The U.S. Department of Energy recognizes that sealing and conditioning a crawl space is one of the more impactful steps a homeowner can take for both energy efficiency and long-term structural performance.

Getting a Clear Picture of What You’re Working With

Floor joist damage isn’t something that tends to sit still. Moisture and termites don’t stop because a repair hasn’t been scheduled yet, and framing that’s already weakened is more vulnerable to further damage. The practical implication is that getting an inspection sooner rather than later usually means a smaller scope of repair and a lower cost.

At Hawk, we offer free crawl space inspections with no obligation. We’ll get under the house, document what we find, and give you a straight assessment of what’s there and what we’d recommend. You don’t need to be home for us to take a look. Reach out here to schedule yours.

Frequently Asked Questions

How many floor joists need to be damaged before it becomes a serious problem?

There’s no clean threshold, because it depends on which joists are damaged and how severely. A single joist with significant rot in a high-load area, directly beneath a load-bearing wall or a heavy fixture, can be more consequential than several joists with minor surface damage in a low-traffic area. The severity of the damage matters as much as the count. An inspection that maps out where the damage is and how deep it goes gives you a much clearer picture than a number alone.

Can floor joists be repaired without replacing the subfloor?

Often yes. Joist repair or sistering happens from below, in the crawl space, and in many cases the subfloor above doesn’t need to be disturbed. If the subfloor itself has been damaged by the same moisture that got the joists, that’s a separate issue that might need to be addressed from above, but it’s evaluated independently. A good inspection will tell you whether the damage is limited to the framing or whether it extends into the subfloor material as well.

Is floor joist repair covered by homeowner’s insurance?

Generally not, unless the damage was caused by a specific covered event like a burst pipe. Damage from long-term moisture, wood rot, or termites is typically treated as a maintenance issue and excluded from standard homeowner’s policies. It’s worth reviewing your specific policy and asking your insurer directly, but most homeowners in this situation are paying out of pocket. That’s another reason catching it early, before the scope has grown, tends to make a meaningful difference in overall cost.

What’s the difference between floor joist repair and sagging floor repair?

They overlap significantly but aren’t identical. Sagging floor repair is the broader category and includes issues with support posts, beams, and foundation conditions, not just the joists themselves. Floor joist repair specifically addresses damage to the horizontal framing members that span between supports. In practice, a sagging floor is often caused at least in part by joist damage, but it can also be caused by failing posts or inadequate support with joists that are otherwise in fine shape. An inspection is what tells you which you’re actually dealing with. If you want more context on the broader picture, our sagging floor repair blog post covers what that scope of work typically looks like.

Sagging Floor Repair: What’s Causing It and How It Gets Fixed

Sagging Floor Repair: What’s Causing It and How It Gets Fixed

A floor that feels soft underfoot, bounces when you walk across it, or has developed a noticeable slope is one of those home problems that’s easy to dismiss at first. Maybe it’s subtle enough that you chalk it up to the age of the house. But in coastal Virginia, where moisture is persistent and the soil under a home is constantly moving, a sagging floor is usually telling you something real about what’s happening in the crawl space below it.

Sagging floor repair isn’t one specific fix. It’s a category of work that depends on what’s actually causing the floor to drop, and getting that diagnosis right is the whole game. The wrong repair on the wrong cause is money spent that doesn’t solve anything.

What Causes Sagging Floors in Hampton Roads Homes

The vast majority of sagging floor issues in this region trace back to the crawl space. Most homes in Chesapeake, Norfolk, Portsmouth, and the surrounding areas were built on crawl space foundations, and crawl spaces in coastal Virginia deal with a moisture environment that’s genuinely difficult. High humidity, a water table that sits close to the surface in many neighborhoods, and soil that expands and contracts with seasonal moisture changes all work together to create conditions that take a toll on the wood framing sitting just above the ground.

The most common causes break down like this:

Wood rot in the floor joists or sill plates. When a crawl space stays consistently damp, the wood framing absorbs moisture over time. That moisture creates the conditions for fungal decay, which slowly breaks down the structural integrity of the wood. A joist that’s lost significant cross-section to rot can’t carry the load it was designed to carry, and the floor above it starts to drop. This process is gradual and largely invisible until the floor starts showing symptoms. The EPA notes that wood decay fungi require sustained moisture to develop, which is why crawl space moisture control is directly connected to the structural condition of the framing above it.

Failing support posts or columns. Crawl space foundations rely on a grid of support posts or columns, often set on concrete pads, to carry the load of the floor system down to the ground. These posts can fail for a few reasons: the concrete pad beneath them settles or shifts in unstable soil, the post itself rots if it’s wood, or the original installation simply wasn’t adequate for the load. When a post fails or shifts, the beam it was supporting drops, and the floor above follows.

Termite damage. Termites are a real problem in Hampton Roads, and they often do their worst work in the crawl space where nobody’s looking. They hollow out floor joists and sill plates from the inside, leaving a shell that looks intact from the outside but has almost no structural capacity left. By the time floors start sagging from termite damage, the infestation has typically been active for years. If termite damage is part of the picture, the structural repair and the pest treatment have to happen together.

Undersized or overspanned framing. Some homes, particularly older ones, were built with framing that was marginal to begin with. Joists that span too far without adequate support in the middle will deflect under load over time. This is less about damage and more about the original design not having enough structural redundancy. Adding support in the right places addresses it.

Warning Signs Worth Taking Seriously

Floors don’t usually sag overnight. The process is gradual, and the early signs are easy to explain away. Here’s what to watch for:

A floor that feels springy or soft in a specific area, especially near the center of a room, is a common early indicator. Floors are supposed to feel solid. Any noticeable give underfoot is worth paying attention to. Similarly, a floor with a visible slope, one where furniture doesn’t sit level or where you can feel yourself walking slightly uphill or downhill, suggests that part of the support structure has dropped relative to the rest.

Gaps opening up between the baseboard and the floor, or between the floor and a door threshold, can indicate that the floor has moved downward in that area. Doors that suddenly start dragging on the floor, or that used to close cleanly and now don’t, sometimes point to the same thing. Interior wall cracks that appear near the floor, particularly diagonal ones, can also be a sign that the framing below has shifted enough to stress the structure above it.

If you’ve got any of these symptoms and your home has a crawl space, the next step is getting someone under there to look. A lot of what causes sagging floors is completely invisible from inside the house.

How Sagging Floor Repair Actually Works

The repair approach depends on what the inspection finds. There’s no universal fix, but most sagging floor repairs in crawl space homes involve some combination of the following:

Replacing damaged framing. If joists or sill plates have rot or termite damage, that material has to come out and be replaced with new, sound wood before any structural support work makes sense. You can’t jack up a floor and expect the repair to hold if the wood you’re jacking against is compromised. This part of the work is labor-intensive because it’s happening in a confined space, but it’s not optional when the framing is genuinely damaged.

Installing adjustable steel support jacks. Once the framing is in good shape, or if the framing is intact and the issue is failing posts, heavy-duty adjustable steel jacks get installed at intervals beneath the main support beams. These are a significant upgrade over the older concrete block or wood post systems they often replace. Steel jacks are rated for high load capacity, and critically, they’re adjustable, meaning they can be incrementally raised over time rather than trying to lift everything at once, which reduces the risk of cracking interior drywall as the floor comes back up. Our crawl space services include jack installation as part of a full structural assessment.

Addressing the moisture problem. This part gets skipped more often than it should, and it’s why some sagging floor repairs don’t stay fixed. If the crawl space conditions that caused the rot or post failure in the first place aren’t corrected, the new materials are going to face the same environment the old ones did. A proper repair almost always includes some level of moisture remediation, whether that’s a full crawl space encapsulation, improved drainage, a dehumidifier, or some combination of all three. The structural fix and the moisture fix belong together.

What to Expect from the Process

Most of the work happens in the crawl space, which means minimal disruption inside the house. You might hear equipment and there’ll be activity outside around the crawl space access, but day-to-day life in the home generally continues without much interruption.

The timeline depends on scope. A straightforward jack installation without significant framing damage might be completed in a day. A project that involves replacing damaged joists, treating for mold or termites, and adding encapsulation is a multi-day job. A good contractor will walk you through the timeline after the inspection, once they know what they’re actually dealing with.

One thing worth knowing: if floors have sagged significantly, they often can’t be returned to perfectly level in one shot. Lifting a floor that’s been down for years too aggressively can crack interior drywall and stress the framing above. Most experienced contractors will raise the floor incrementally over time rather than all at once, which is another reason adjustable jacks are the preferred tool for this kind of work.

If you’ve got floors that are giving you pause, the most useful thing you can do is get a professional set of eyes in the crawl space. At Hawk, our inspections are free and there’s no pressure, and you don’t have to be home for us to take a look. Schedule yours here and we’ll tell you straight what we find.

Frequently Asked Questions

Is a sagging floor a structural emergency?

It depends on the severity and the cause. A floor with significant sag, one where the drop is visually obvious or where the underlying framing has severe rot or termite damage, warrants prompt attention. A floor that’s slightly soft or has a minor slope that’s been stable for years is less urgent but still worth having inspected. The concern with waiting is that the conditions causing the sag, usually moisture and the damage it enables, continue the whole time. What’s a moderate repair today can become a more involved one a few years from now.

Can I repair a sagging floor myself?

Some homeowners do attempt DIY crawl space jack installations, and there’s a fair amount of information online about it. The challenge is that without knowing why the floor is sagging, you risk adding support to damaged framing that can’t actually hold it, missing rot or termite damage that will continue to worsen, or lifting too aggressively and cracking drywall upstairs. A professional inspection at minimum is worth it before attempting anything structural, even if you end up doing some of the work yourself.

How long does sagging floor repair last?

When the repair addresses both the structural issue and the underlying moisture cause, a properly done job should be long-lasting. Adjustable steel jacks don’t rot and don’t shift the way older wood or concrete post systems do. New framing installed in a properly controlled crawl space environment, one that’s been encapsulated and dehumidified, is not going to face the same deterioration the original framing did. The durability of the repair is closely tied to whether the moisture problem was fixed at the same time.

What’s the difference between a sagging floor and a foundation problem?

They’re related but not the same thing. A sagging floor in a crawl space home is usually a problem with the support structure between the foundation and the floor, the posts, beams, and joists, rather than the foundation itself. That said, the two often show up together because the same moisture conditions that damage wood framing can also affect the foundation. An inspection will usually clarify which is which. You can read more about foundation repair services if you suspect the issue goes deeper than the crawl space framing.

Foundation Repair in Chesapeake, VA: What the Process Actually Looks Like

If you’ve gotten to the point where you’re searching for foundation repair in Chesapeake, VA, chances are you’ve already noticed something: a crack that won’t stay patched, a door that doesn’t close right anymore, or maybe a contractor already told you there’s an issue and you want to understand what you’re actually getting into. This article isn’t going to spend a lot of time re-explaining the warning signs. Instead, it’s going to walk through what foundation repair actually involves once you’ve decided to move forward, what methods are commonly used, and what to expect from the process.

Foundation repair sounds like one thing, but it’s really a category that covers a range of solutions depending on what’s wrong and why. The right approach for a home with a few settling cracks is very different from what’s needed for a home with a foundation wall that’s actively bowing inward.

Why Chesapeake Foundations Need Different Solutions Than Other Regions

Foundation repair methods aren’t one-size-fits-all, and the reason comes down to soil. Chesapeake and the broader Hampton Roads area sit on coastal plain soils with significant clay content and a water table that, in a lot of neighborhoods, isn’t far below the surface. Clay soil swells when it’s wet and shrinks when it dries, and that cycle repeats every year with the seasons. Add in groundwater pressure from a high water table, and you’ve got soil conditions that put ongoing, uneven stress on a foundation.

This matters for repair because a fix that works great in a region with stable, well-drained soil might not hold up here. A repair method has to account for soil that’s going to keep moving. That’s part of why deep foundation solutions, ones that bypass the unstable upper soil layers entirely and anchor into more stable strata below, have become the standard for serious foundation issues in this region.

Common Foundation Repair Methods Used in Chesapeake

Unfortunately, there isn’t a single, one-size-fits-all foundation repair technique. The right method depends on what’s causing the problem and how severe it’s gotten.

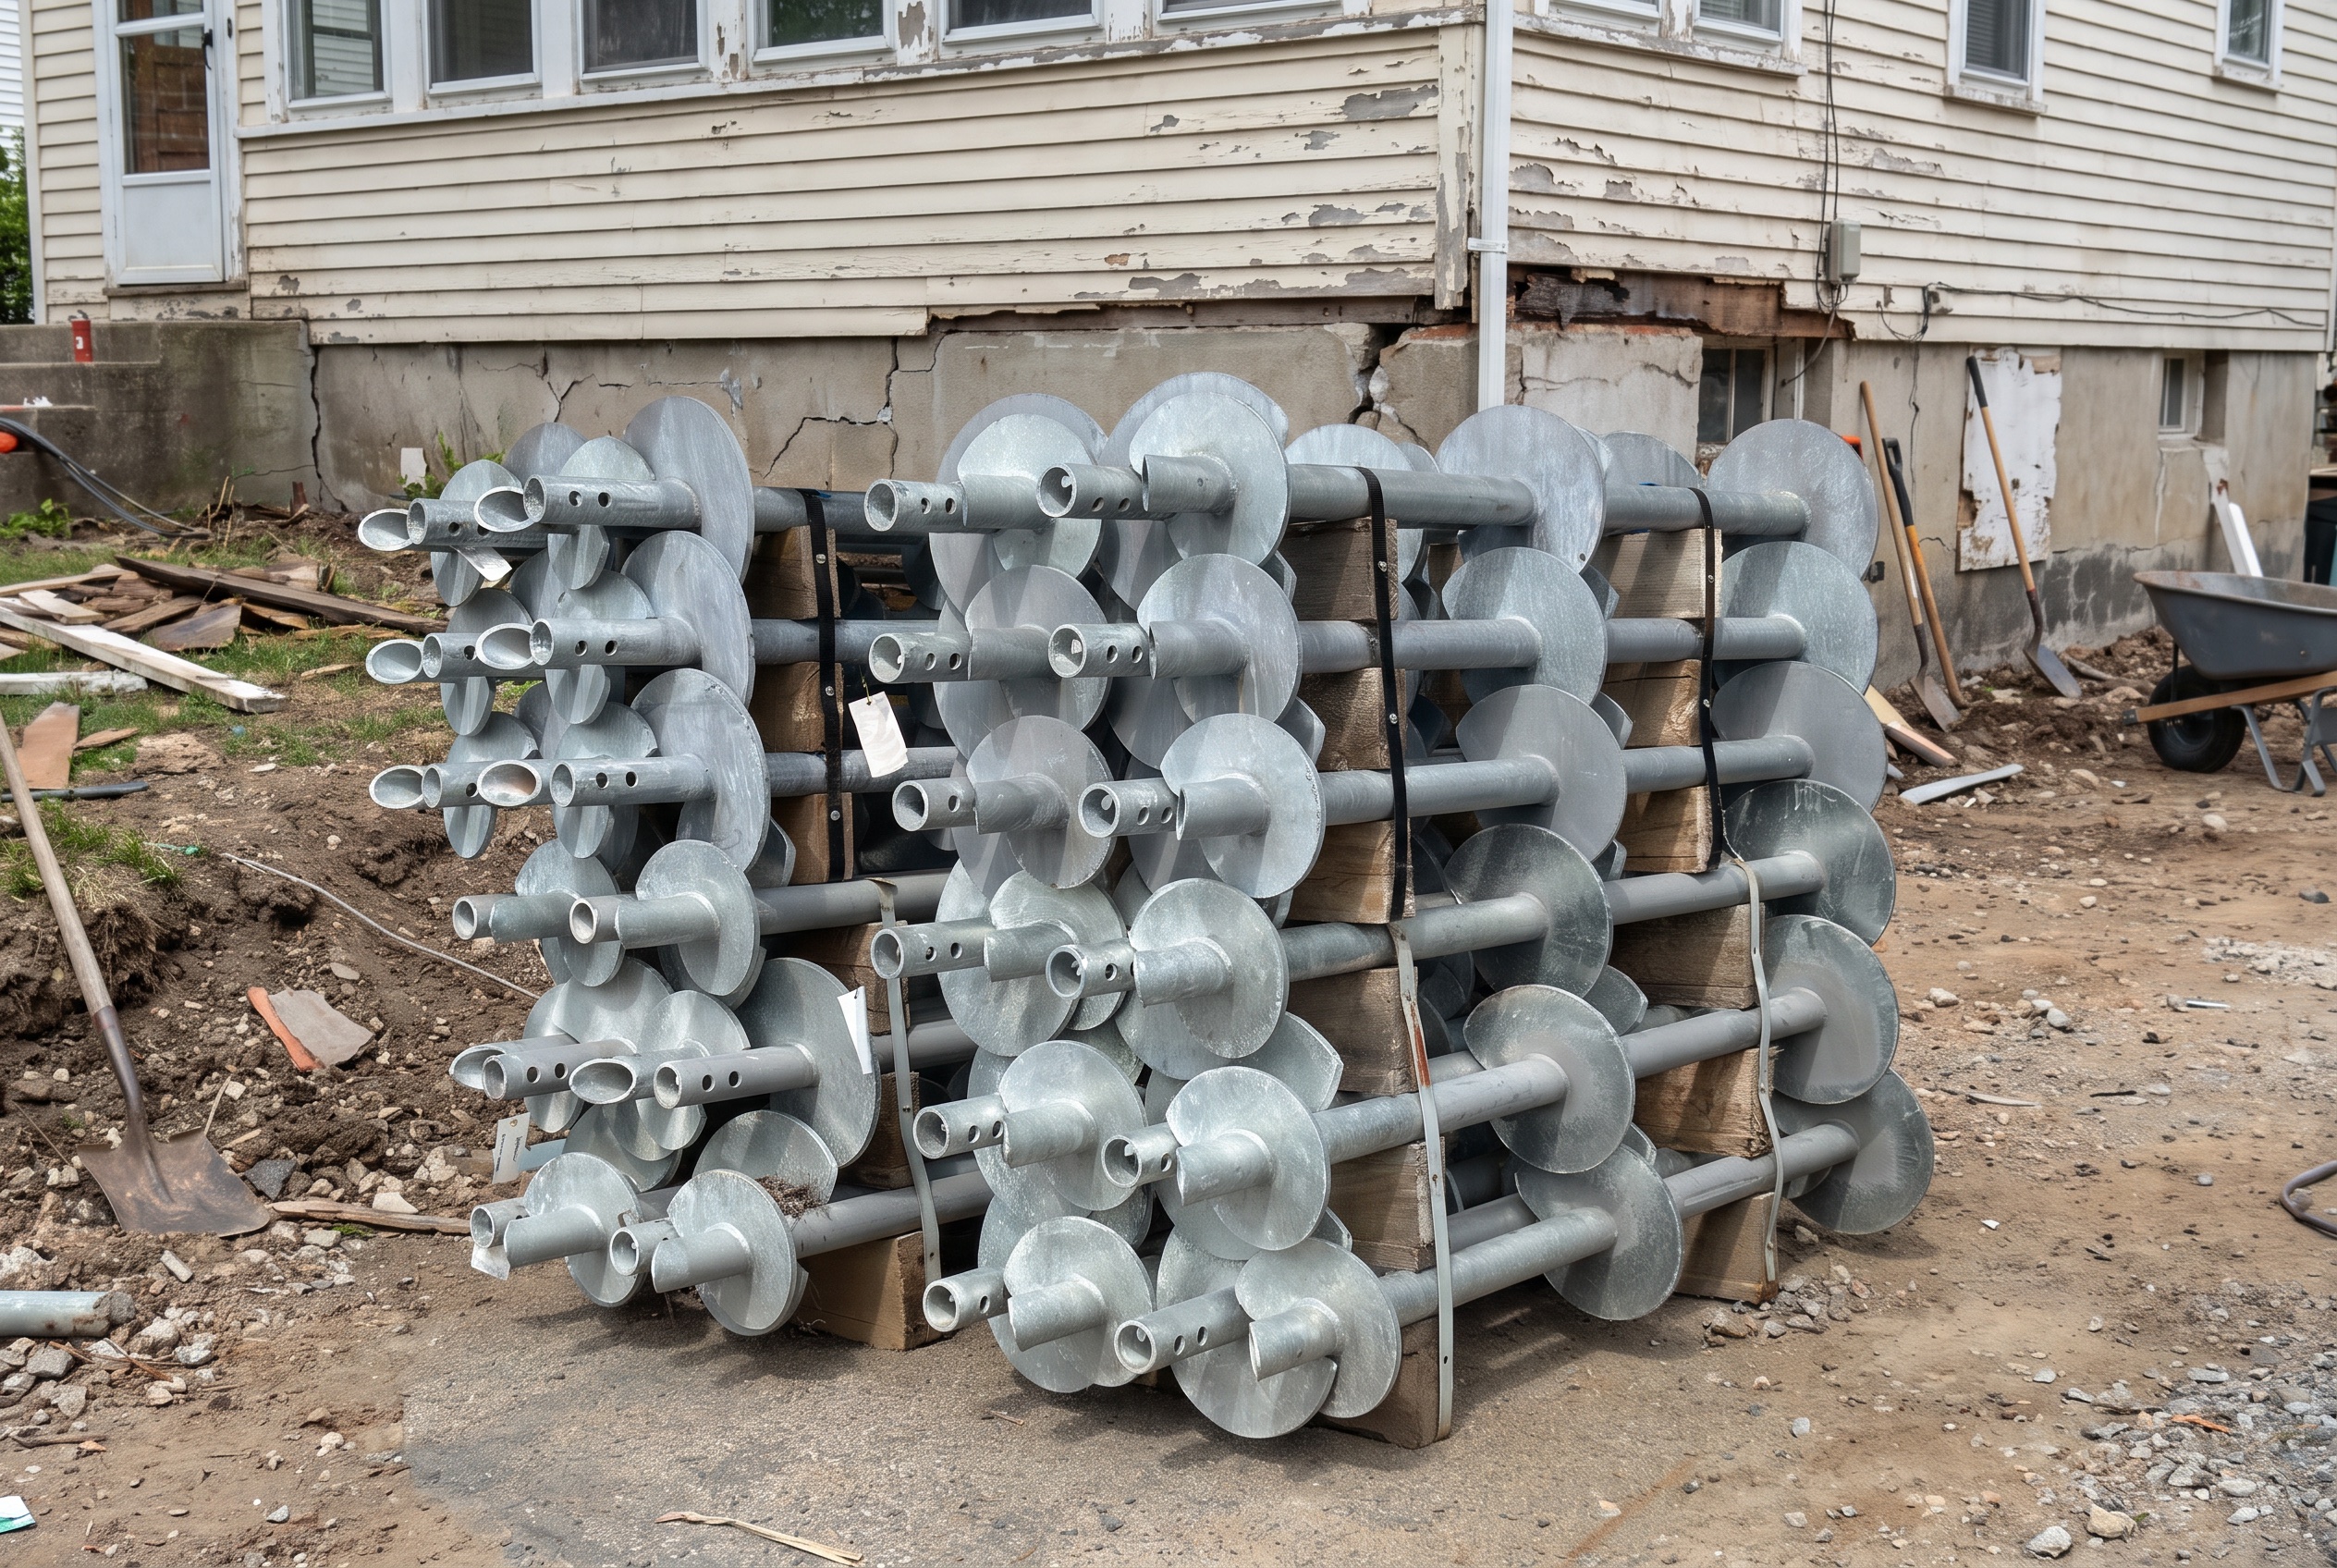
Helical piers. For homes dealing with significant settlement, helical piers are often the most reliable long-term solution. These are steel shafts with helix-shaped plates that get screwed into the ground using hydraulic equipment, similar in concept to a giant screw, until they reach load-bearing soil deep enough to provide stable support. One of the practical advantages of helical piers is that the torque required to install them correlates directly with their load-bearing capacity, so the contractor can verify during installation that each pier is actually capable of supporting the structure’s weight. They’re installed with minimal excavation, which means less disruption to your yard and landscaping compared to older underpinning methods. You can read more about helical pier installation and how it applies to different foundation types.

Foundation jacks and post-pier repair. For homes with crawl space foundations, sagging floors are often caused by failing support posts or rotted sill plates rather than a problem with the foundation walls themselves. In these cases, heavy-duty adjustable steel jacks get installed at intervals beneath the main support beams. Unlike older methods involving concrete blocks or wood shims, steel jacks allow for incremental adjustment over time, which matters in a region where soil movement is ongoing rather than a one-time event. If the original wood framing has rot or termite damage, that damaged material needs to be replaced before new supports go in, otherwise you’re just adding support to compromised wood.

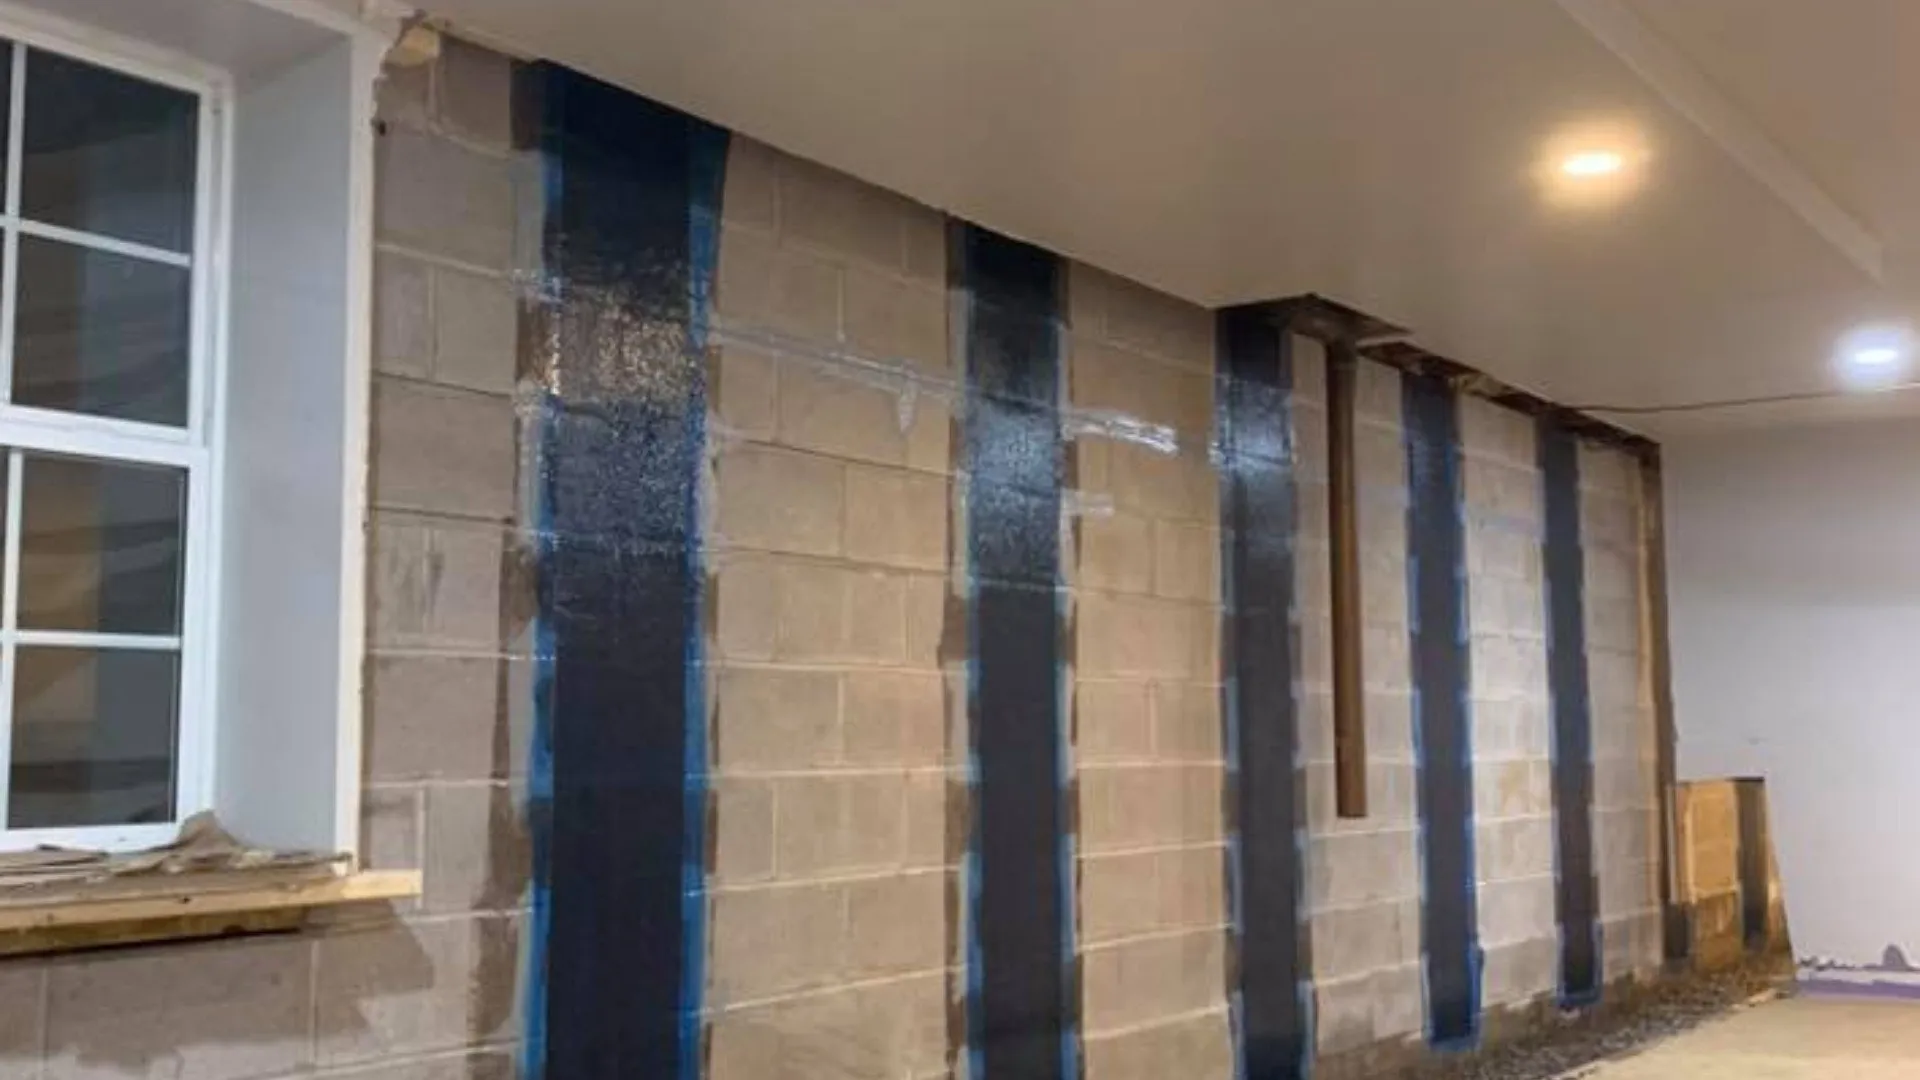
Wall stabilization for bowing or cracked foundation walls. If a basement or crawl space wall is bowing inward, that’s a sign of lateral pressure from saturated soil pushing against it. Stabilization typically involves installing supports, either steel braces or anchoring systems, that counteract that pressure and prevent further movement. In some cases this is paired with addressing the drainage issue causing the pressure in the first place, since stabilizing a wall without dealing with the water behind it just means the same pressure keeps building.

Drainage and waterproofing as part of the repair. A lot of foundation problems in this region trace back to water, whether it’s hydrostatic pressure against walls or moisture causing soil to expand unevenly beneath footings. Because of that, foundation repair often includes a drainage component: French drains, sump pumps, or grading improvements that redirect water away from the foundation. Skipping this step on a repair is a bit like fixing a leak in your roof but leaving the hole in the ceiling that’s letting water in. The structural fix and the water management need to work together. Basement waterproofing and foundation repair frequently go hand in hand for exactly this reason.

What to Expect During the Repair Process

The process generally starts with an inspection, and a thorough one matters more than people often realize. A good inspection isn’t just looking at the visible cracks, it’s looking at the soil around the foundation, the drainage situation, the crawl space if there is one, and trying to understand why the movement is happening, not just where it shows up. Two homes with similar-looking cracks can have completely different underlying causes, and the repair plan should reflect that.

From there, the contractor should walk you through what they found and what they’re recommending, including why. This is a good point to ask questions. If something doesn’t make sense, or if the recommendation seems to jump straight to the most expensive option without much explanation, that’s worth pushing back on. The EPA’s guidance on moisture control in buildings notes that addressing moisture sources is foundational to long-term structural performance, which is a good reminder that a repair plan focused only on the symptom (the crack, the sag) without addressing the cause (water, soil movement) is incomplete.

Installation timelines vary a lot depending on scope. A handful of helical piers for a residential foundation might be completed in a day or two. A larger project involving multiple repair methods, drainage work, and structural reinforcement could take longer. Most of this work is done from outside the home or in the crawl space, so disruption to daily life inside the house is usually minimal, though there will be some noise and equipment in the yard during the process.

How Much Does It Cost, and Is It Worth It?

This is the question everyone wants a number for, and the honest answer is that it depends entirely on what’s being repaired. A few helical piers for localized settlement is a very different scope than a full perimeter stabilization with integrated drainage. The factors that drive cost include how many piers or jacks are needed, how deep they need to go (which depends on soil conditions specific to your property), whether drainage or waterproofing work is part of the scope, and how much existing damage, like rotted framing, needs to be addressed before structural repairs can even begin.

What’s worth keeping in mind is that foundation problems driven by soil movement and water don’t resolve themselves. They tend to progress, and the cost of repair generally goes up the longer the underlying issue continues. A free inspection is the best way to get an actual number for your situation rather than guessing based on a range you found online.

Getting Started

If you’re at the point of looking into foundation repair, the most useful next step is a professional inspection that tells you specifically what’s going on with your home and what it would take to fix it. At Hawk, our inspections are free and there’s no obligation, and you don’t need to be home for us to take a look. Get in touch here to schedule one, and we’ll walk you through exactly what we find and what your options look like.

Frequently Asked Questions

How long do foundation repairs last?

It depends heavily on the method. Helical piers are engineered for very long lifespans, often cited at well over a century, since the steel shafts are typically galvanized for corrosion resistance and anchored into stable soil layers below the zone affected by seasonal movement. Other repairs, like foundation jacks or wall stabilization, are also designed as long-term or permanent solutions, but their durability depends on whether the underlying moisture or drainage issues were addressed at the same time. A repair that ignores the water problem causing the movement is more likely to need follow-up work down the road.

Will foundation repair disrupt my landscaping or yard?

Some methods cause more disruption than others. Helical pier installation involves minimal excavation, generally just small access points where each pier goes in, so the impact on landscaping is usually limited. Drainage work, like installing a French drain around the perimeter, involves more digging along the affected area. Any reputable contractor should be able to tell you upfront what kind of yard disruption to expect for your specific repair plan, and most will work with you on restoring the area afterward.

Can I sell my house if it’s had foundation repair?

Yes, and in many cases documented foundation repair from a licensed contractor can actually be a positive in a real estate transaction. Buyers and inspectors are often more concerned about unresolved or undisclosed foundation issues than about a problem that was professionally addressed with proper documentation. Many foundation repair systems come with transferable warranties, which can provide additional reassurance to a buyer. The bigger red flag for resale is foundation movement that was patched cosmetically without addressing the structural cause.

Do I need foundation repair if I’m only seeing minor cracks?

Not necessarily, but it’s worth having it looked at. Minor, stable cracks that haven’t changed in years are often just normal settling and may not need structural repair. The concern is when cracks are new, growing, or appearing alongside other symptoms like sticking doors or sloping floors, which can indicate active movement. A free inspection can tell you whether what you’re seeing is cosmetic or an early sign of something that’s worth addressing now while the scope of repair is smaller.

Signs of Foundation Problems Chesapeake Homeowners Should Watch For

Signs of Foundation Problems Chesapeake Homeowners Should Watch For

Most foundation problems don’t announce themselves all at once. They show up quietly, often in places you’d dismiss as normal wear and tear. A door that starts sticking in the summer. A crack in the drywall you patch and repaint. A floor that feels a little soft near one wall. In coastal Virginia, where expansive clay soils and a high water table are the norm, these kinds of symptoms tend to appear gradually and get written off until the damage is significant enough that it can’t be ignored anymore.

The signs of foundation problems are worth knowing, because catching them early is almost always cheaper than dealing with them after they’ve had time to develop. This isn’t about alarming anyone, it’s about helping homeowners recognize what’s worth a closer look versus what’s probably nothing.

Why Chesapeake Homes Are Particularly Vulnerable

Before getting into specific symptoms, it helps to understand why Hampton Roads is such a challenging environment for foundations in the first place.

The soil in much of Chesapeake, Norfolk, and the surrounding area contains significant clay content. Clay soil expands when it absorbs water and contracts when it dries out. That constant movement, driven by seasonal rainfall, summer droughts, and the region’s consistently high humidity, puts ongoing stress on foundations. Over time, that stress adds up. The U.S. Geological Survey has documented land subsidence as an ongoing issue in the Hampton Roads region, compounding the natural movement of expansive soils.

Add in a water table that in some neighborhoods sits just a few feet below the surface, and you have conditions that put real, sustained pressure on foundations that were built to sit on stable ground. Homes near Great Bridge, Deep Creek, or low-lying parts of Virginia Beach deal with this more acutely than properties on higher ground, but no home in this region is completely insulated from it.

The Most Common Signs of Foundation Problems

Cracks in the interior drywall or plaster. Not every crack in your walls is a foundation issue. Hairline cracks that run horizontally along seams are usually just normal settling or seasonal movement. The ones worth paying attention to are diagonal cracks, particularly those that run at a 45-degree angle from the corners of windows and door frames. These patterns typically indicate differential settlement, where one part of the foundation is moving at a different rate than another. Stair-step cracking in brick or block exterior walls follows the same logic and is one of the clearer visual indicators of foundation movement.

Doors and windows that stick or won’t close properly. This one gets blamed on humidity constantly, and humidity is sometimes the culprit. Wood framing does expand in Virginia’s muggy summers. But when a door that used to close fine starts dragging on the floor or catching at the top of the frame, and the problem doesn’t improve in drier weather, that’s worth investigating. Foundation movement shifts the structural frame of the house, and doors and windows are often the first places that show it because they require precise alignment to operate correctly.

Uneven or sloping floors. You might notice this as a subtle sensation when you walk through a room, or you might spot it when furniture starts sitting unevenly. In crawl space homes, which make up a large portion of the housing stock in older parts of Norfolk, Portsmouth, and Chesapeake, floor sag often points to failing support posts, rotted sill plates, or inadequate joist support rather than the foundation itself. But the two issues are related. Moisture that comes up through an unencapsulated crawl space is what rots the wood framing, and moisture problems in crawl spaces often trace back to foundation conditions that allow water to collect near the structure.

Gaps between walls and ceilings or floors. When a foundation settles unevenly, the framing above it moves. That movement shows up as separation at the joints where walls meet ceilings, or where the baseboard meets the floor. Small gaps that appear uniformly around a room aren’t usually alarming. Large gaps, or gaps that are noticeably worse in one area of the house, suggest movement in that section of the foundation.

Bowing or leaning walls in the basement or crawl space. If you have a basement, get down there and look at the walls. Walls that bow inward at the center are under lateral pressure from the soil outside. This is a more serious symptom that warrants prompt attention. In a crawl space, leaning or deteriorating block piers, cracked concrete footings, or posts that have shifted off their bases are all indicators that the structural support system has been compromised.

Water intrusion or chronic dampness. Water in your basement or crawl space isn’t a direct sign of foundation failure, but it’s a strong indicator that conditions exist which can lead to it. Hydrostatic pressure from saturated soil pushes against foundation walls constantly. Over time, that pressure causes cracks, wall movement, and eventually more significant structural issues. If you’re seeing water stains, efflorescence (the white chalky deposits on concrete or block), or standing water after rain, those are worth addressing before they become structural problems.

What Not to Panic About

It’s worth saying plainly that not every crack or creak means your foundation is failing. Homes move. Seasonal changes cause wood to expand and contract, and older homes in particular have usually done a fair amount of settling over the decades. A single hairline crack that hasn’t changed in years is usually not a crisis.

The pattern to watch for is change. A crack that’s been stable for a long time is different from a crack that keeps growing. A door that started sticking recently is more concerning than one that’s always been a little tight. If you’re noticing multiple symptoms at the same time, or symptoms that seem to be getting worse, that’s when it makes sense to have someone take a look.

When to Call a Foundation Contractor

If you’re seeing diagonal cracking in multiple locations, doors or windows that have noticeably changed in how they operate, floors with a visible slope, or any bowing in your basement walls, those warrant a professional inspection. The same goes for any situation where water is regularly getting into the basement or crawl space.

A good contractor will do more than look at the symptoms. They’ll want to understand what’s happening beneath them: the soil conditions around the foundation, the drainage situation, and whether the issue is active or has stabilized. FEMA’s coastal construction guidance emphasizes that in coastal plain environments like Hampton Roads, soil behavior and drainage are central to foundation performance, not just afterthoughts.

At Hawk, we offer free structural inspections with no obligation, and you don’t need to be home for us to take a look. If something you’ve seen around your house has been nagging at you, that’s usually reason enough to have it checked. Schedule a free inspection here and we’ll tell you honestly what we find.

Frequently Asked Questions

How do I know if a crack in my wall is a foundation issue or just normal settling?

The shape and location of the crack matters more than the size. Horizontal or stair-step cracks in masonry, and diagonal cracks running from the corners of door and window frames, are more associated with foundation movement than straight vertical hairline cracks along drywall seams. If a crack has been stable for years and isn’t accompanied by other symptoms, it’s probably not an emergency. If it’s new, growing, or appearing alongside sticky doors or sloping floors, get it looked at.

Can foundation problems get worse if I ignore them?

Yes, and usually they do. Foundation issues driven by soil movement or water pressure are ongoing processes. The forces causing the problem don’t stop just because the repair hasn’t happened yet. What starts as a small crack or minor settlement can develop into more significant structural movement over time, and the cost of repair tends to increase with the severity of the damage. Early intervention is almost always the more cost-effective path.

Do foundation problems affect home value?

Significantly, yes. Foundation issues are one of the most common deal-killers in real estate transactions. Home inspectors flag them, buyers get nervous, and lenders sometimes won’t approve financing on a property with unresolved structural problems. Even cosmetically repaired symptoms, like patched cracks, often get flagged during inspection if the underlying cause hasn’t been addressed. Having documented repairs from a licensed contractor is much better for resale than a history of visible problems with no resolution. You can read more about our foundation repair services and what a proper fix involves.

Are foundation problems common in Chesapeake and Hampton Roads?

More common here than in many other parts of Virginia, yes. The combination of expansive clay soils, a high water table in many neighborhoods, and the coastal humidity creates conditions that put consistent stress on foundations. Homes built before modern moisture management practices were standard, particularly pier-and-beam homes in older parts of Norfolk and Portsmouth, tend to show foundation and structural symptoms more frequently. But newer construction isn’t immune either, especially in areas with poor site drainage or on lots that weren’t properly graded.

What Does Crawl Space Encapsulation Cost? Here’s What Actually Moves the Price

What Affects Crawl Space Encapsulation Cost

If you’ve been searching around for crawl space encapsulation prices, you’ve probably found a range so wide it’s almost useless. Some sources quote $1,500, others say $30,000. Both numbers are technically possible, and neither one tells you much about what you’re actually going to pay. The cost depends on what’s actually happening under your house, and no two crawl spaces in Hampton Roads are quite the same.

What this article will do is walk you through the variables that genuinely move the price around, so that when you sit down with a contractor, you know what questions to ask and why one quote might be higher or lower than another.

The Main Factors That Drive Crawl Space Encapsulation Cost

Square footage is the most obvious variable, but it’s far from the only one. A 1,000-square-foot crawl space in good condition with just a moisture problem is a fundamentally different project from a 1,000-square-foot crawl space with standing water, mold on the joists, a failed vapor barrier from 1997, and an HVAC unit sitting on the dirt. The labor, materials, and scope of work can be completely different even at the same size.

Here’s what actually pushes a number up or down:

Existing moisture and water damage. If there’s active water intrusion, you can’t just lay down a liner and call it done. Standing water has to be removed. If the ground stays consistently wet, you may need a French drain system or a sump pump before encapsulation makes sense. Those are separate line items that add to the total.

The condition of the existing vapor barrier (if there is one). Some homes in coastal Virginia have old 6-mil poly sheeting that’s been sitting under the house for decades. It might be shredded, covered in mold, or incompletely installed. Removal and disposal of old material is labor-intensive and adds cost.

Liner quality and thickness. The grade of vapor barrier used in your crawl space matters quite a bit for long-term performance. A 6-mil plastic sheet meets minimum code in some areas, but it tears easily and doesn’t hold up well to foot traffic or punctures. Most professional encapsulations use a reinforced liner in the 12-mil range or higher. Heavier-duty materials cost more, but they’re what makes an encapsulation last instead of requiring repairs or replacement in a few years.

Mold remediation. If there’s mold on the wood framing, that has to be addressed before you seal the space. Encapsulating a crawl space with active mold just traps the problem inside. The EPA notes that mold will continue to grow as long as moisture is present, which is why remediation and moisture control have to happen together, not separately. Remediation is priced separately and depends on how much surface area is affected. In older homes in Norfolk or Portsmouth especially, where pier-and-beam construction is common and moisture has had decades to do its work, this is often a real part of the job.

Whether a dehumidifier is included. An encapsulated crawl space still needs active moisture control. Even with all the vents sealed and the liner fully installed, moisture can still enter through the ground or small gaps. A professional-grade dehumidifier sized to the space is usually part of a complete system. The unit itself can range from a few hundred dollars for a builder-grade machine to upward of $1,500 or more for a commercial-rated unit. This is one area where cheaper is often a false economy.

Drainage systems. If your crawl space sits in an area with a high water table (which describes a large portion of Chesapeake, Virginia Beach, and surrounding areas), you may need a drainage solution as part of the overall system. That means a perimeter drain, a sump pit, and a pump. Homes near Deep Creek or Great Bridge, for instance, sit in areas where groundwater levels can be very close to the surface, and that groundwater pressure doesn’t stop just because you put a liner down.

Crawl space height and accessibility. A 36-inch crawl space is much easier to work in than a 14-inch one. Tight spaces mean slower labor, which means higher labor cost per square foot. It’s not the biggest variable, but it’s real.

Why Coastal Virginia Conditions Matter for Your Project

Hampton Roads is one of the more challenging environments in the country for crawl spaces. The region sits on coastal plain soils with a high water table, and the humidity levels here are consistently among the highest in Virginia. That combination creates a moisture environment that can overwhelm a basic vapor barrier that would work fine in a drier climate.

The clay-heavy soils common in Chesapeake also expand and contract significantly with moisture changes. That movement creates gaps and cracks over time, and water finds its way in. A proper encapsulation system for a Chesapeake home typically needs to account for this, which is why drainage and active dehumidification are usually part of the recommendation and not optional add-ons.

The stack effect amplifies this further. Warm air rising through the home pulls air upward from the crawl space, which means whatever is in that air ends up inside your living space. The U.S. Department of Energy recognizes crawl space moisture control as a key factor in home energy efficiency and indoor air quality, and estimates that a significant share of the air on a home’s first floor can originate from below. That’s why addressing the crawl space environment is as much a health and air quality issue as it is a structural one.

What to Watch Out For When Getting Quotes

Not every quote for crawl space encapsulation is quoting the same thing. Some contractors price just the liner installation. Others include dehumidification. Some will bundle drainage. Others won’t mention it until you ask.

When you’re comparing estimates, make sure you understand what’s included in each one. A quote for $4,000 that includes the liner, vent sealing, and a dehumidifier may actually be a better value than a $2,500 quote that only covers the liner, especially if the cheaper option means you’re back dealing with moisture problems in two years.

Also ask about liner thickness and brand. Contractors who are cutting costs somewhere often do it on materials. There’s a significant difference between a 6-mil vapor barrier and a 20-mil reinforced liner in terms of durability, and the price difference between the two materials is smaller than most homeowners expect.

If a company is pushing the highest-end solution before they’ve assessed your specific situation, that’s worth a second look. A good contractor will walk through what’s actually happening under your house and recommend what’s needed for your conditions, not the same package for every job. Crawl space services should be matched to the actual condition of your crawl space, not a one-size-fits-all upsell.

Getting an Accurate Number for Your Home

The honest answer is that the only way to know what your project will cost is to have someone get under your house and look. Square footage alone doesn’t tell the whole story. The condition of your existing moisture control, the water table situation in your specific neighborhood, the height of the crawl space, whether there’s any mold or structural damage: all of that shapes the scope of work.

At Hawk Crawlspace and Foundation Repair, we offer free inspections with no obligation. You don’t even need to be home for the inspection. We’ll take a look, document what’s there, and give you a clear picture of what’s going on and what we’d recommend. Contact us to schedule your inspection and get a number that’s actually based on your home, not a ballpark from the internet.

Frequently Asked Questions

Does crawl space encapsulation increase home value?

Generally yes, though the impact varies. A properly encapsulated crawl space removes a common red flag during home inspections, can improve energy efficiency, and eliminates moisture-related issues that can cause structural damage over time. Buyers and their inspectors notice crawl space condition, and a clean, dry encapsulated space is a selling point compared to a damp, unprotected one.

How long does crawl space encapsulation last?

A well-installed system using quality materials should last 15 to 25 years or longer. The liner itself, if it’s a heavy-duty reinforced product and isn’t disturbed by heavy foot traffic or mechanical work under the house, can last considerably longer. The dehumidifier will need periodic maintenance and eventual replacement, typically every 10 to 15 years depending on the unit and conditions.

Can I just install a vapor barrier myself to save money?

You can, and for very minor moisture situations it may help. But a DIY vapor barrier and a professional encapsulation system are not the same thing. Proper encapsulation involves sealing foundation vents, mechanically fastening and taping the liner to the walls and around all penetrations, and adding active moisture control. A loose sheet of plastic on the ground is better than nothing, but it won’t address the stack effect or stop moisture from coming in through the walls and vents. In coastal Virginia’s climate, a half-measure often just delays the problem.

Do I need encapsulation or just a vapor barrier?

It depends on what’s actually going on under your house. A vapor barrier is a component of an encapsulation system, not an alternative to one. If you have minor moisture on the ground and no active water intrusion, a quality liner may be sufficient. If you have higher humidity, any signs of mold on the wood, active water entry, or a high water table situation, a full encapsulation with vent sealing and a dehumidifier is usually the right approach. A free inspection will tell you which camp you’re in. You can learn more about the full encapsulation process here.