2530 Centerville Turnpike S, Chesapeake, VA 23322

Bowing Foundation Walls: Causes, Warning Signs, and How They Get Fixed

Bowing Foundation Walls: Causes, Warning Signs, and How They Get Fixed

A foundation wall that’s bowing or leaning inward is one of the more serious structural symptoms a homeowner can find. It’s also one of the more misunderstood ones. People either panic and assume the house is about to collapse, or they dismiss it as something that’s always been there and probably isn’t a big deal. The reality is usually somewhere in between, but it’s never something to leave uninspected. Bowing walls indicate that the soil outside is winning a pressure contest against your foundation, and that contest doesn’t reach a natural stopping point on its own.

This post covers what causes foundation walls to bow, what the warning signs look like, and what the actual repair options are, specifically the methods Hawk uses for homes in the Chesapeake and Hampton Roads area.

What Causes Bowing Foundation Walls

The short answer is hydrostatic pressure and soil movement, two forces that Hampton Roads homes deal with more acutely than homes in most other parts of Virginia.

Foundation walls are built to handle vertical load, the weight of the structure above pressing straight down. They’re less well-suited to lateral load, horizontal pressure pushing against them from the outside. That lateral pressure comes from the soil surrounding the foundation, and it becomes a problem when something increases the pressure beyond what the wall was designed to resist.

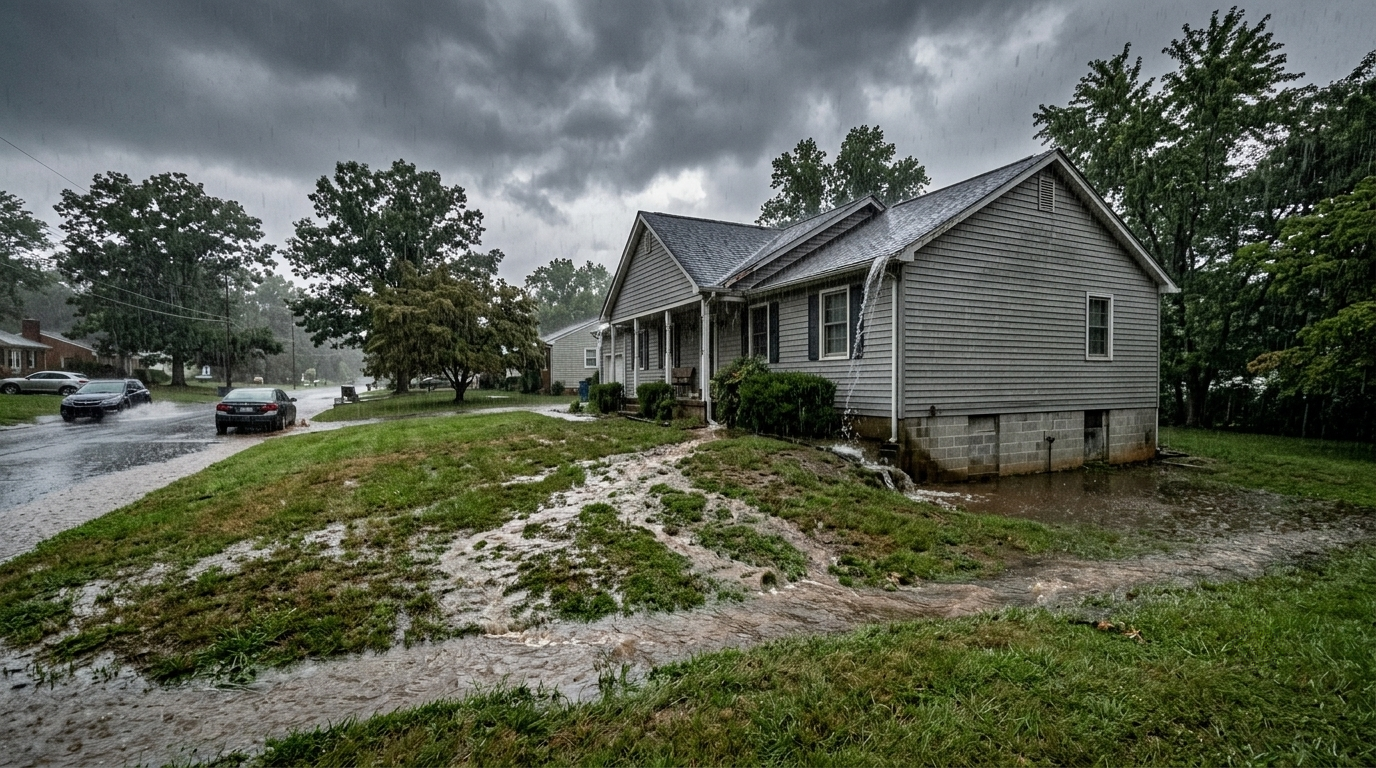
Saturated soil after heavy rain. Water is heavy, roughly 62 pounds per cubic foot, and when the soil around a foundation becomes saturated after a significant rain event, that weight translates into lateral pressure against the wall. In Hampton Roads, where summer storms can drop two to three inches of rain in a short window and the water table in many neighborhoods is already close to the surface, saturation events happen regularly. Every time the soil around the foundation becomes fully saturated, it’s pushing hard against the wall. Over enough cycles, that pressure causes movement. The USGS documents the direct connection between surface rainfall and rising groundwater levels, which is why foundation wall pressure in this region is a seasonal problem, not just a one-storm event.

Expansive clay soil. The clay-heavy soils common in Chesapeake and the surrounding area expand when they absorb moisture and contract when they dry out. That expansion exerts pressure against whatever is in its way, and foundation walls are directly in its way. The pressure during a wet cycle is significant, and the repeated expansion and contraction over years of seasonal change causes cumulative stress on the wall that eventually manifests as cracking or inward movement.

Freeze-thaw cycles. Water in soil expands by roughly nine percent when it freezes. In the mid-Atlantic winter, ground temperatures in Hampton Roads fluctuate above and below freezing enough times in a season to produce meaningful freeze-thaw pressure cycles against foundation walls. This is less severe here than in areas with harder winters, but it’s a contributing factor in older foundations that are already dealing with clay pressure and saturation.

Inadequate drainage and grading. A yard that slopes toward the house rather than away from it directs storm runoff straight to the foundation. Clogged gutters that overflow at the foundation line do the same thing. Over time, the soil immediately adjacent to the foundation stays wetter than it should, maintaining higher baseline lateral pressure against the wall than would exist with proper drainage management.

Age and original construction. Older concrete block foundations, which are common in the older housing stock throughout Norfolk, Portsmouth, and parts of Chesapeake, are more vulnerable to bowing than poured concrete walls. Block walls have mortar joints that can deteriorate over decades, reducing the wall’s overall lateral strength. A block foundation that handled the original soil pressure fine when it was new may begin to show movement as mortar joints weaken and soil conditions put sustained pressure on an older, less cohesive wall.

Warning Signs of a Bowing Foundation Wall

Some of these are visible from inside the basement or crawl space. Others show up elsewhere in the house as the wall movement affects the structure above it.

Horizontal cracks running across the wall. This is the most direct indicator of lateral pressure. A horizontal crack, particularly one that runs across the middle third of a wall, is the wall telling you it’s being bent. The middle of the wall is where bending stress is highest when lateral pressure is applied from outside. Horizontal cracks are more serious than vertical or diagonal cracks in foundation walls because they indicate active bending force rather than settlement or shrinkage.

Stair-step cracks in block walls. In concrete block or brick foundations, lateral pressure often produces cracks that follow the mortar joints in a stair-step pattern. This is the block or brick equivalent of a horizontal crack and carries the same concern: the wall is moving in response to outside pressure.

Visible inward lean or bow. Sometimes you can see it directly. Standing at one end of the wall and looking along its length, a wall that’s bowing inward shows a curve rather than a straight line. Even a slight inward lean, one that seems minor visually, represents meaningful structural movement that has already occurred and will continue without intervention.

Gaps at the top of the wall where it meets the floor above. When a foundation wall pushes inward at its base or middle, it can separate slightly from the floor framing above it. This gap at the top of the wall is a sign of movement and can allow moisture intrusion in addition to indicating structural change.

Doors and windows that have changed in function. Wall movement in the foundation can transmit to the framing above, causing door frames to rack slightly and windows to bind. If first-floor doors or windows that used to operate correctly have started sticking or not latching without an obvious reason, it’s worth looking at the foundation walls as a potential cause.

The key thing to understand about all of these signs is that they represent movement that has already happened. The question is whether that movement is ongoing and what’s driving it, which is what an inspection is meant to determine.

How Bowing Foundation Walls Get Repaired

The right repair method depends on how much the wall has moved, what’s causing the pressure, and the construction type of the wall. In Hampton Roads, Hawk uses a few primary approaches depending on what the inspection finds.

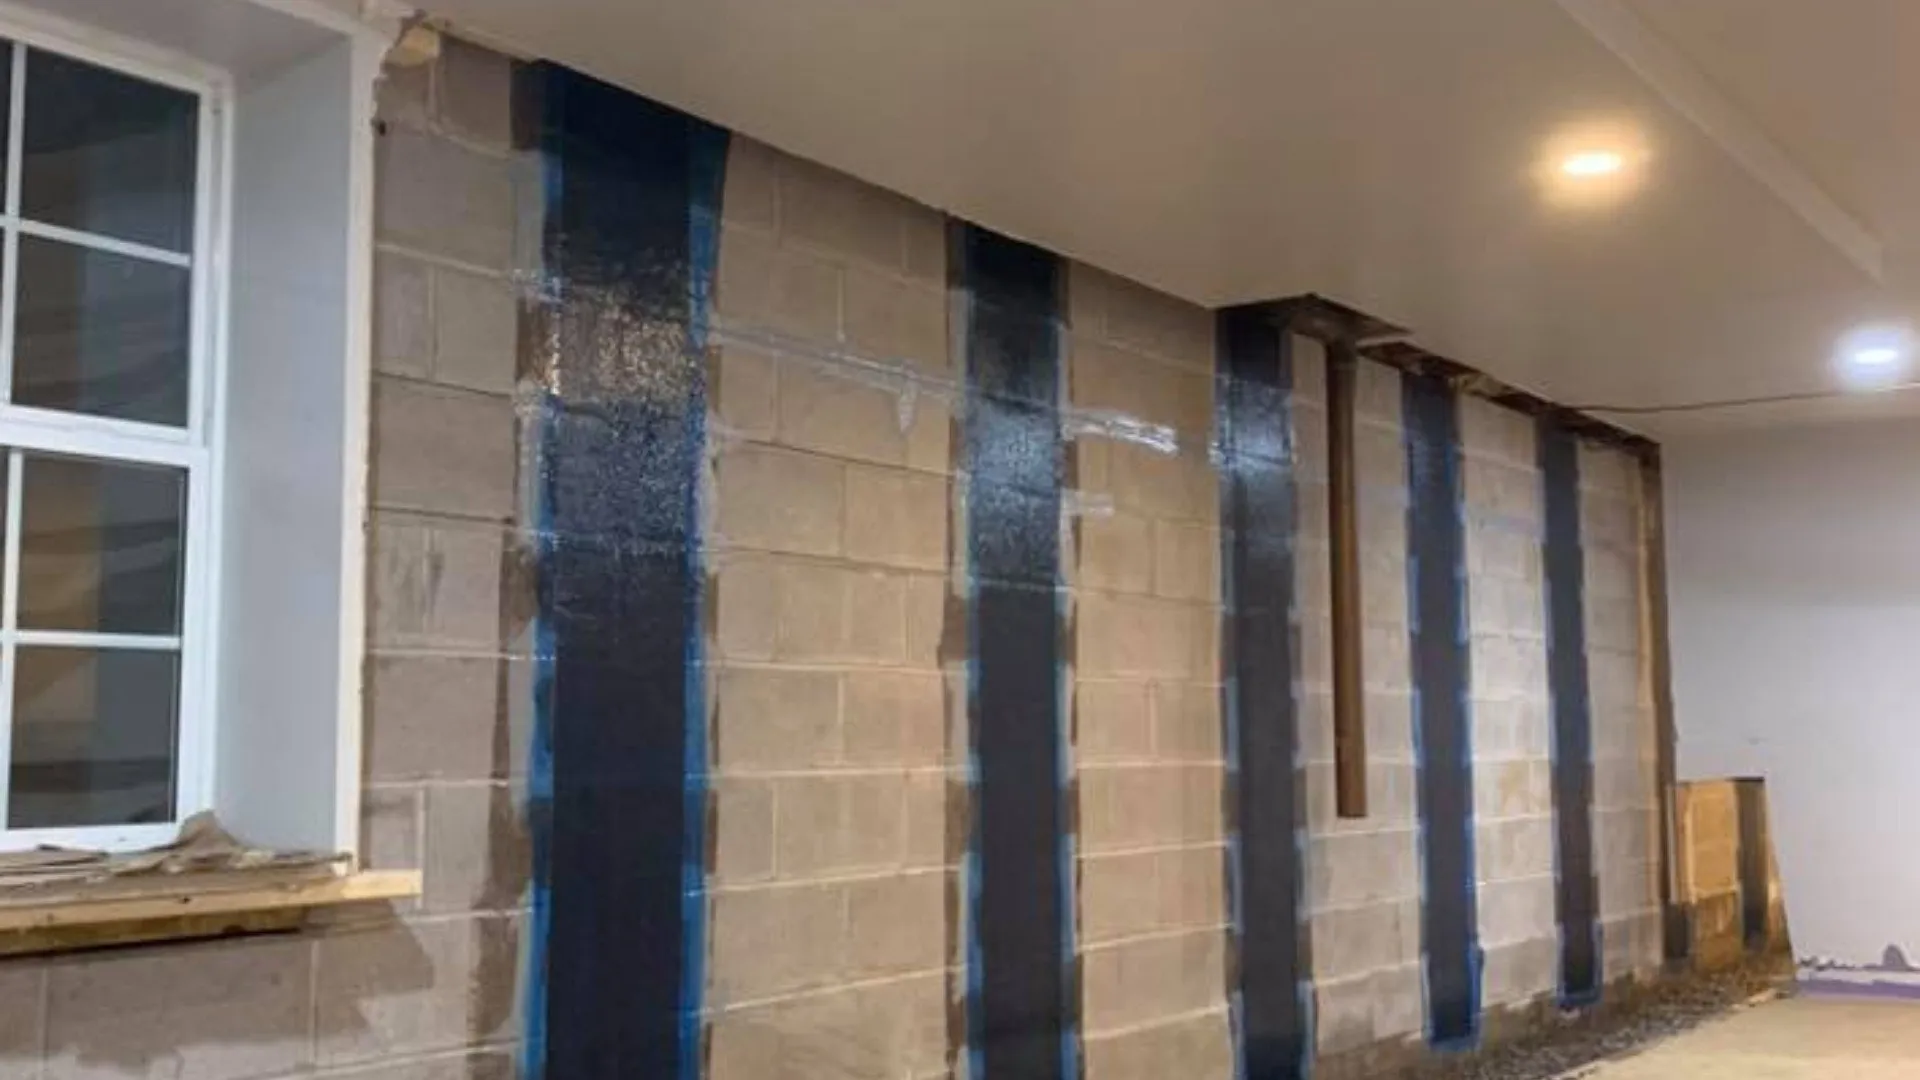
Carbon fiber straps. For walls that have bowed inward by roughly two inches or less, carbon fiber straps are typically the recommended repair. Carbon fiber is extremely strong in tension, and the straps work by anchoring the wall against further inward movement. They’re epoxy-bonded to the wall surface and attached at the top and bottom to the floor framing and footing, effectively tying the wall into the structure so lateral pressure can’t push it further in. The installation is minimally invasive, doesn’t require excavation outside the home, and leaves a relatively low-profile repair on the interior wall surface. Carbon fiber straps don’t push the wall back to its original position but they stop the movement from progressing, which is the primary goal for walls in the two-inch or less range. Hawk’s bowed wall repair services cover this method for qualifying walls throughout the service area.

Wall anchors. For walls with more significant movement or where the soil conditions make a purely internal repair insufficient, wall anchors are another option. This method involves installing steel plates on the interior wall surface, connected by steel rods driven through the wall and into the soil outside, where they anchor to a buried steel plate. Tightening the anchor system over time can actually work to straighten the wall gradually, which is an advantage over carbon fiber straps for walls that have moved beyond the two-inch threshold. The installation does require some excavation outside to place the outer anchor plate, but it’s significantly less disruptive than a full wall replacement.

Addressing drainage alongside the repair. Neither carbon fiber straps nor wall anchors change the soil pressure being applied to the exterior of the wall. A repair that stabilizes the wall without improving drainage is stabilizing it against a force that’s going to keep pushing. This is why most bowing wall repairs in this region include a recommendation for drainage improvements: regrading, downspout extensions, and in cases with active water intrusion, a French drain or sump pump to intercept water before it saturates the soil against the foundation. Managing the water source reduces the lateral pressure that caused the bowing in the first place and extends the life of the repair. Foundation repair and stabilization services at Hawk are typically assessed together with drainage conditions for exactly this reason.

Wall replacement. In severe cases where a wall has moved significantly, has extensive cracking throughout its height, or is a block wall with badly deteriorated mortar that can’t be effectively stabilized in place, full or partial wall replacement may be the most practical solution. This is a more significant undertaking that involves excavation and shoring, but for walls beyond the range where straps or anchors provide adequate stabilization it may be the only option that produces a truly reliable result. A professional structural assessment is what determines whether a wall is a candidate for stabilization or replacement.

When to Stop Watching and Start Acting

Bowing wall repairs have better outcomes and lower costs the earlier they happen. A wall that has moved less than two inches is a straightforward carbon fiber strap repair. A wall that has moved four inches and has significant cracking throughout is a much more involved scope. The soil pressure that caused the movement doesn’t stop while a homeowner is deciding whether to get it looked at, which means the wall is likely continuing to move the whole time.

If you’ve noticed horizontal cracks, stair-step cracking, or any visible inward lean in your basement or crawl space walls, getting a professional inspection is the right next step. At Hawk, inspections are free and there’s no obligation. We’ll assess the wall condition, measure any movement, evaluate the drainage situation around the foundation, and give you a straight recommendation on what repair approach makes sense for what we find. Schedule your free inspection here.

Frequently Asked Questions

Is a bowing foundation wall dangerous?

It can be, depending on severity and how quickly it’s progressing. A wall with minor bowing that has been stable for years is less immediately concerning than one with active movement and significant cracking. In severe cases, an inward-leaning foundation wall can compromise the structural integrity of the floor system above it and in extreme cases risk partial collapse of the wall. Most bowing wall situations don’t reach that point if addressed in a reasonable timeframe, but the underlying pressure doesn’t stop on its own. Getting it assessed and monitored is the appropriate response to any visible wall movement.

Can I buy a house with a bowing foundation wall?

It depends on the severity and whether the repair is included in the transaction. Minor bowing with a documented repair plan or completed repair from a licensed contractor is a manageable situation. Significant bowing with no repair history and active movement is a real concern that affects both the safety of the home and its financing eligibility. Many lenders won’t approve mortgages on properties with unresolved structural issues. If you’re buying a home with a bowing wall, having an independent structural assessment done before closing is worth the cost.

Will carbon fiber straps straighten my wall?

No, and this is an important distinction. Carbon fiber straps prevent further inward movement by tying the wall into the structure above and below. They don’t push the wall back to its original position. For walls that have moved two inches or less, stopping the movement is generally considered a successful repair outcome. For walls where the movement is more significant and straightening is a goal, wall anchors that can be gradually tightened over time are the more appropriate method. Which approach is right depends on how far the wall has already moved and what the structural assessment recommends.

How long does bowing wall repair take?

Carbon fiber strap installation is typically completed in a day for a standard residential wall section. The number of straps required depends on the length and condition of the wall, but the installation process itself is relatively quick since it doesn’t involve excavation or major structural disruption. Wall anchor installation takes longer due to the exterior work involved. Full wall replacement is a multi-day project requiring excavation, shoring, and new wall construction. The timeline for any specific job is something your contractor should walk you through after the inspection, once the scope is clear.

Foundation Jacks: What They Are, When You Need Them, and What to Expect

Foundation Jacks: What They Are, When You Need Them, and What to Expect

If someone has told you that your crawl space needs foundation jacks, or if you’ve noticed sagging floors, sticking doors, or cracks in the drywall and started researching what might be causing them, you’ve probably come across the term. Foundation jacks are one of the more common structural repairs in older Hampton Roads homes, and they’re also one of the more misunderstood ones. This post covers what they are, what problem they solve, and what a proper installation actually looks like.

What Foundation Jacks Are and What They Do

Foundation jacks, sometimes called crawl space jacks or adjustable steel columns, are heavy-duty support posts installed beneath the main beams and floor joists of a crawl space home. Their job is to provide or restore vertical support to a floor system that has lost it, whether because the original support posts have failed, rotted, shifted off their bases, or because the floor was never adequately supported to begin with.

A crawl space foundation system works as a chain: the subfloor sits on floor joists, the joists bear on beams, the beams bear on support posts or columns, and those posts bear on concrete pads sitting on the ground. When any link in that chain fails, the floor above it loses support and starts to sag. Foundation jacks address that by replacing or supplementing the failing support element with a new steel column that can carry the load and, critically, be adjusted over time.

That adjustability matters more than it might seem. Lifting a sagging floor back toward level isn’t something you do all at once. Wood framing that has been carrying a deflected load for months or years has memory, and raising it too aggressively too quickly can crack interior drywall, stress the framing above, and cause more cosmetic damage than the sag itself. Adjustable steel jacks allow a contractor to raise the floor incrementally, a small amount at a time over weeks or months if needed, until it reaches the target elevation without causing collateral damage in the process.

Foundation Jacks vs. Crawl Space Jacks: What’s the Difference

The terms get used interchangeably but there’s a technical distinction worth knowing. Crawl space jacks typically refer to the adjustable steel columns installed specifically within the crawl space to support the floor beam system above, replacing or supplementing original wood or concrete block posts. Foundation jacks is a broader term that can refer to both those interior support columns and to jacking systems used to lift and stabilize the foundation structure itself, including the perimeter walls and footings.

In practice, most residential calls in this region involve the crawl space support column application: failing or inadequate posts beneath the main girder beams that are allowing the floor to sag. That’s the scenario this post is primarily focused on. If the issue involves the perimeter foundation walls or footings rather than the interior support grid, that’s typically addressed through helical piers or wall stabilization, which is a different scope of work covered in our post on helical pier installation.

Why Crawl Space Support Posts Fail in Hampton Roads

The support posts in a crawl space can fail for a few different reasons, and in coastal Virginia, moisture is usually involved directly or indirectly.

Original wood posts rot. It’s straightforward: wood in a persistently damp crawl space absorbs moisture and eventually decays. The process is slow and invisible until it isn’t. A post that looks structurally sound from outside can be significantly compromised internally by fungal decay, and by the time the floor above starts to show movement, the post may have lost most of its load-carrying capacity. Homes in Hampton Roads with unencapsulated crawl spaces, which describes a large portion of the older housing stock in Chesapeake, Norfolk, and Portsmouth, are dealing with this moisture environment year-round.

Concrete block pads shift or sink. The pads that original wood posts sit on are only as stable as the soil beneath them, and Hampton Roads soil, with its clay content and seasonal moisture fluctuation, is not always stable. A pad that shifts laterally or sinks slightly can leave a post leaning or effectively unsupported. A post that’s leaning is carrying its load in compression at an angle rather than straight down, which is significantly less efficient and can lead to the post eventually buckling or shifting further.

Termite damage hollows out wood posts and beams. Subterranean termites are common throughout the region and favor the dark, damp, undisturbed environment of a crawl space. A post or beam section that’s been colonized by termites can be structurally hollow while still looking intact from the outside. By the time the floor gives any sign of a problem, the damage is usually well established. The EPA notes that termites cause billions in structural damage annually in the US, with crawl space framing among the most commonly affected areas.

Inadequate original support. Some homes, particularly those that have had additions built without proper engineering or older homes built to standards that wouldn’t pass current code, simply don’t have enough support posts beneath the main beams. Joists spanning too far without intermediate support deflect under load over time, producing a floor that bounces or sags even without any damage to the existing posts.

Signs That Foundation Jacks Might Be Needed

Most of these overlap with general sagging floor symptoms, which makes sense since that’s usually the problem they’re solving. The ones most directly associated with failing crawl space support posts are:

A floor with a noticeable low point toward the center of a room, often directly above where a support beam runs, is a common presentation. The center of a span is where deflection shows up first and most dramatically when support is lost. A floor that’s bouncy or springy underfoot, particularly in a concentrated area, points to the same issue.

Doors on the first floor that have changed in how they operate, dragging at the top or the floor, or no longer latching correctly, can indicate the floor framing has shifted enough to rack the door frames slightly. If multiple doors in the same area of the house are having issues simultaneously, that’s a clearer signal than one problem door that’s always been slightly off.

Gaps opening between the baseboard and the floor in a specific area, or between the floor and a threshold, suggest the floor has dropped in that zone. Diagonal cracks in drywall near the floor, particularly at the corners of doorways, can accompany floor movement for the same reason they accompany foundation movement: the framing is shifting and the rigid drywall cracks at the stress points.

If you’ve gotten into the crawl space and can see posts that are leaning, sitting off-center on their pads, visibly rotted or soft, or in some cases missing entirely where a previous owner removed them without replacement, those are the most direct indicators that support is inadequate and needs to be addressed.

What a Proper Foundation Jack Installation Involves

The installation process starts with a thorough assessment of what’s actually happening in the crawl space. The contractor needs to identify which posts or sections of the beam system are failing, whether the existing bearing pads are adequate or need to be replaced, what condition the beams themselves are in, and whether there’s any moisture or structural damage that needs to be addressed before new supports go in. Installing a jack against a rotted beam is not a repair.

New concrete bearing pads are poured or placed where needed to give the jack a stable base. These need to be sized appropriately for the load being transferred and placed on undisturbed soil or properly compacted fill. This is a step that less careful contractors skip or shortcut, and it matters because a jack sitting on an inadequate pad will eventually shift just like the original post did.

The steel jack columns are installed and set to the appropriate height to make contact with the beam above without loading it aggressively. From there, any lifting happens gradually. Depending on how much the floor has sagged and how long it’s been that way, the target elevation may be reached in one visit or over a series of incremental adjustments. The goal is a floor that’s functionally level and properly supported, not necessarily one that’s been forced back to its original position at the cost of cracking everything above it.

One thing worth knowing: there’s a distinction between adjustable jack posts designed for permanent installation and the telescoping split-post columns sometimes used as temporary shoring during construction. Split jack posts are not rated for permanent structural use in the US, and any home inspector worth their license will flag them as a deficiency if they’re being used as a permanent support. A proper foundation jack installation uses columns engineered and rated for permanent load-bearing applications. It’s a reasonable question to ask any contractor before work begins.

Addressing the Moisture Problem Alongside the Repair

If the original support posts failed because of moisture-driven rot or termite damage in a persistently damp crawl space, installing new steel jacks without addressing the crawl space moisture environment is an incomplete fix. Steel doesn’t rot the way wood does, but new wood framing used to replace damaged beams or joists will face the same conditions that degraded the original material. And a crawl space that stays wet is a crawl space that’s going to keep producing structural problems over time.

A complete repair in a moisture-compromised crawl space pairs the structural work with moisture control: at minimum a quality vapor barrier, and in most Hampton Roads conditions a full crawl space encapsulation with sealed vents and active dehumidification. The structural fix stops the immediate problem. The moisture fix stops it from recurring. You can read more about what encapsulation involves and why it matters for structural longevity in our post on crawl space encapsulation.

At Hawk we offer free inspections with no obligation. We’ll get into the crawl space, assess the support structure, identify what’s failing and why, and give you a clear picture of what the repair involves and what moisture control measures need to accompany it. Schedule your free inspection here.

Frequently Asked Questions

How many foundation jacks does a crawl space need?

It depends on the span of the beams, the load above them, and how many of the existing support points are failing or inadequate. A typical residential crawl space might have support posts at eight to ten foot intervals beneath the main girder beams. If several of those points are compromised, multiple jacks go in. If only one section has settled or failed, the repair may be more localized. The inspection is what determines the scope, and a contractor who gives you a jack count before looking at the crawl space is guessing.

Will foundation jacks fix my sagging floors permanently?

Steel jack columns installed on adequate bearing pads in a moisture-controlled crawl space are a long-term structural solution. They don’t rot, they’re adjustable if settling occurs over time, and they’re rated for permanent load-bearing use. The durability of the repair depends heavily on whether the underlying moisture problem was addressed at the same time. New supports in a crawl space that stays wet are better than failing old ones, but the environment is still working against the framing above them. The structural repair and the moisture fix belong together for a truly durable result.

Can foundation jacks be installed in a low crawl space?

Yes, though it affects the labor involved. Crawl spaces in this region vary significantly in height, and a tight 18-inch crawl space requires more time and effort to work in than a 36-inch one. Most professional contractors have the equipment and experience to work in confined spaces, but it’s worth discussing the access situation during the inspection so there are no surprises about scope or timeline. Tighter spaces also sometimes limit what equipment can be brought in, which can affect which repair approaches are practical.

Are foundation jacks the same as helical piers?

No, though both are structural support solutions. Foundation jacks are adjustable steel columns installed within the crawl space to support the interior beam and joist system. They address failing or inadequate interior support posts. Helical piers are deep foundation elements screwed into the ground to stabilize or lift the foundation structure itself, including perimeter walls and footings, or to provide deep foundation support for new construction on unstable soil. Both may be part of the solution for a home with significant structural issues, but they address different parts of the structural system. You can read more about the helical pier application in our post on helical pier installation.

Crawl Space Encapsulation vs. Vapor Barrier: What’s the Difference and Which One Do You Need?

Crawl Space Encapsulation vs. Vapor Barrier: What’s the Difference and Which One Do You Need?

If you’ve been researching crawl space moisture problems, you’ve probably seen both terms thrown around, sometimes interchangeably, sometimes as if they’re completely different things. The confusion is understandable because a vapor barrier is actually a component of an encapsulation system, not an alternative to one. But the distinction between installing a vapor barrier and doing a full encapsulation is significant, and choosing the wrong one for your situation means either spending more than you need to or not actually solving the problem.

This post explains what each approach involves, what separates them, and how to think about which one makes sense for your home.

Crawl Space Encapsulation vs. Vapor Barrier: What Each One Actually Is

A vapor barrier is a sheet of plastic liner installed on the ground of the crawl space. Its job is to block moisture vapor from rising out of the soil and into the air of the space above it. That’s it. It’s one layer of protection against one source of moisture: ground vapor.

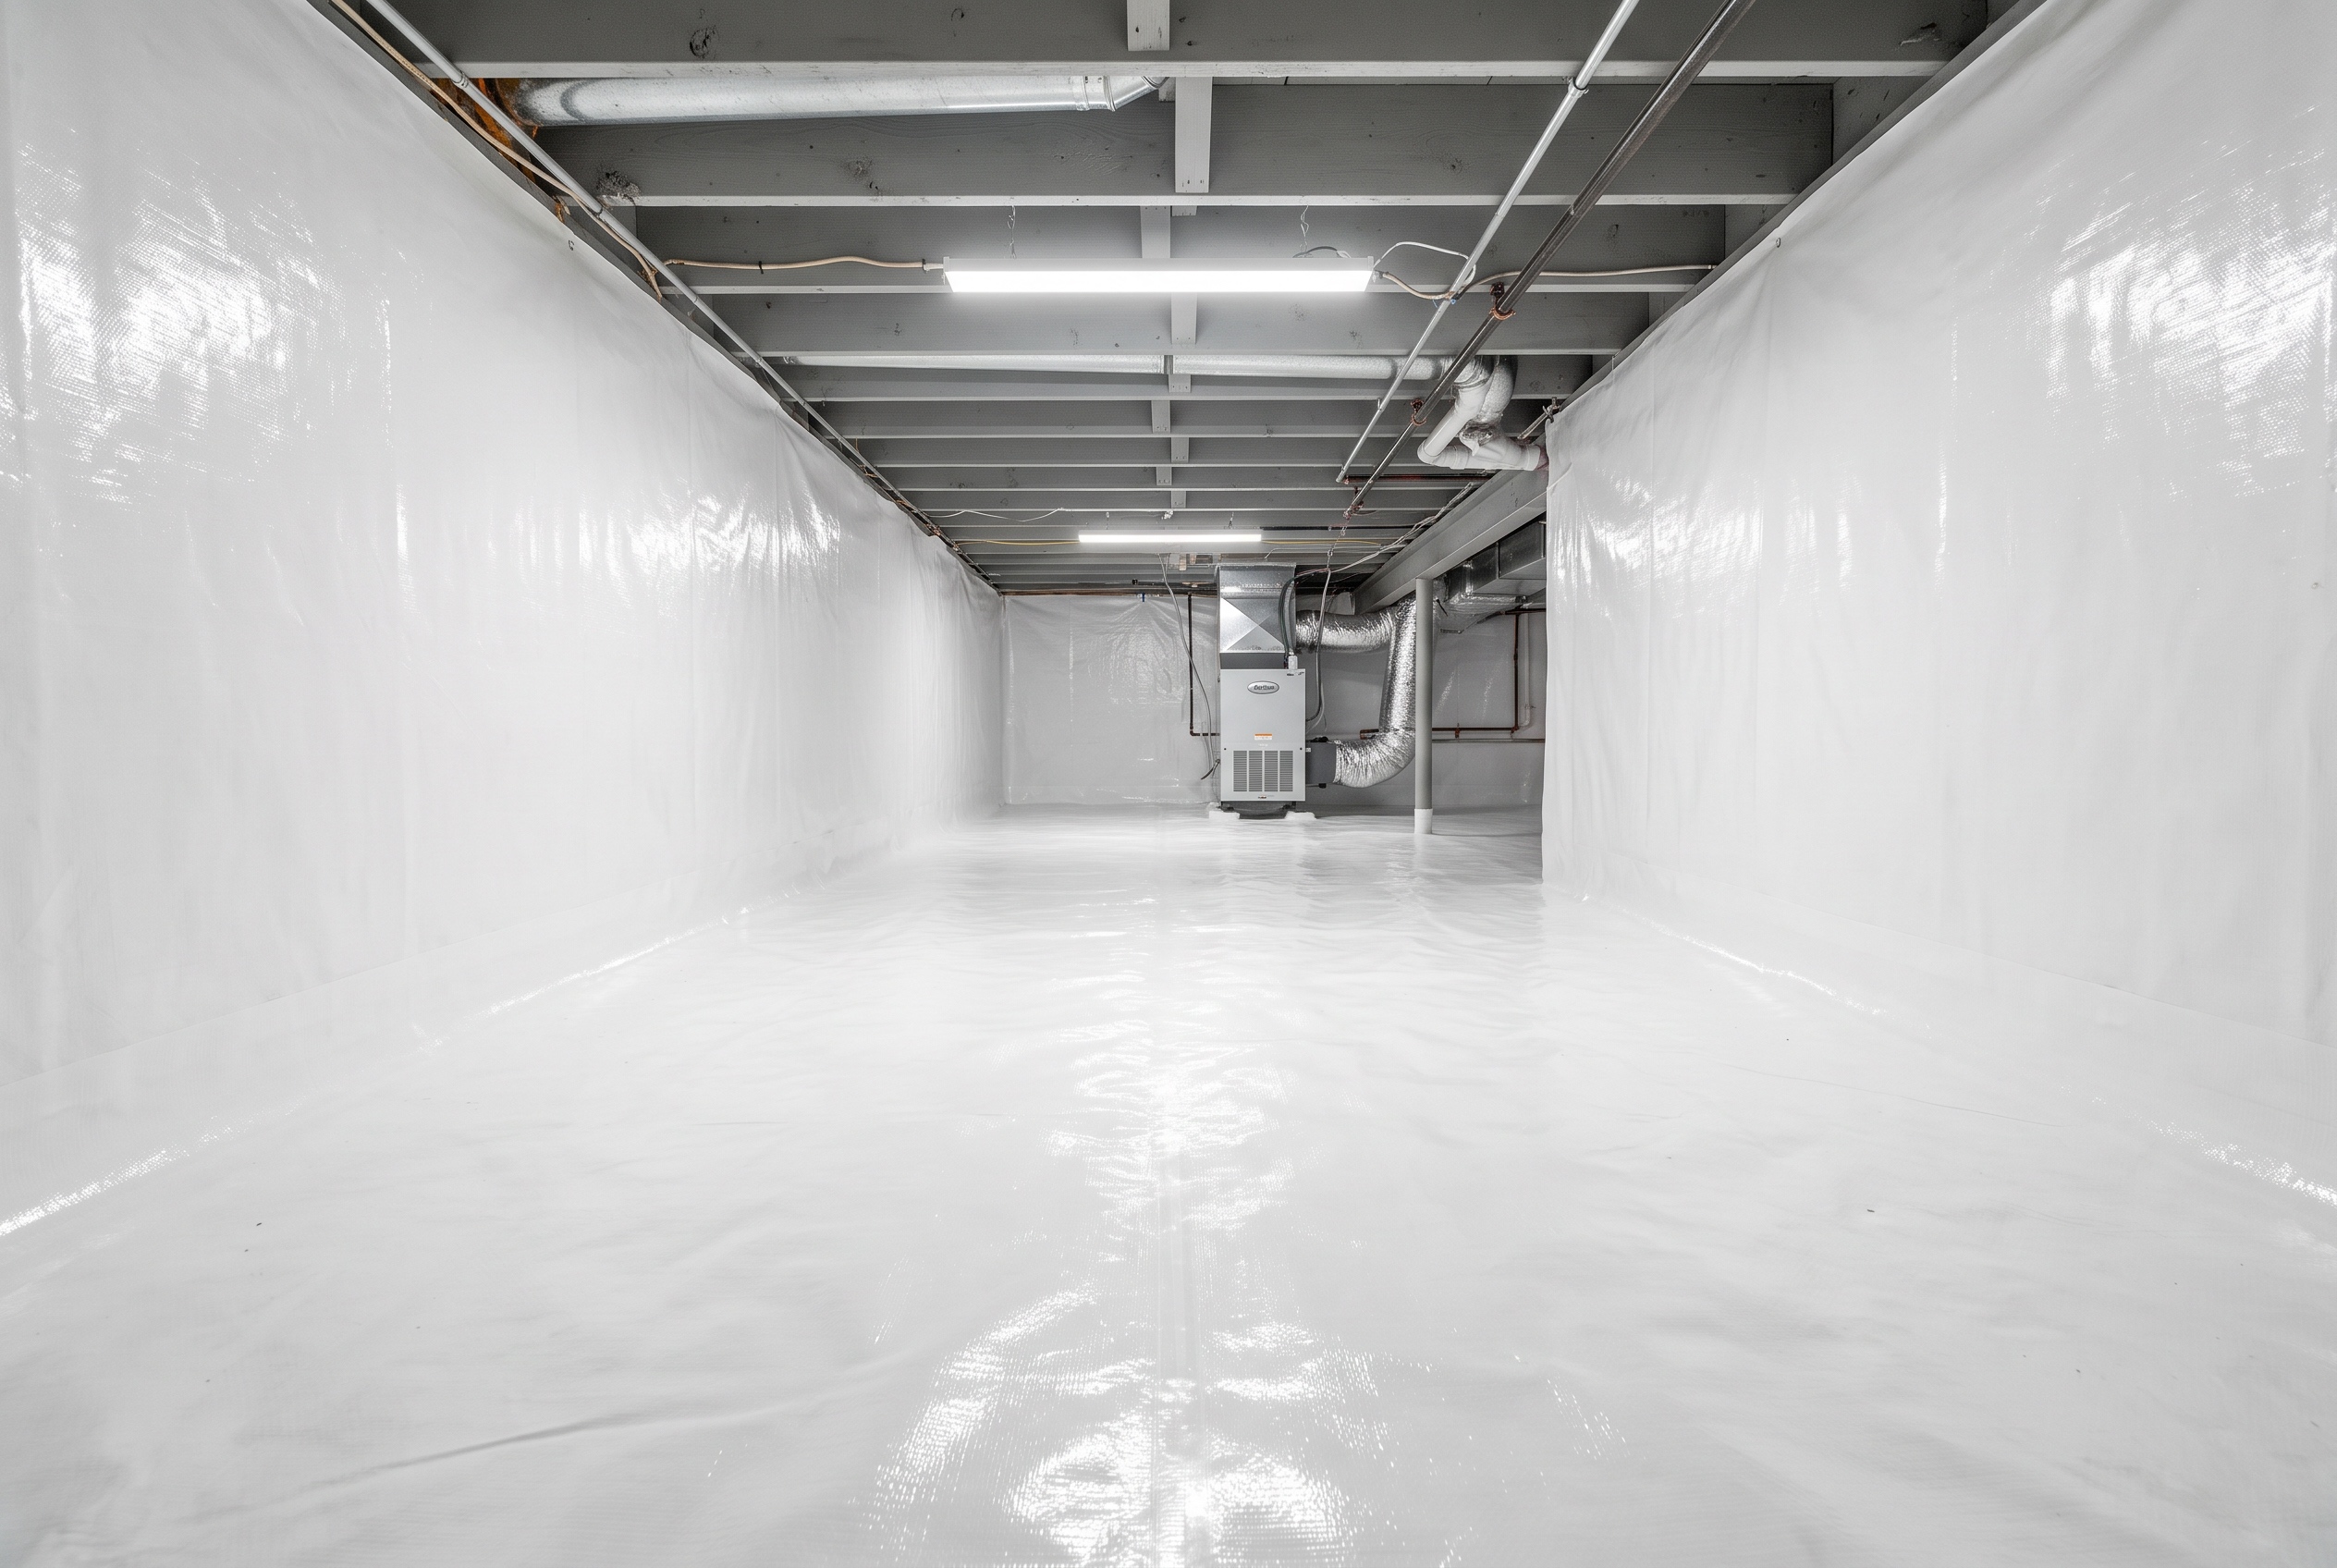
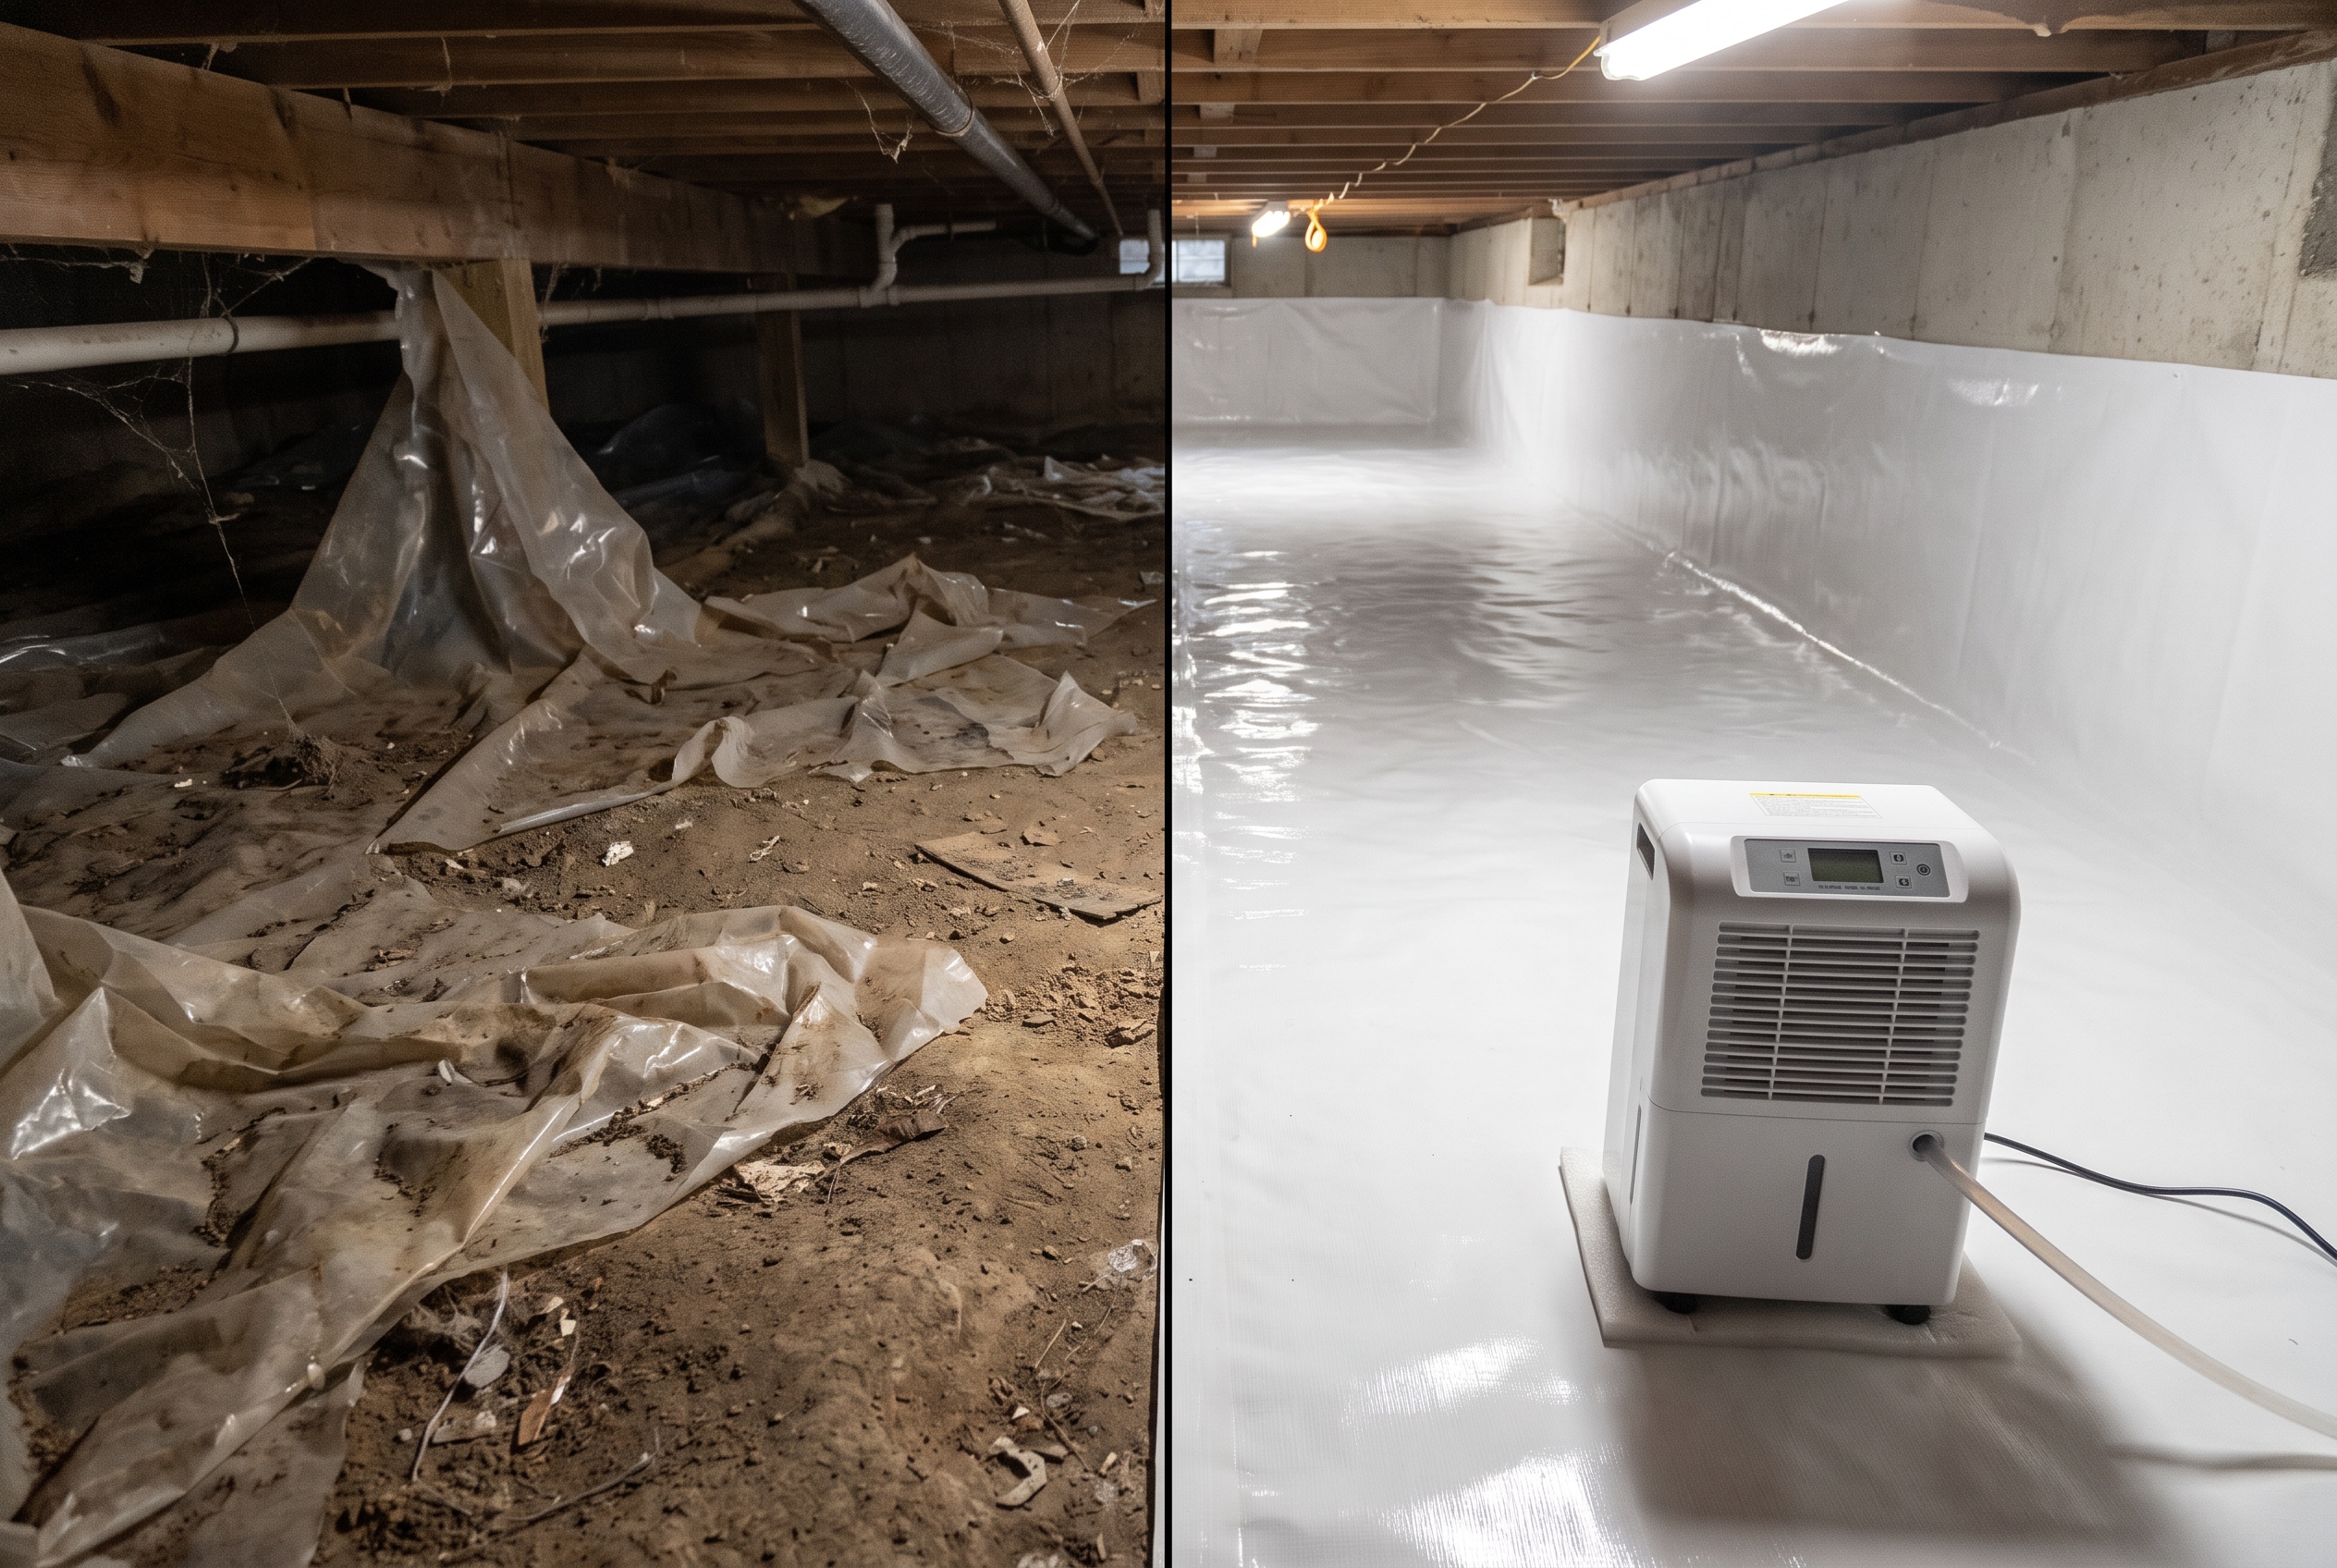
Crawl space encapsulation is a complete moisture management system. It includes a vapor barrier as its foundation, but it goes significantly further. A full encapsulation seals the ground and the foundation walls with a continuous heavy-duty liner, closes off the foundation vents so humid outdoor air can’t enter the space, and pairs the sealed environment with active dehumidification to maintain humidity at a level where mold and wood decay can’t establish. Some systems also include drainage components like a French drain or sump pump when water intrusion is part of the picture.

The simplest way to think about it: a vapor barrier addresses moisture coming up from the ground. Encapsulation addresses moisture coming from the ground, from the air, and from any other entry point, and then actively maintains the resulting environment. One is a passive partial measure. The other is a complete system.

What a Vapor Barrier Alone Can and Can’t Do

A properly installed vapor barrier does a real job. Soil moisture evaporates upward continuously, and without a barrier between the ground and the crawl space air, that vapor raises humidity levels even when there’s no standing water and no obvious moisture source. A quality liner covering the full ground surface blocks that vapor pathway and reduces the baseline moisture load in the space meaningfully.

What a vapor barrier can’t do is address the other ways moisture gets into a crawl space. Foundation vents, the ones built into most older crawl spaces under the assumption that airflow would keep things dry, let in outdoor air. In a climate like Hampton Roads, where summer air is hot and saturated with humidity, those vents are pumping moisture-laden air into the crawl space all season long. That air hits the cooler surfaces inside, loses its capacity to hold moisture, and deposits it on the joists, the liner, and everything else down there. A vapor barrier on the ground does nothing about that.

Similarly, a vapor barrier doesn’t address moisture entering through cracks in the foundation walls, around pipe penetrations, or rising up through the ground during periods of high water table. And it provides no active control: if conditions change, the humidity in the space changes with them, with no mechanism to bring it back down.

The EPA notes that controlling moisture at the source is the most effective strategy for preventing mold growth, and in a crawl space, the ground is only one of several moisture sources. A barrier that addresses the ground while leaving the others open is a partial solution at best.

When a Vapor Barrier Is Sufficient

There are situations where a vapor barrier alone is a reasonable answer, and being honest about that matters. Not every crawl space needs a full encapsulation, and a contractor who recommends the same complete system for every home regardless of conditions is worth a second look.

A vapor barrier replacement or upgrade makes sense when the existing moisture situation is genuinely limited to ground vapor, the foundation vents aren’t causing a significant condensation problem, there’s no history of water intrusion or standing water, the wood framing is in good condition with no signs of mold or rot, and the relative humidity in the space is elevated but not severely so. In that scenario, installing or replacing a quality liner, something in the 12-mil reinforced range rather than the minimum code-required 6-mil, addresses the primary moisture source without requiring the full system.

The catch is that this describes a smaller portion of Hampton Roads crawl spaces than most homeowners assume. The regional environment, high baseline humidity, a water table that rises after every significant storm, and foundation vents that were never well-suited to a coastal climate, means that a lot of crawl spaces here are dealing with moisture from multiple directions simultaneously. A vapor barrier in those conditions improves things without actually solving them.

When You Need Full Encapsulation

Full encapsulation is the right answer when the crawl space moisture problem goes beyond ground vapor. Specifically, if any of the following apply, a vapor barrier alone is unlikely to get the space to where it needs to be.

If the foundation vents are letting in humid summer air and causing condensation on the framing, sealing those vents is a necessary part of the fix. That’s encapsulation, not just a liner swap. If the relative humidity in the crawl space is consistently above 60 percent during warm months, active dehumidification is needed to bring it down and keep it there. A liner on the ground doesn’t accomplish that on its own.

If there’s any history of water intrusion, standing water after rain, or visible efflorescence on the foundation walls indicating water has been moving through them repeatedly, the moisture is coming from more than one direction. If the wood framing shows any signs of mold, dark staining, or soft spots, the moisture has already been elevated long enough to cause effects, and the environment that allowed that needs to be fully corrected, not partially improved.

For most homes in Chesapeake, Norfolk, Virginia Beach, and the surrounding area, full encapsulation is the more appropriate recommendation. The coastal Virginia environment is demanding enough that partial measures tend to slow the problem down rather than solve it. The Department of Energy’s guidance on crawl space performance supports the sealed, conditioned crawl space model specifically for humid climates where passive ventilation doesn’t work, which is an accurate description of this region.

The Components of a Complete Encapsulation System

Understanding what full encapsulation actually includes helps clarify why it performs differently than a vapor barrier alone.

The liner is the starting point. A proper encapsulation uses a reinforced polyethylene liner in the 12-mil range or heavier, covering the entire ground surface and running up and mechanically fastening to the foundation walls. All seams are lapped and taped so there’s no exposed soil or gap anywhere in the space. This is a meaningfully different installation than a loose sheet of 6-mil poly laid on the ground with the edges stopping at the wall.

The foundation vents are sealed. This is the step that separates encapsulation from vapor barrier installation more than anything else, and it’s the step that makes the approach work in a humid climate. With the vents closed, the crawl space becomes a controlled environment rather than one that’s constantly exchanging air with the outdoors.

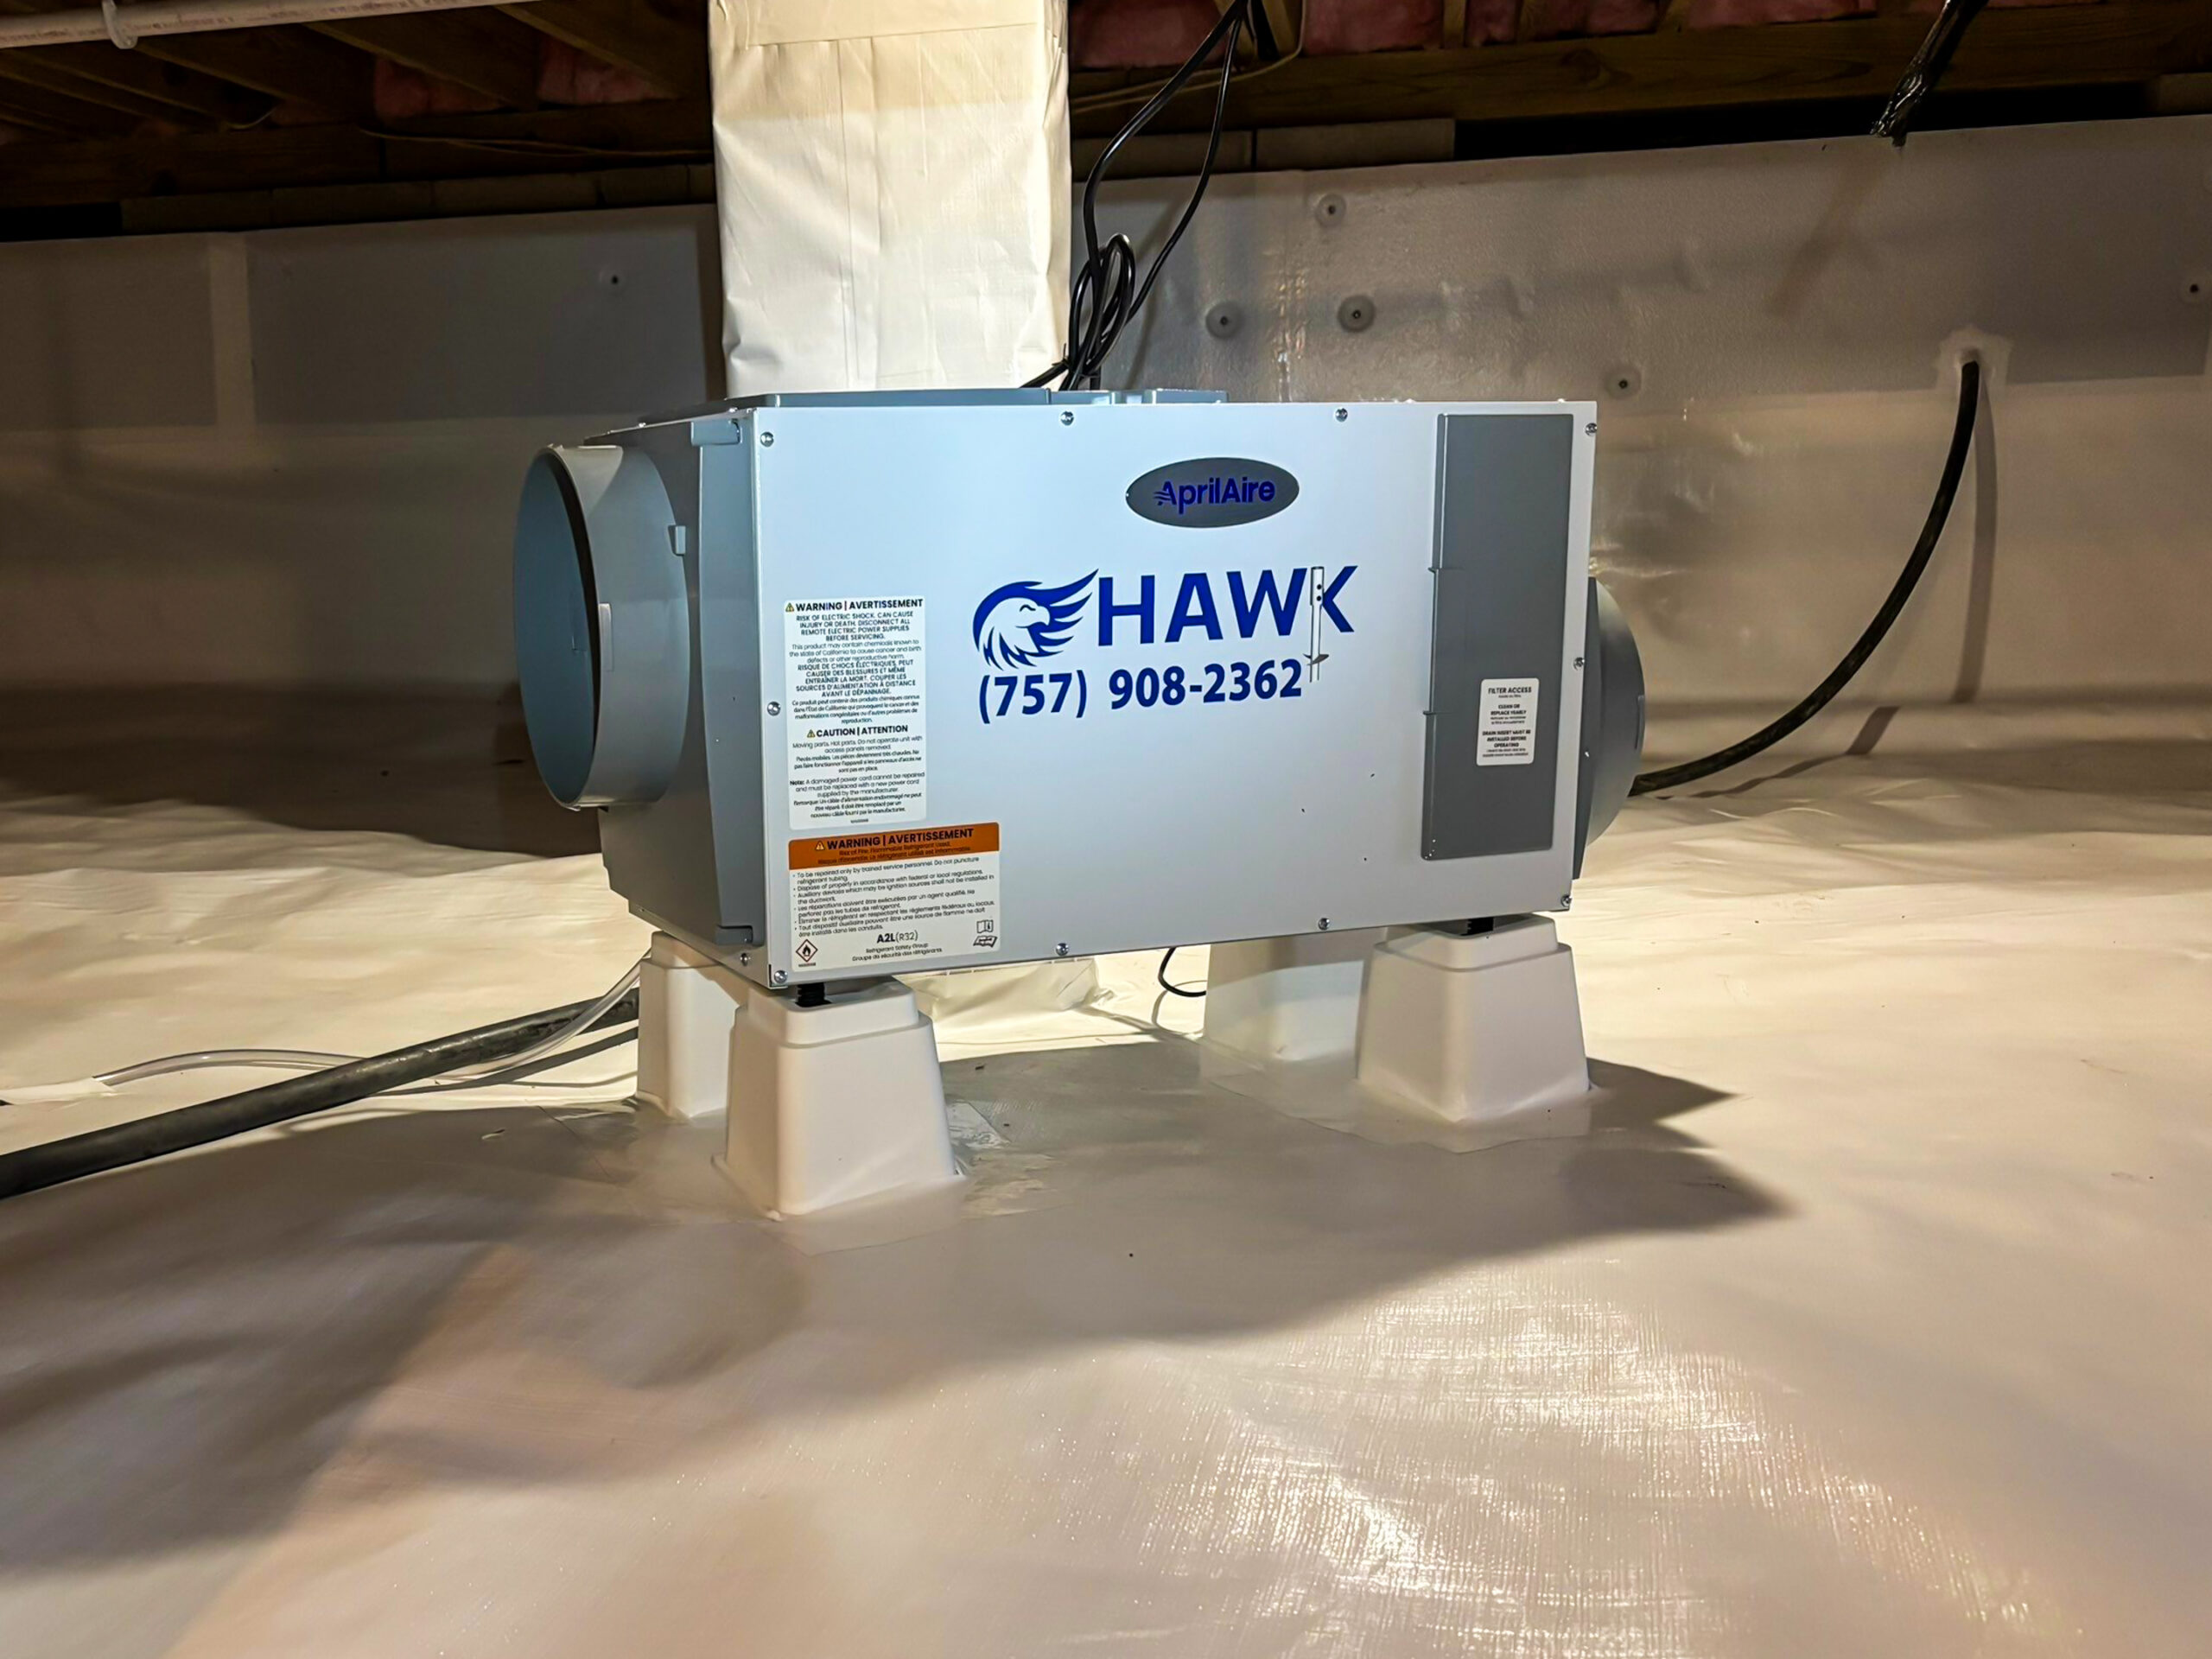
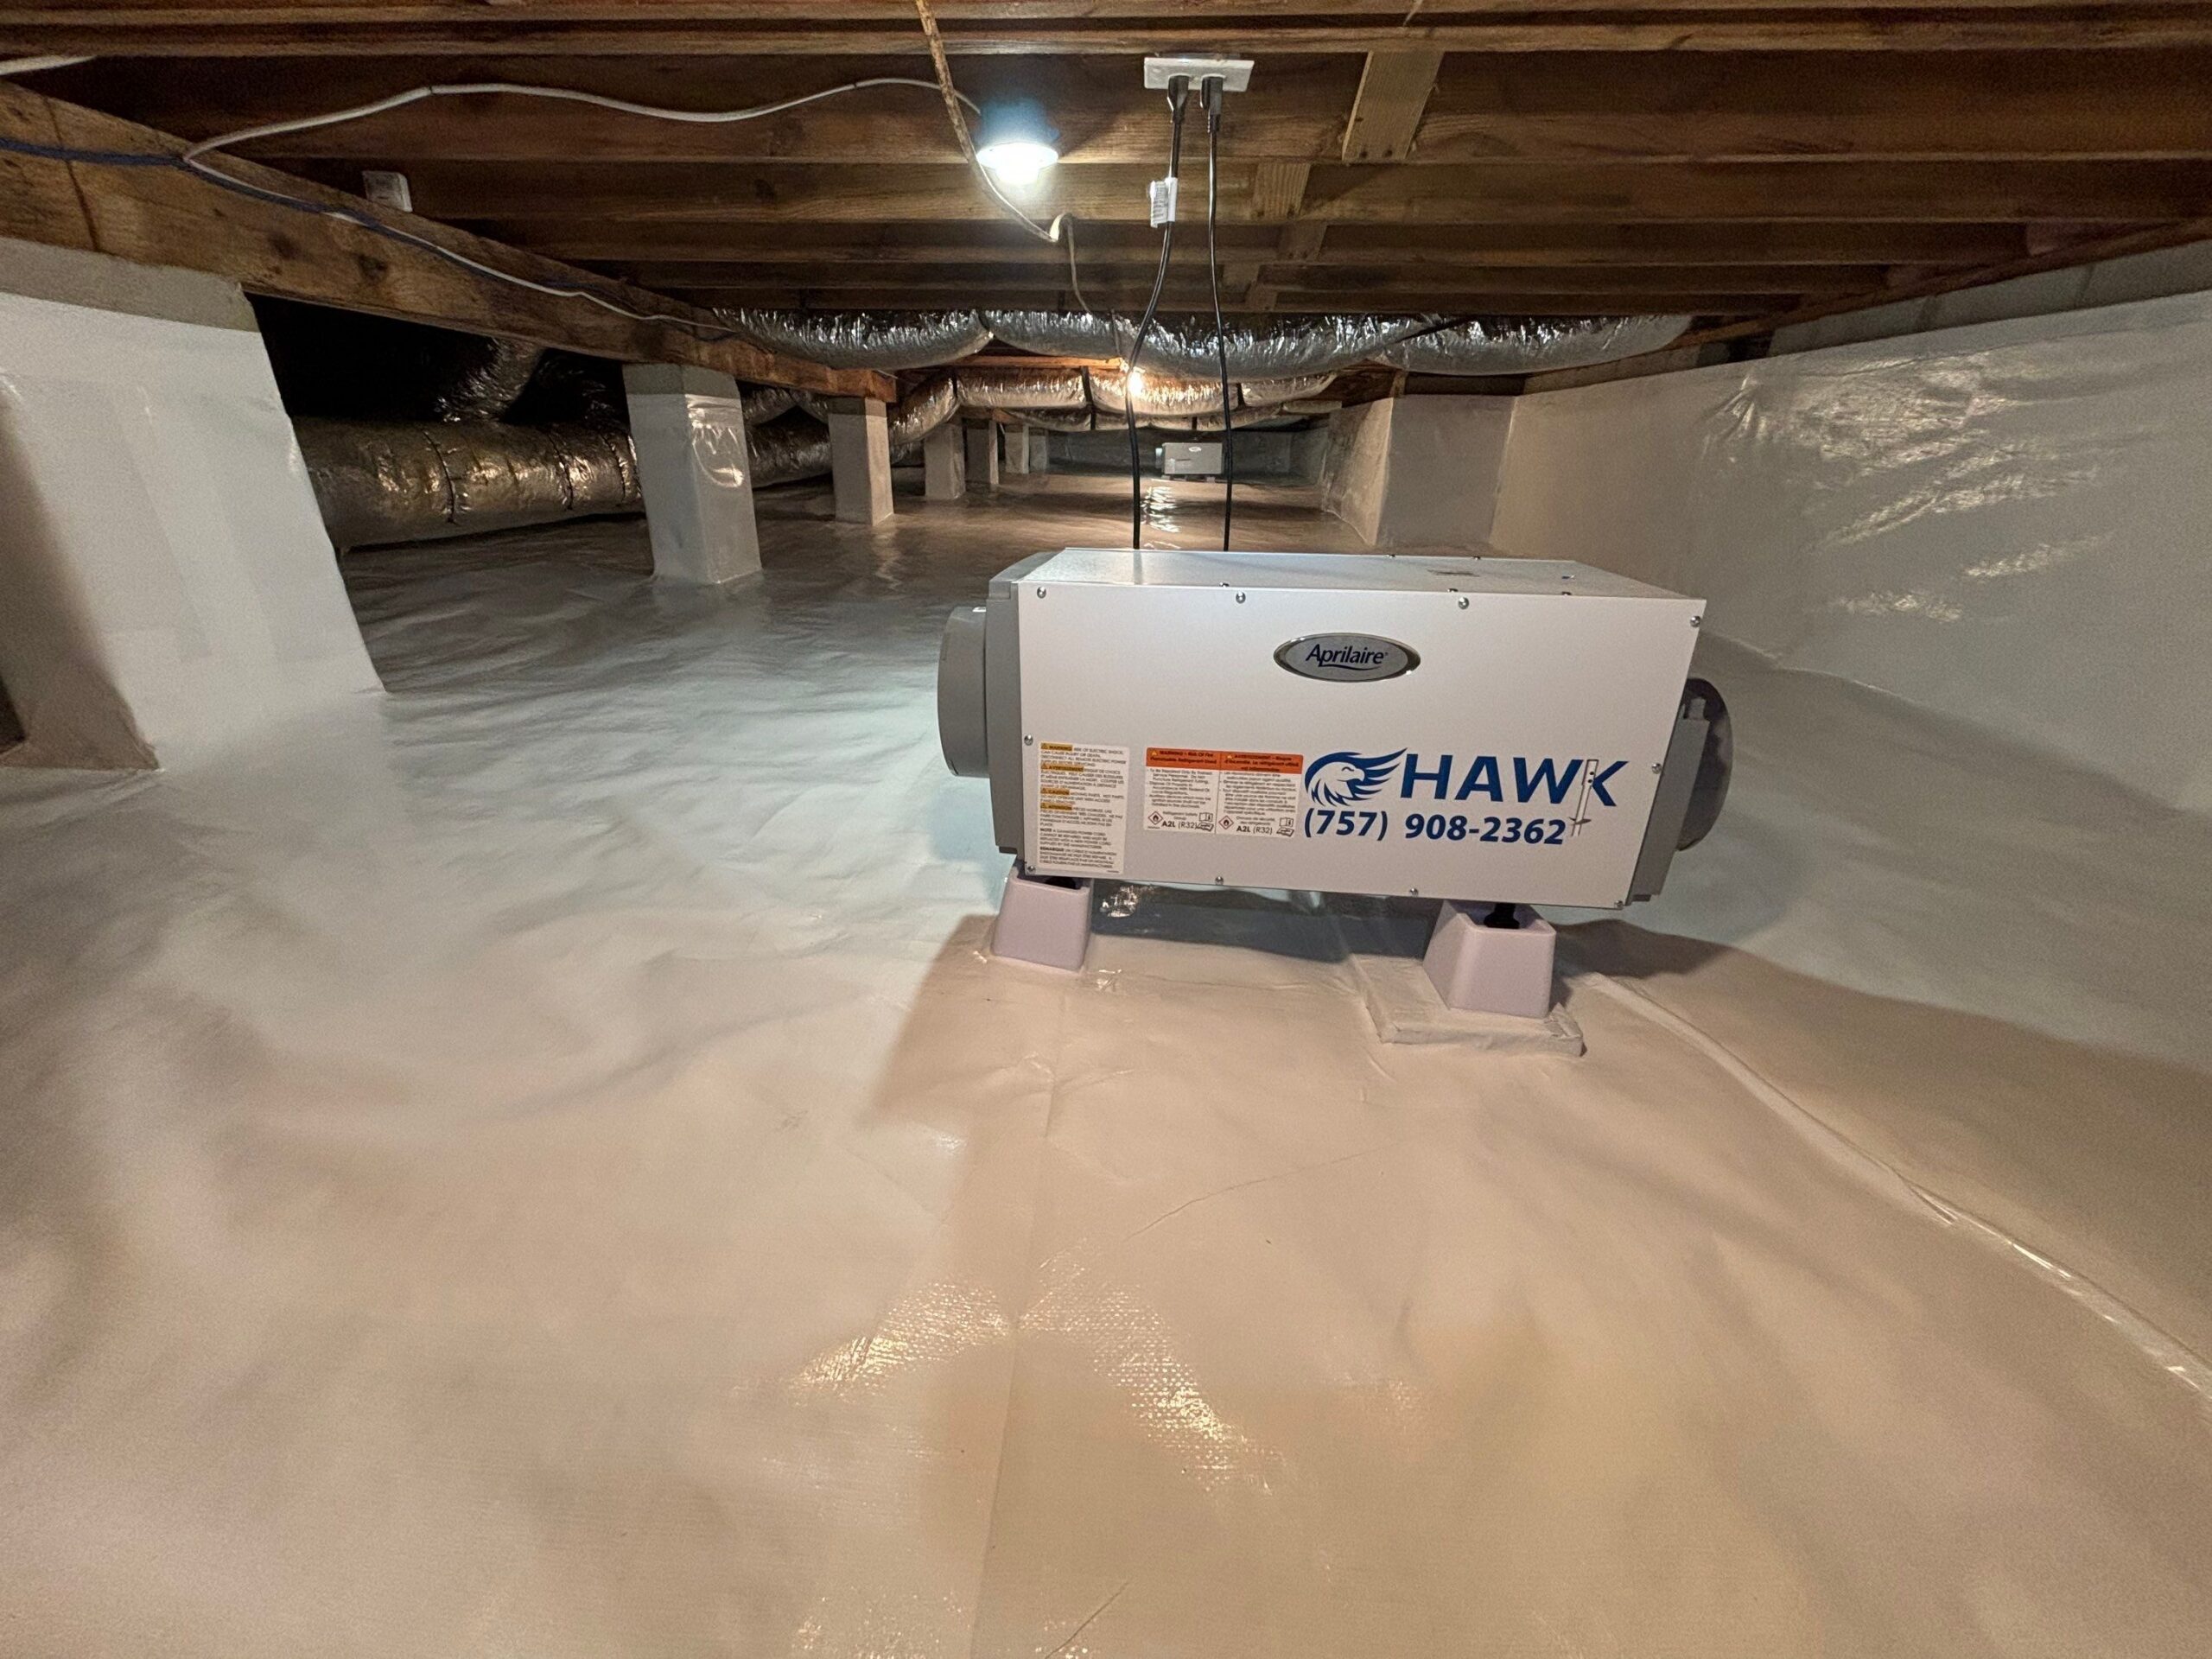
A professional-grade dehumidifier is installed to actively manage humidity in the sealed space. Sized correctly for the square footage and moisture load of the specific crawl space, the unit maintains relative humidity below the threshold where mold and decay can establish, regardless of what outdoor conditions are doing. You can read more about how dehumidifier sizing and installation works in our post on crawl space dehumidifier installation.

Drainage components are added when water intrusion is part of the picture. A French drain around the perimeter, a sump pit, and a pump handle water that would otherwise accumulate in the space and undermine everything else the system is doing. Not every encapsulation requires drainage, but when the site conditions call for it, leaving it out means the rest of the system is working against an active water source.

How to Know Which One Your Crawl Space Needs

The honest answer is that you need someone to actually look at the crawl space before making that call. The condition of the existing vapor barrier if there is one, the humidity level, the state of the framing, whether there’s evidence of water intrusion, and what the foundation vents are doing to the moisture environment all factor into the right recommendation. Two homes in the same neighborhood can have different answers depending on what’s happening under each one.

What you can do in the meantime is think about the symptoms. If the crawl space has a musty smell, if the first floor of the house feels humid even with the AC running, if there are any soft spots in the flooring, if you’ve had water in the space after rain, or if the existing vapor barrier is old, torn, or incomplete, those are signs that conditions have gotten beyond what a simple liner replacement is likely to fix. You can read more about the specific crawl space encapsulation process and what a complete system looks like for Hampton Roads homes.

At Hawk we offer free crawl space inspections with no obligation. We’ll assess the moisture situation, the condition of the existing vapor barrier and framing, and give you a straight recommendation on whether a barrier replacement or a full encapsulation makes sense for your specific crawl space. Schedule your free inspection here.

Frequently Asked Questions

Is encapsulation worth the extra cost over a vapor barrier?

In most Hampton Roads crawl spaces, yes. The additional cost of sealing the vents and adding a dehumidifier is relatively modest compared to the total project cost, and it’s the difference between a system that actually controls the crawl space environment and one that partially improves it. A vapor barrier that doesn’t stop the moisture problem from continuing is money spent that doesn’t solve anything long-term. The right question is whether your crawl space has a moisture problem that a barrier alone can actually fix, and in most cases in this region, the answer is that it can’t.

Can I add encapsulation components to an existing vapor barrier?

Sometimes, but it depends on the condition of the existing liner. If the current vapor barrier is a quality product in good condition with no major tears or gaps, it may be possible to build on it by sealing the vents and adding a dehumidifier. More often, older vapor barriers in Hampton Roads crawl spaces are degraded enough that starting fresh with a new heavy-duty liner as part of a complete encapsulation is the better approach. A professional inspection will tell you which situation you’re in.

Will encapsulation fix my mold problem?

Encapsulation prevents mold from growing by removing the moisture conditions it needs. It does not remediate mold that’s already established on the framing. If there’s active mold in the crawl space, professional mold remediation needs to happen before or alongside the encapsulation work. Installing an encapsulation system over existing mold growth seals the problem in rather than solving it. You can read more about the remediation side of this in our post on crawl space mold removal.

How long does crawl space encapsulation last compared to a vapor barrier?

A properly installed encapsulation system using heavy-duty liner material should last significantly longer than a standard 6-mil vapor barrier. The liner itself, if it’s a quality reinforced product and isn’t subjected to repeated heavy foot traffic or mechanical damage, can last 20 years or more. The dehumidifier will need periodic maintenance and eventual replacement, typically in the ten to fifteen year range depending on the unit and conditions. A basic 6-mil vapor barrier in a Hampton Roads crawl space often degrades within a decade and may need replacement sooner in particularly demanding conditions.

Helical Pier Installation: What It Is, How It Works, and When You Need It

Helical Pier Installation: What It Is, How It Works, and When You Need It

Helical piers come up in two very different conversations. The first is the one nobody wants to have: a foundation is sinking, cracks are spreading, and something has to be done. The second is a conversation that doesn’t happen nearly enough: a homeowner is planning a deck or addition and wants to know the right way to support it on soil that won’t hold a standard concrete footing. Both conversations end up in the same place, because helical piers are the answer to both problems. This post covers what they are, how installation works, and the full range of situations where they make sense.

What Helical Piers Are and Why They Work

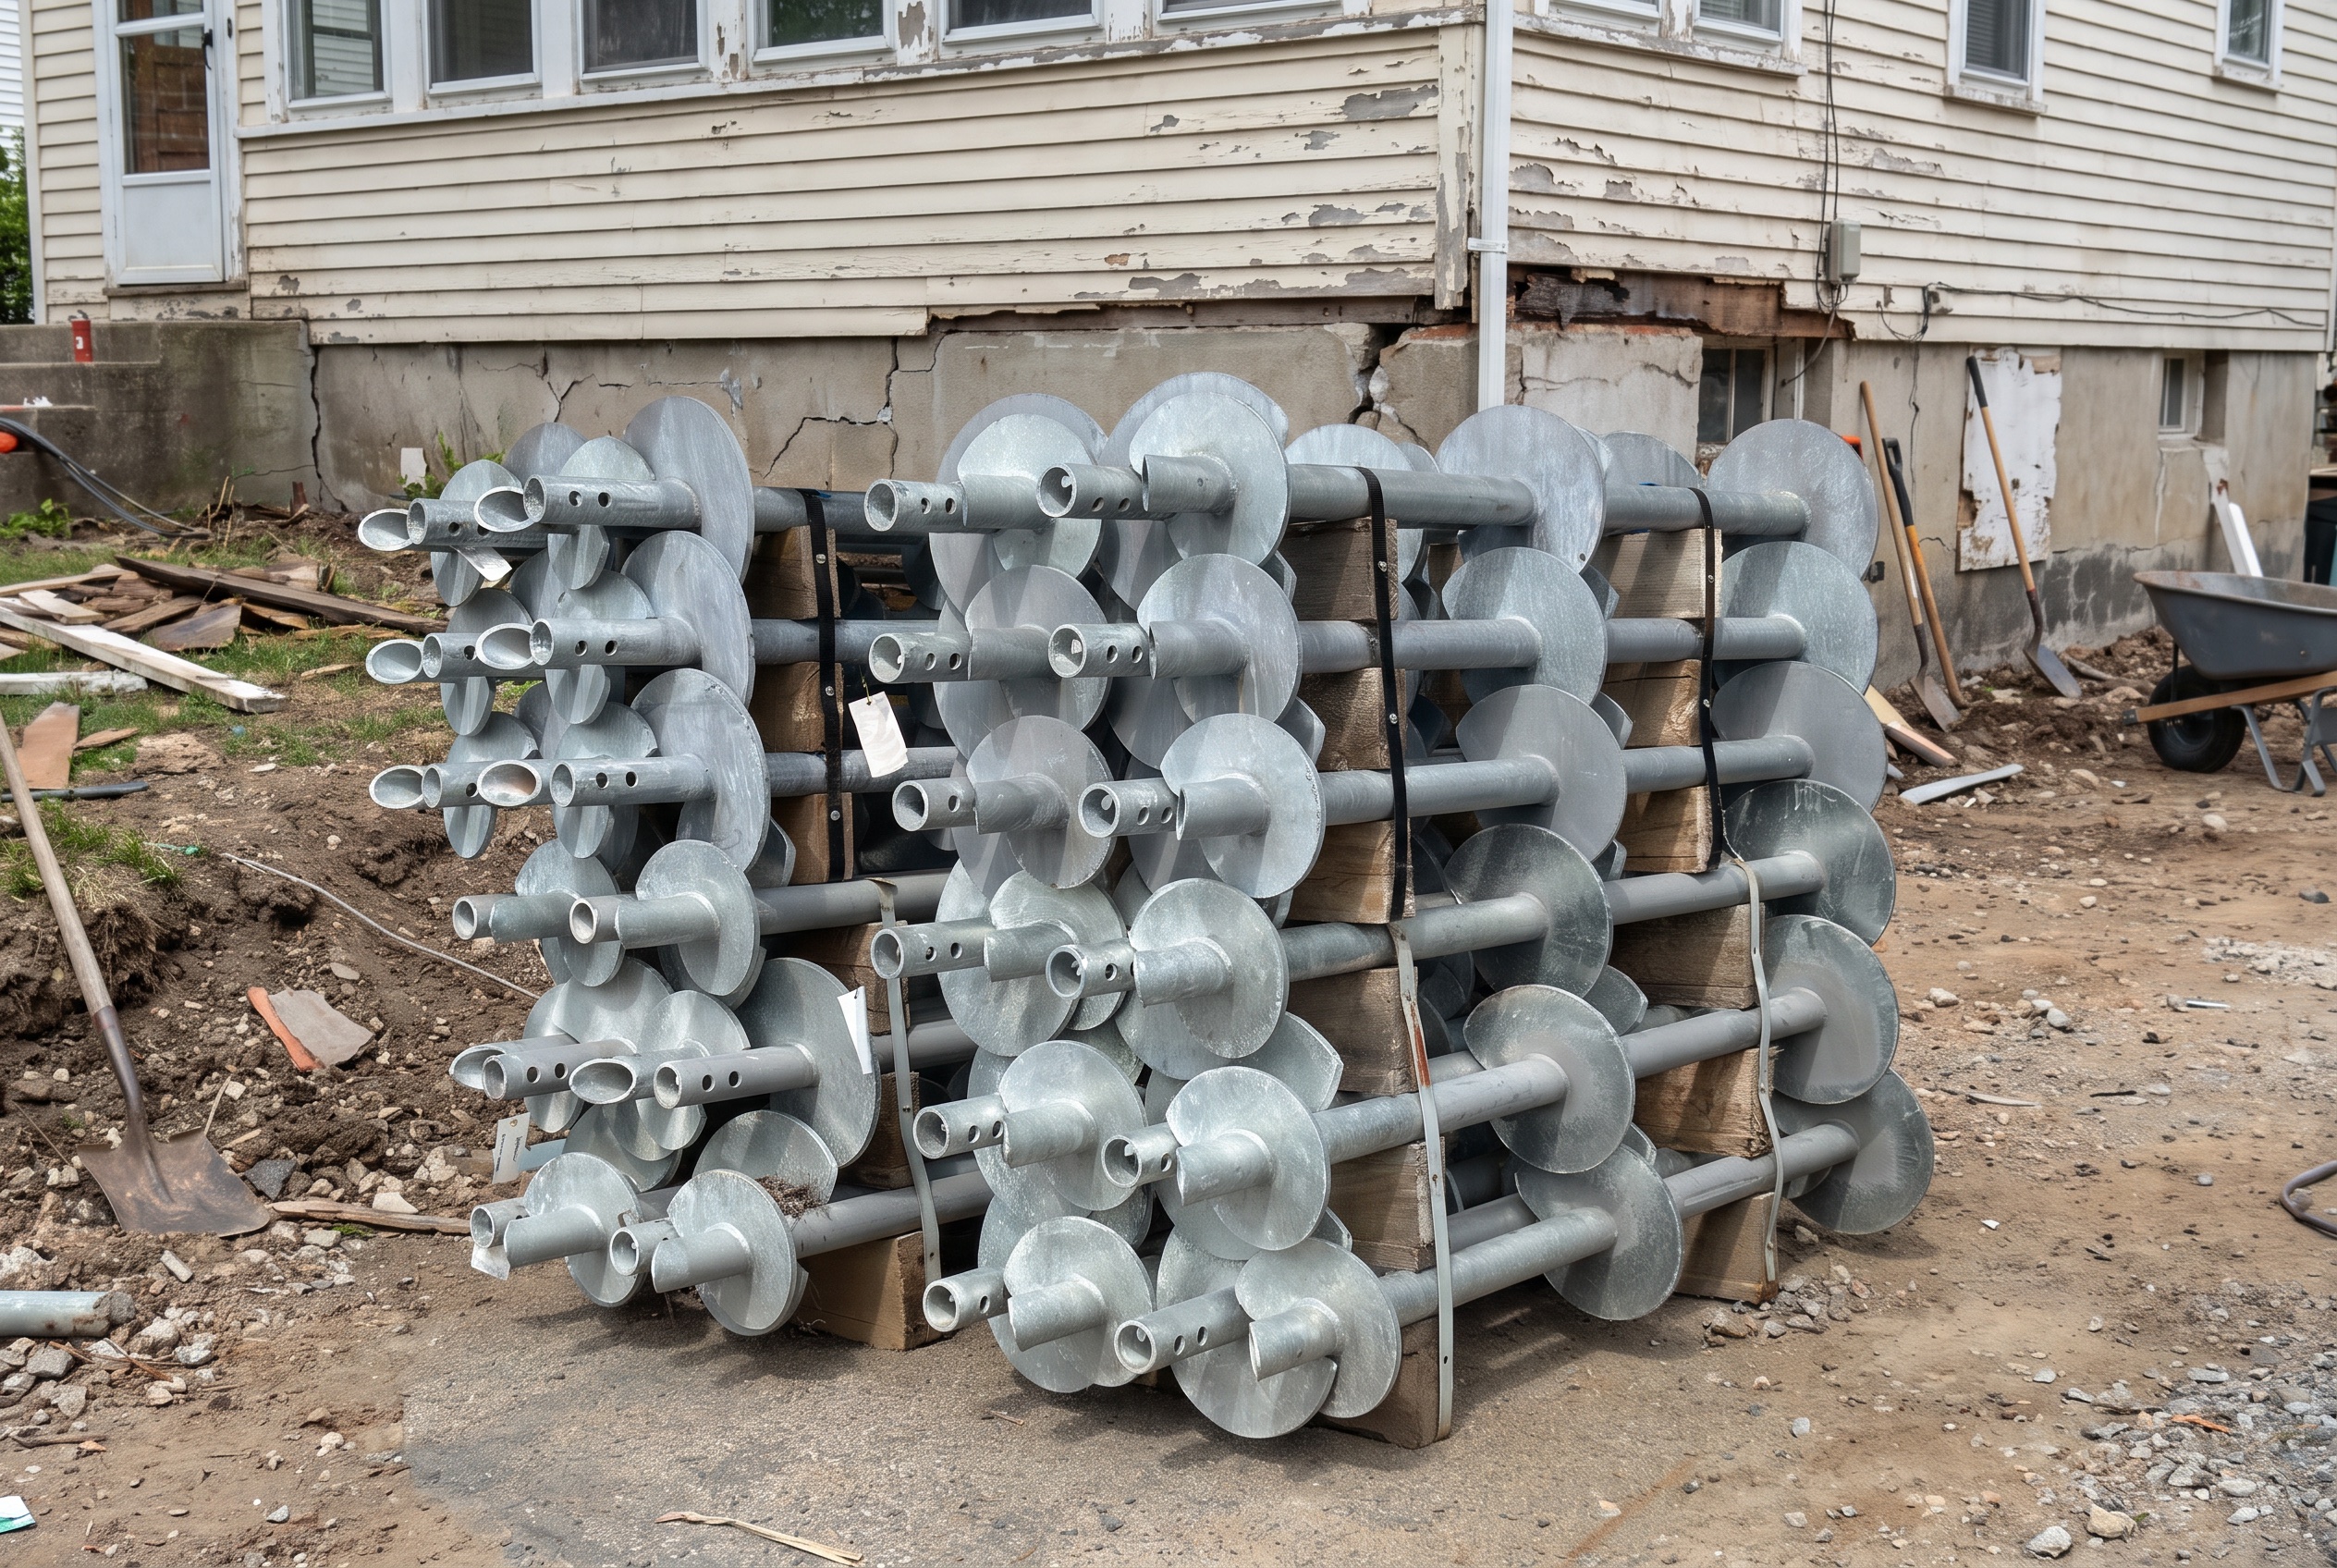
A helical pier is a steel shaft with helix-shaped plates welded along its length, engineered to be screwed into the ground using hydraulic equipment until it reaches soil with enough density and stability to support a structural load. The helix plates do the work: as the pier rotates, they advance through unstable upper soil layers and drive the shaft downward until it locks into competent bearing material below. Think of it as a giant structural screw, purpose-built to bypass whatever is happening near the surface and anchor into ground that won’t move.

One of the more useful aspects of helical pier installation is that load capacity can be verified during the installation itself. The torque required to advance the pier through the soil correlates directly to the bearing capacity of the soil at that depth. When the torque reaches the value that corresponds to the required load capacity for that pier location, installation stops. There’s no waiting for concrete to cure, no guessing whether the footing is adequate. The capacity is confirmed in real time as the pier goes in.

The shafts are typically fabricated from galvanized steel, which provides corrosion resistance in the wet, often acidic soils common throughout Hampton Roads. Properly installed helical piers are engineered for extremely long service lives, well beyond the lifespan of the structure they support. FEMA’s coastal construction guidance identifies deep foundation systems as the appropriate solution for structures on coastal plain soils where shallow foundations are subject to movement from soil instability, high water tables, and erosion, which describes most of Hampton Roads.

Why Coastal Virginia Soil Makes Helical Piers the Right Choice

Standard shallow foundations, concrete footings poured at or near the surface, rely on the soil immediately beneath them to carry the load of the structure. In a geologically stable area with dense, well-drained soil, that works reliably. In Hampton Roads it’s a more complicated picture.

The region sits on coastal plain soils with significant clay content and a water table that in many neighborhoods is only a few feet below the surface. Clay soil expands when wet and contracts when dry, and that seasonal movement is relentless. A footing sitting in clay that swells, shifts, and shrinks year after year is a footing that’s going to move. The water table complicates things further: during wet seasons and after heavy storms, groundwater rises and saturates the soil, reducing its load-bearing capacity at exactly the depths where shallow footings are trying to find support.

Helical piers solve this by going deep enough to bypass the problem layer entirely. Depending on soil conditions at a specific site, piers may need to reach 15, 25, or in some cases significantly deeper to find the stable bearing strata that won’t move with seasonal moisture changes. Once they’re there, the structure above is anchored to ground that the clay cycle at the surface simply can’t affect.

Helical Piers for Foundation Repair and Stabilization

The most common reason homeowners call about helical piers is a foundation that’s already showing signs of movement. Diagonal cracks in brick or drywall, doors and windows that have stopped operating correctly, floors that have developed a noticeable slope, gaps opening up between walls and ceilings: these are the symptoms of a foundation that has lost adequate support and is settling unevenly.

In these situations, helical piers are installed at intervals around the affected section of the foundation. Brackets are attached to the existing foundation wall or footing, the piers are driven through those brackets to the required depth, and the load is transferred from the unstable shallow soil to the pier system anchored in stable ground below. In some cases, hydraulic lifting equipment allows the settled foundation to be raised incrementally back toward its original elevation before the load is locked onto the piers, which can close cracks and restore door and window operation that the settlement disrupted.

The installation process is relatively low-impact compared to older underpinning methods. Access holes are small, there’s no large excavation required along the foundation perimeter, and the work is typically completed in a day or two for a residential foundation repair scope. Interior disruption is minimal since most of the work happens outside or in the crawl space. You can read more about the full scope of foundation repair services and how helical piers fit into the remediation process.

Helical Piers for New Additions, Decks, and New Construction

This is the application that doesn’t get talked about enough, and it’s one of the more valuable services Hawk provides for contractors, builders, and homeowners planning significant projects.

When you add a room addition, a sunroom, a garage, or a large deck to an existing home in Hampton Roads, that new structure needs a foundation. The instinct is usually to pour concrete footings, which works fine in stable soil conditions. In coastal Virginia, where the soil near the surface is often clay-heavy and the water table is close by, a new concrete footing is betting that the soil will behave. Sometimes it does. Sometimes the addition settles at a different rate than the original house over the following years, which produces separation cracks, structural gaps, and in serious cases, a new addition that’s visibly pulling away from the home it was built to extend.

Helical piers eliminate that risk by giving the new structure the same deep, stable foundation that a remediated existing foundation has. The piers are installed first, before any framing goes up, and the new structure is built on top of a foundation system that’s anchored well below the zone of soil movement. The cost difference between helical pier footings and standard concrete footings is real, but it’s a fraction of what it costs to remediate a settled addition a few years after construction.

For decks specifically, helical piers are an increasingly common alternative to standard concrete tube footings, and for good reason. A deck footing poured in clay soil is subject to the same heave and movement as any other shallow foundation. In Hampton Roads, deck posts that started out plumb and level can develop noticeable lean or movement within a few seasons as the soil beneath shifts. Helical piers driven to stable bearing depth stay where they’re put regardless of what the surface soil does above them.

Beach house additions and elevated structures near the water have even more reason to consider helical piers. Coastal soils tend to be looser and more saturated than inland areas, and structures near the water deal with additional considerations around erosion and storm surge that make shallow foundations a higher-risk choice. A helical pier foundation for a coastal addition or elevated deck is built for the conditions it’s actually going to face rather than conditions that exist in a drier, more stable environment.

What the Installation Process Looks Like

For both repair and new construction applications, the installation process follows a similar sequence. Hydraulic drive equipment, usually mounted on a compact machine that can access tight spaces including alongside existing structures, advances the pier into the ground by rotation. Each pier section is added as the shaft goes deeper, with sections coupled together until the required depth and torque are reached.

For new construction and addition projects, the piers are typically installed before any concrete work or framing begins, and the structural elements of the new build connect directly to the pier heads. For existing foundation repair, the bracket system connects the pier to the existing footing and transfers the load after the pier is in place.

Installation speed is one of the practical advantages of helical piers for larger projects. A residential repair or small addition scope typically involves four to eight piers installed in a day. Larger commercial or multi-pier projects can move significantly faster. And unlike poured concrete, helical piers can be loaded immediately after installation since there’s no curing time involved. For contractors working on a schedule, that’s a meaningful advantage over alternatives that require waiting days before proceeding.

Is a Helical Pier System Right for Your Project?

If you’re dealing with an existing foundation that’s showing signs of settlement, the answer is almost certainly worth exploring through a professional inspection. If you’re planning an addition, deck, or new structure on Hampton Roads soil and haven’t thought about what the foundation situation looks like below the surface, it’s a conversation worth having before construction starts rather than after.

At Hawk, we work with both homeowners dealing with existing foundation problems and contractors and builders who need reliable deep foundation solutions for new projects. Our inspections are free and there’s no obligation. Get in touch here and we’ll give you a straight assessment of what your project needs and whether helical piers are the right fit.

Frequently Asked Questions

How deep do helical piers need to go?

It depends on the soil profile at the specific site. In Hampton Roads, where unstable clay and high water tables are common near the surface, piers often need to reach 15 to 25 feet or more to find adequate bearing material. In some areas with particularly deep soft soil layers, greater depths are needed. The installation process itself determines the required depth: the pier advances until the torque readings confirm that it has reached soil with sufficient density to support the design load. There’s no predetermined depth that applies universally across different sites.

Can helical piers be installed in a tight space or next to an existing structure?

Yes, and this is one of their practical advantages over other deep foundation methods. The hydraulic drive equipment used for helical pier installation is compact enough to work in confined spaces, including alongside existing foundations, in crawl spaces with adequate clearance, and in tight urban lots where larger equipment can’t access. For addition projects built adjacent to an existing home, this matters: the foundation work for the new structure can be completed without disturbing the existing building or requiring large excavation equipment that wouldn’t fit on a typical residential lot.

Are helical piers a permanent solution?

Yes. The galvanized steel shafts are engineered for corrosion resistance in the soil conditions they’re installed in, and the load transfer to stable bearing strata means the pier system isn’t subject to the same seasonal movement that affects shallow foundations. Properly installed helical piers are designed to outlast the structures they support. The brackets and connection hardware at the foundation are also engineered for long-term performance, and the system as a whole is a permanent structural fix rather than a temporary stabilization measure.

Do helical piers work for both residential and commercial projects?

Yes. Helical pier systems are engineered and load-rated for a wide range of applications, from residential foundation repair and deck footings to commercial building foundations, infrastructure support, and specialty applications like utility pole bases and EV charging station foundations. The design load for each pier is determined by the specific structural requirements of the project, and the installation is verified against those requirements through the torque monitoring process. Hawk works across both residential and commercial scopes. You can read more about commercial foundation applications on our foundation services page.

Do You Need a Crawl Space Dehumidifier? Here’s How to Know

Do You Need a Crawl Space Dehumidifier? Here’s How to Know

If you’ve been researching crawl space moisture problems, a dehumidifier has probably come up as part of the solution. But there’s a fair amount of confusion around what a crawl space dehumidifier actually does, whether you need one, and what separates a unit that works from one that just runs up your electric bill without solving anything. This post answers those questions directly.

What a Crawl Space Dehumidifier Does and Why It Matters

A crawl space dehumidifier pulls moisture out of the air in the space beneath your home and maintains relative humidity at a level where mold, wood rot, and structural damage can’t take hold. The target in a crawl space is generally below 55 to 60 percent relative humidity. Above that range, the conditions favor mold growth on wood framing, and the wood itself begins absorbing moisture in ways that reduce its structural integrity over time.

In Hampton Roads, hitting that target without mechanical help is difficult. The region’s coastal climate means baseline outdoor humidity is high for most of the year, and that humidity finds its way into crawl spaces through the ground, through foundation vents, and through gaps and cracks in the foundation walls. A crawl space that’s doing well in October can be sitting at 80 percent relative humidity in July without any obvious source of water intrusion. That’s just the environment here.

The dehumidifier is the active control component in a crawl space moisture management system. A vapor barrier handles ground moisture vapor. Sealed vents cut off humid outdoor air. The dehumidifier manages whatever moisture remains and keeps the space consistently dry regardless of what’s happening with the weather outside. The EPA recommends keeping indoor relative humidity below 60 percent to prevent mold growth, and in a crawl space that standard applies directly to the wood framing the rest of your house is sitting on.

Signs You Probably Need a Crawl Space Dehumidifier

Some of these are things you’ll notice inside the house, while others require a look at the crawl space itself.

A persistent musty smell on the first floor, especially during summer months when the house is closed up, is one of the more reliable indicators that crawl space humidity is elevated. That smell is mold and mildew, and because of the stack effect pulling air upward from below, crawl space air circulates into the living space continuously. If the crawl space smells, the house eventually smells.

Floors that feel cold in winter despite running the heat, or a first floor that never quite reaches the comfort level the thermostat suggests, can indicate that moisture has compromised the insulation between the floor joists. Wet insulation loses a significant portion of its rated thermal performance, and a crawl space with chronically high humidity is a crawl space where that insulation is underperforming year-round.

Inside the crawl space itself, condensation on the vapor barrier or on any metal surfaces, visible mold or dark staining on the joists or sill plates, insulation that’s sagging or pulling away from the joist faces, and any soft spots in the wood framing are all indicators that moisture has been elevated long enough to cause real effects. Any of these warrants both remediation and active humidity control going forward.

If you’ve had a moisture reading taken in your crawl space and it came back above 60 percent relative humidity during warmer months, that’s the clearest indicator of all. A properly sized dehumidifier is part of what brings that number down and keeps it there.

Can You Just Use a Regular Household Dehumidifier?

This is a question that comes up a lot, and the honest answer is that a standard portable dehumidifier from a big box store is not the right tool for a crawl space, even if it technically runs in one.

The main issue is capacity and design. Household dehumidifiers are built for conditioned living spaces with moderate humidity levels. A crawl space in Hampton Roads during summer is a different environment entirely: higher humidity loads, lower temperatures than a finished room, and often more square footage than a single portable unit is rated to handle. Running a residential unit in those conditions means it’s working at the edge of its design parameters constantly, which shortens its lifespan significantly and often means it still can’t keep up with the moisture load.

There’s also the drainage issue. Household dehumidifiers collect water in a reservoir that has to be manually emptied. In a crawl space that nobody checks regularly, that reservoir fills up, the unit shuts off on its safety switch, and the humidity climbs right back up. A crawl space dehumidifier is designed to drain continuously through a hose to a sump pit or drain, so it runs without interruption and without requiring anyone to go under the house to empty a bucket.

Professional-grade crawl space dehumidifiers are also rated for lower operating temperatures, built with corrosion-resistant components suited for the crawl space environment, and designed for the higher moisture loads this region generates. The upfront cost is higher than a portable unit, but a unit that actually keeps the space dry and runs reliably for ten or more years is a different value proposition than a cheaper unit that struggles, fails in a couple of years, and leaves the humidity problem unsolved in the meantime.

Dehumidifier Alone vs. Dehumidifier as Part of an Encapsulation System

This is where a lot of homeowners get the sequence wrong. A dehumidifier installed in an unencapsulated crawl space with open foundation vents is fighting a losing battle in a Hampton Roads summer. The unit will run almost continuously trying to keep up with the moisture load coming in through the vents and the ground, wear out faster than it should, and still may not hit the target humidity level during peak summer months. It’s the same principle as running an air conditioner with the windows open.

The right sequence is encapsulation first, dehumidifier second. A properly encapsulated crawl space with sealed vents and a quality vapor barrier creates a controlled environment where the dehumidifier is maintaining conditions rather than fighting an open-ended battle against outdoor humidity. In that context, a correctly sized unit runs efficiently, lasts longer, and keeps the space reliably below the humidity threshold where problems develop.

That said, there are situations where adding a dehumidifier makes sense as a standalone improvement, particularly if the crawl space already has a reasonably intact vapor barrier and the vents are sealed or the space is otherwise reasonably tight. A professional assessment of the specific conditions under your house is what determines the right approach. The Department of Energy’s guidance on crawl space conditioning supports the sealed crawl space model specifically because passive ventilation doesn’t work in humid climates, and active dehumidification as part of a sealed system is the approach that actually performs.

Sizing and Installation

Getting the sizing right matters more than most homeowners realize. A unit that’s too small runs constantly without reaching target humidity. A unit that’s oversized cycles on and off too frequently and doesn’t run long enough to effectively dehumidify the air. Proper sizing accounts for the square footage of the crawl space, the ceiling height, the current moisture load, and the specific conditions of the space.

Installation involves positioning the unit for adequate airflow, setting up the continuous drain line, and in some cases installing a condensate pump if there’s no gravity drain available. Most professional installations also include a humidistat that allows the unit to be set to a target humidity level and cycle automatically to maintain it rather than running continuously regardless of conditions.

If you’re not sure whether your crawl space needs a dehumidifier, what size it needs, or whether encapsulation should come first, that’s exactly what a professional inspection is for. At Hawk we’ll assess the moisture conditions, look at what’s already in place, and give you a clear recommendation on what the space actually needs. Our inspections are free and there’s no obligation. Schedule yours here.

Frequently Asked Questions

How much does a crawl space dehumidifier cost to run?

Operating cost depends on the unit’s wattage, how often it runs, and your local electricity rates. A properly sized unit in a well-encapsulated crawl space runs less frequently than an undersized unit fighting high humidity, which keeps operating costs lower. Units sized and installed correctly in a sealed crawl space typically run intermittently to maintain target humidity rather than continuously, which is both more effective and more efficient than a struggling undersized unit running flat out.

How long does a crawl space dehumidifier last?

A quality professional-grade unit, properly maintained, should last ten to fifteen years or more. The key factors are whether it was correctly sized for the space, whether the crawl space is properly sealed so the unit isn’t overworked, and whether it receives basic annual maintenance: cleaning the coils, checking the drain line, and making sure the unit is functioning correctly. A unit that’s been running at capacity in a high-humidity environment without maintenance will have a shorter lifespan than one that’s well matched to a controlled space.

Do I need to do anything to maintain a crawl space dehumidifier?

Yes, though the maintenance is fairly minimal. The filter needs to be cleaned periodically, the coils should be inspected and cleaned annually, and the drain line should be checked to make sure it’s clear and draining properly. If the unit has a humidistat, it’s worth verifying it’s reading accurately. Annual professional servicing is a reasonable practice for units doing significant work in demanding conditions like a Hampton Roads crawl space.

Will a crawl space dehumidifier fix my mold problem?

A dehumidifier prevents mold from growing by keeping humidity below the level where it can establish. It does not remediate existing mold. If there’s already mold growth on the framing in your crawl space, that needs to be addressed through professional remediation before moisture control measures are put in place. Installing a dehumidifier in a crawl space with active mold manages the humidity going forward but doesn’t undo the existing growth. You can read more about what crawl space mold removal involves and how remediation and moisture control work together as part of the same solution.

Crawl Space Mold Prevention: How to Keep It From Coming Back

Crawl Space Mold Prevention: How to Keep It From Coming Back

If you’ve already dealt with mold in your crawl space, you know how disruptive and expensive remediation can be. If you haven’t, keeping it that way is worth some deliberate effort. In Hampton Roads, where the humidity is relentless and crawl spaces deal with moisture pressure from multiple directions at once, mold prevention isn’t something that happens on its own. It requires the right conditions under your house, and those conditions don’t exist by accident.

This post is for two groups of homeowners: those who just had crawl space mold removed and want to make sure it doesn’t come back, and those who haven’t had a problem yet and want to keep it that way. The approach is largely the same either way.

Why Crawl Space Mold Prevention Starts With Understanding What Mold Needs

Mold is not complicated. It needs three things to grow: a food source, the right temperature, and moisture. In a crawl space, the food source is the wood framing and it’s not going anywhere. The temperature range that mold thrives in covers most of what a coastal Virginia crawl space experiences year-round. That leaves moisture as the only variable you can actually control.

Every effective mold prevention strategy in a crawl space is really a moisture control strategy. The specific methods vary depending on where the moisture is coming from, but the goal is always the same: keep relative humidity in the crawl space consistently below the threshold where mold can establish and grow. The EPA identifies 60 percent relative humidity as the general threshold above which mold growth becomes likely on organic surfaces. In an uncontrolled Hampton Roads crawl space in July, humidity levels well above that are common.

The Main Sources of Crawl Space Moisture in Hampton Roads

Effective prevention means knowing where the moisture is actually coming from. In this region, there are usually a few sources working at the same time.

Ground moisture vapor. Soil holds water, and that water evaporates upward continuously. In a crawl space without a proper vapor barrier, that moisture vapor rises into the air of the space and raises humidity levels even when there’s no standing water and no visible dampness. This is the baseline moisture load that every unencapsulated crawl space in the region is dealing with every day.

Outdoor air through foundation vents. Vented crawl spaces were designed with the idea that airflow would carry moisture out. In a dry inland climate that logic has some merit. In coastal Virginia it backfires badly. Summer air here is hot and saturated with humidity. When that air enters a cooler crawl space, it loses its capacity to hold moisture and deposits it on every surface it contacts: the joists, the vapor barrier, the insulation, the ground. Venting a crawl space in this climate doesn’t dry it out, it keeps it wet throughout the warmest and most mold-favorable months of the year.

Surface water and groundwater intrusion. After heavy rain, water can enter the crawl space through cracks in the foundation walls, through gaps around penetrations, or directly up through the ground as the water table rises. Neighborhoods in low-lying parts of Chesapeake, near waterways in Norfolk and Virginia Beach, or anywhere with a history of standing water in the yard after storms are dealing with this more acutely. A single flooding event that doesn’t dry out quickly is enough to start mold growth within a couple of days.

Plumbing leaks. Slow leaks from supply lines or drain pipes running through the crawl space can introduce moisture in a concentrated area over a long period. Because nobody is looking at the crawl space regularly, these leaks sometimes go undetected for months. By the time the floor above shows any sign of a problem, mold has usually had significant time to develop in the affected area.

What Actually Prevents Crawl Space Mold

A quality vapor barrier, properly installed. A vapor barrier covering the ground is the baseline requirement. But the details matter. A 6-mil plastic sheet loosely laid on the ground with gaps at the seams and edges pulled away from the walls isn’t doing much. An effective vapor barrier is a heavy-duty reinforced liner, 12-mil thickness or better, that covers the entire ground surface, laps up the foundation walls, and is mechanically fastened and taped at all seams and edges so there’s no exposed soil anywhere in the space. That level of installation blocks the primary source of moisture vapor in most crawl spaces and makes a meaningful difference in humidity levels. You can read more about crawl space vapor barrier installation and what proper installation looks like.

Sealing the foundation vents. For Hampton Roads homes specifically, sealing the crawl space vents is one of the higher-impact changes you can make for mold prevention. It cuts off the primary entry point for humid summer air and allows the crawl space to be managed as a conditioned environment rather than a space that’s constantly exchanging air with the outdoors. This is a standard component of full encapsulation and a significant reason why encapsulated crawl spaces in this region perform so much better on moisture control than vented ones.

Active dehumidification. Even with a quality vapor barrier and sealed vents, some moisture will still make its way into the crawl space through the walls, around penetrations, and through small gaps. A properly sized professional-grade dehumidifier maintains relative humidity below the threshold where mold can grow regardless of what’s happening with outdoor humidity or seasonal moisture fluctuations. This is the active control component that keeps the system working consistently rather than relying on passive measures alone. A dehumidifier sized too small for the space will run constantly and still not keep up. Sizing matters.

Full encapsulation. A complete encapsulation system combines all of the above into one integrated approach: heavy-duty liner covering the ground and walls, sealed vents, and active dehumidification. In Hampton Roads conditions, this is the most reliable long-term solution for crawl space mold prevention because it addresses all three moisture sources simultaneously rather than managing them one at a time. Crawl space encapsulation is particularly well suited to the coastal Virginia environment for the same reason it’s recommended for energy efficiency: the humidity here is too persistent and comes from too many directions for partial measures to hold up season after season.

Drainage management. Preventing surface water and groundwater from entering the crawl space in the first place is part of a complete mold prevention strategy. This means making sure gutters and downspouts are directing water well away from the foundation, that the ground around the house slopes away from it rather than toward it, and that any active water intrusion through the foundation walls or floor is addressed with drainage solutions like a French drain or sump pump before it becomes a recurring moisture problem inside the space.

Regular inspections. None of the above prevents a plumbing leak, pest damage to the vapor barrier, or a drainage issue that develops gradually over time. Getting a professional set of eyes in the crawl space every year or two catches problems before they become mold problems. Most homeowners never look under their house between the time they buy it and the time a symptom shows up inside. In a climate like this one, that’s a long time for conditions to develop unchecked. The U.S. Department of Energy notes that properly managed crawl spaces improve both moisture control and energy performance, two problems that tend to show up together when a crawl space has been left unattended.

If You Just Had Mold Remediated

The period right after remediation is critical. The mold is gone but the crawl space is the same environment it was before, and without changes to moisture control, regrowth is a real possibility. Whatever moisture conditions allowed the mold to establish in the first place need to be corrected before the project is considered finished.

A good remediation contractor will make specific recommendations about what moisture control measures need to follow the cleanup. If yours didn’t, or if you want a second opinion on what the crawl space needs going forward, a fresh inspection is the right starting point. You can read more about what the crawl space mold removal process looks like and how remediation and prevention work together as part of the same solution.

At Hawk, we offer free crawl space inspections with no obligation. Whether you’re coming off a remediation project or just want to understand what your crawl space’s moisture situation looks like before it becomes a problem, we’ll get under there and give you a straight read on what we find. Schedule your free inspection here.

Frequently Asked Questions

How often should I inspect my crawl space for mold?

Once a year is a reasonable baseline for most homes in Hampton Roads, with an additional check after any significant weather event, heavy flooding, or plumbing issue that might have introduced moisture. If your crawl space is fully encapsulated with a dehumidifier, annual checks are usually sufficient to catch any developing issues before they become serious. Unencapsulated crawl spaces in this region benefit from more frequent attention given the persistent moisture environment.

Can I just spray an antimicrobial treatment on the joists as prevention?

Antimicrobial coatings and mold-resistant treatments applied to wood can be part of a remediation process, but they’re not a substitute for moisture control. If the humidity in the crawl space stays above the threshold where mold thrives, a surface treatment will slow things down but won’t stop mold from eventually establishing on untreated surfaces nearby. The coating is a secondary measure. Getting the moisture under control is the primary one.

Does mold prevention require full encapsulation, or are there simpler options?

It depends on the severity of the moisture situation. A crawl space with minor ground moisture and no active water intrusion might do reasonably well with a quality vapor barrier and a properly sized dehumidifier. A crawl space with vents letting in humid summer air, any history of water intrusion, or elevated humidity that’s been a persistent issue really needs the full system to stay reliably below mold-growth conditions year-round. In Hampton Roads, the baseline conditions push most homes toward needing the more complete approach, but an inspection will tell you where your specific crawl space falls on that spectrum.

Is there a time of year when mold prevention matters most?

Summer is the highest-risk season in coastal Virginia. The combination of high outdoor humidity, warm temperatures, and storm activity creates peak conditions for mold growth in uncontrolled crawl spaces. That said, prevention isn’t a seasonal effort. A dehumidifier needs to run year-round, a vapor barrier works every day, and the drainage issues that allow water intrusion can happen in any season. Thinking about crawl space moisture as a year-round management issue rather than a summer problem is the right frame for this region.

Crawl Space Mold Removal: What It Involves and What to Expect

Crawl Space Mold Removal: What It Involves and What to Expect

If you’ve found mold in your crawl space, the instinct is usually to want it gone as fast as possible. That’s reasonable. But mold remediation in a crawl space is a more involved process than scrubbing down a bathroom wall, and understanding what it actually takes helps you ask the right questions, set the right expectations, and avoid the trap of a cheap fix that doesn’t actually solve anything.

This post walks through what crawl space mold removal involves, why it’s different from surface mold cleanup elsewhere in the house, and what has to happen after the mold is gone to keep it from coming back.

Why Crawl Space Mold Is a Different Problem Than Mold Elsewhere in the House

Mold shows up in bathrooms, around windows, and in basements, and in most of those cases it’s a surface problem you can address with cleaning and improved ventilation. Crawl space mold is different for a few reasons.

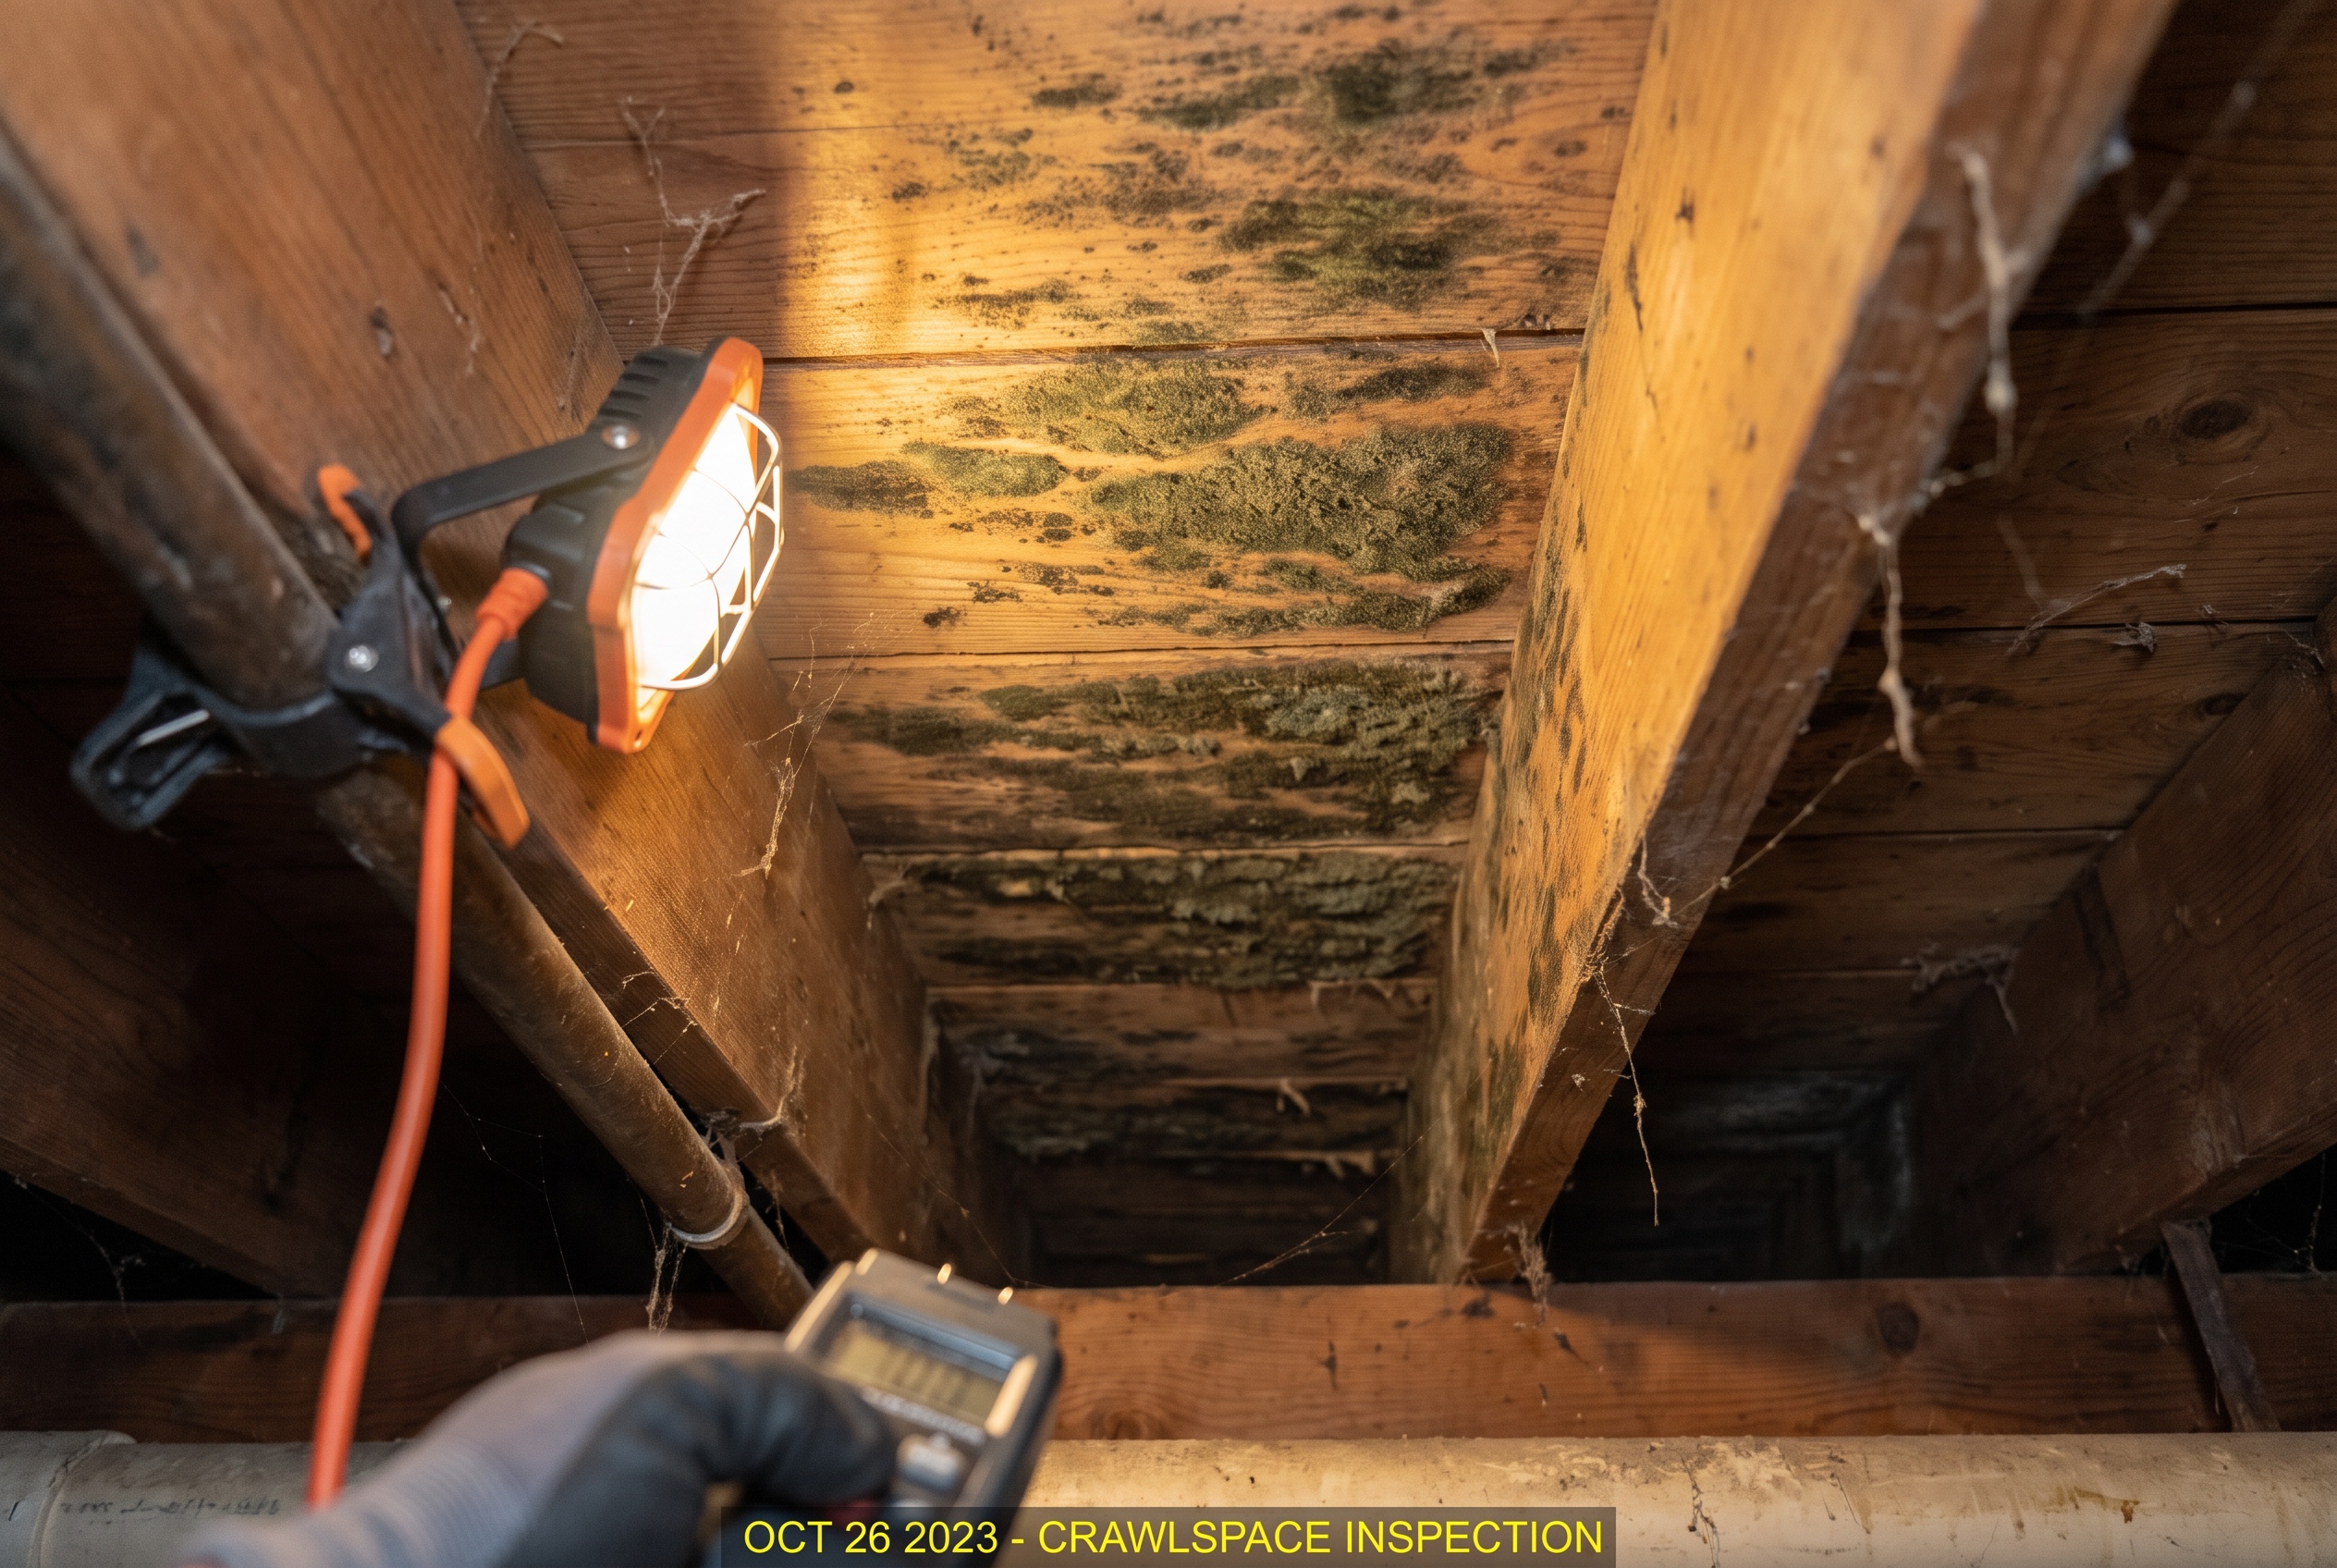
First, it’s usually growing on structural wood. Floor joists, sill plates, and support beams are the primary surfaces mold colonizes in a crawl space, and those aren’t materials you can just wipe down and move on. When mold establishes itself in wood, it’s feeding on the material itself. Depending on how long it’s been there and how aggressive the growth is, the wood may have lost some structural integrity along with the surface contamination.

Second, the crawl space feeds air directly into the living space above it through the stack effect. Mold spores and mycotoxins in the crawl space don’t stay in the crawl space. They get pulled upward into the home continuously, which is why people in houses with significant crawl space mold often notice respiratory symptoms, worsening allergies, or a persistent musty smell on the first floor well before they’ve ever looked under the house. The EPA notes that mold exposure can cause a range of health effects depending on the type of mold and the sensitivity of the individual, and a crawl space is one of the more efficient delivery systems for getting mold into the air people breathe daily.

Third, and most importantly, crawl space mold is almost always a symptom of a moisture problem rather than the problem itself. Treating the mold without addressing the moisture is the single most common reason crawl space mold comes back after remediation. The conditions that allowed it to grow in the first place are still there.

What Crawl Space Mold Removal Actually Involves

Professional crawl space mold remediation isn’t a single step. It’s a sequence, and each part of it matters.

Inspection and assessment. Before any work starts, the extent of the mold growth needs to be mapped out. This means getting into the crawl space and looking at all accessible surfaces, the joists, sill plates, rim joists, support posts, and any insulation or vapor barrier material. The inspection should also assess the moisture conditions: whether there’s standing water, what the humidity level is, whether there’s active water intrusion, and where it’s coming from. A remediation plan built without that information is guesswork.

Containment. In cases of significant mold growth, containment measures are set up to prevent spores from spreading to other parts of the house during the remediation process. This typically involves sealing the crawl space access point and using negative air pressure equipment to keep disturbed spores from migrating upward. It’s a step that gets skipped by less thorough contractors and is a reasonable thing to ask about when evaluating who you hire.

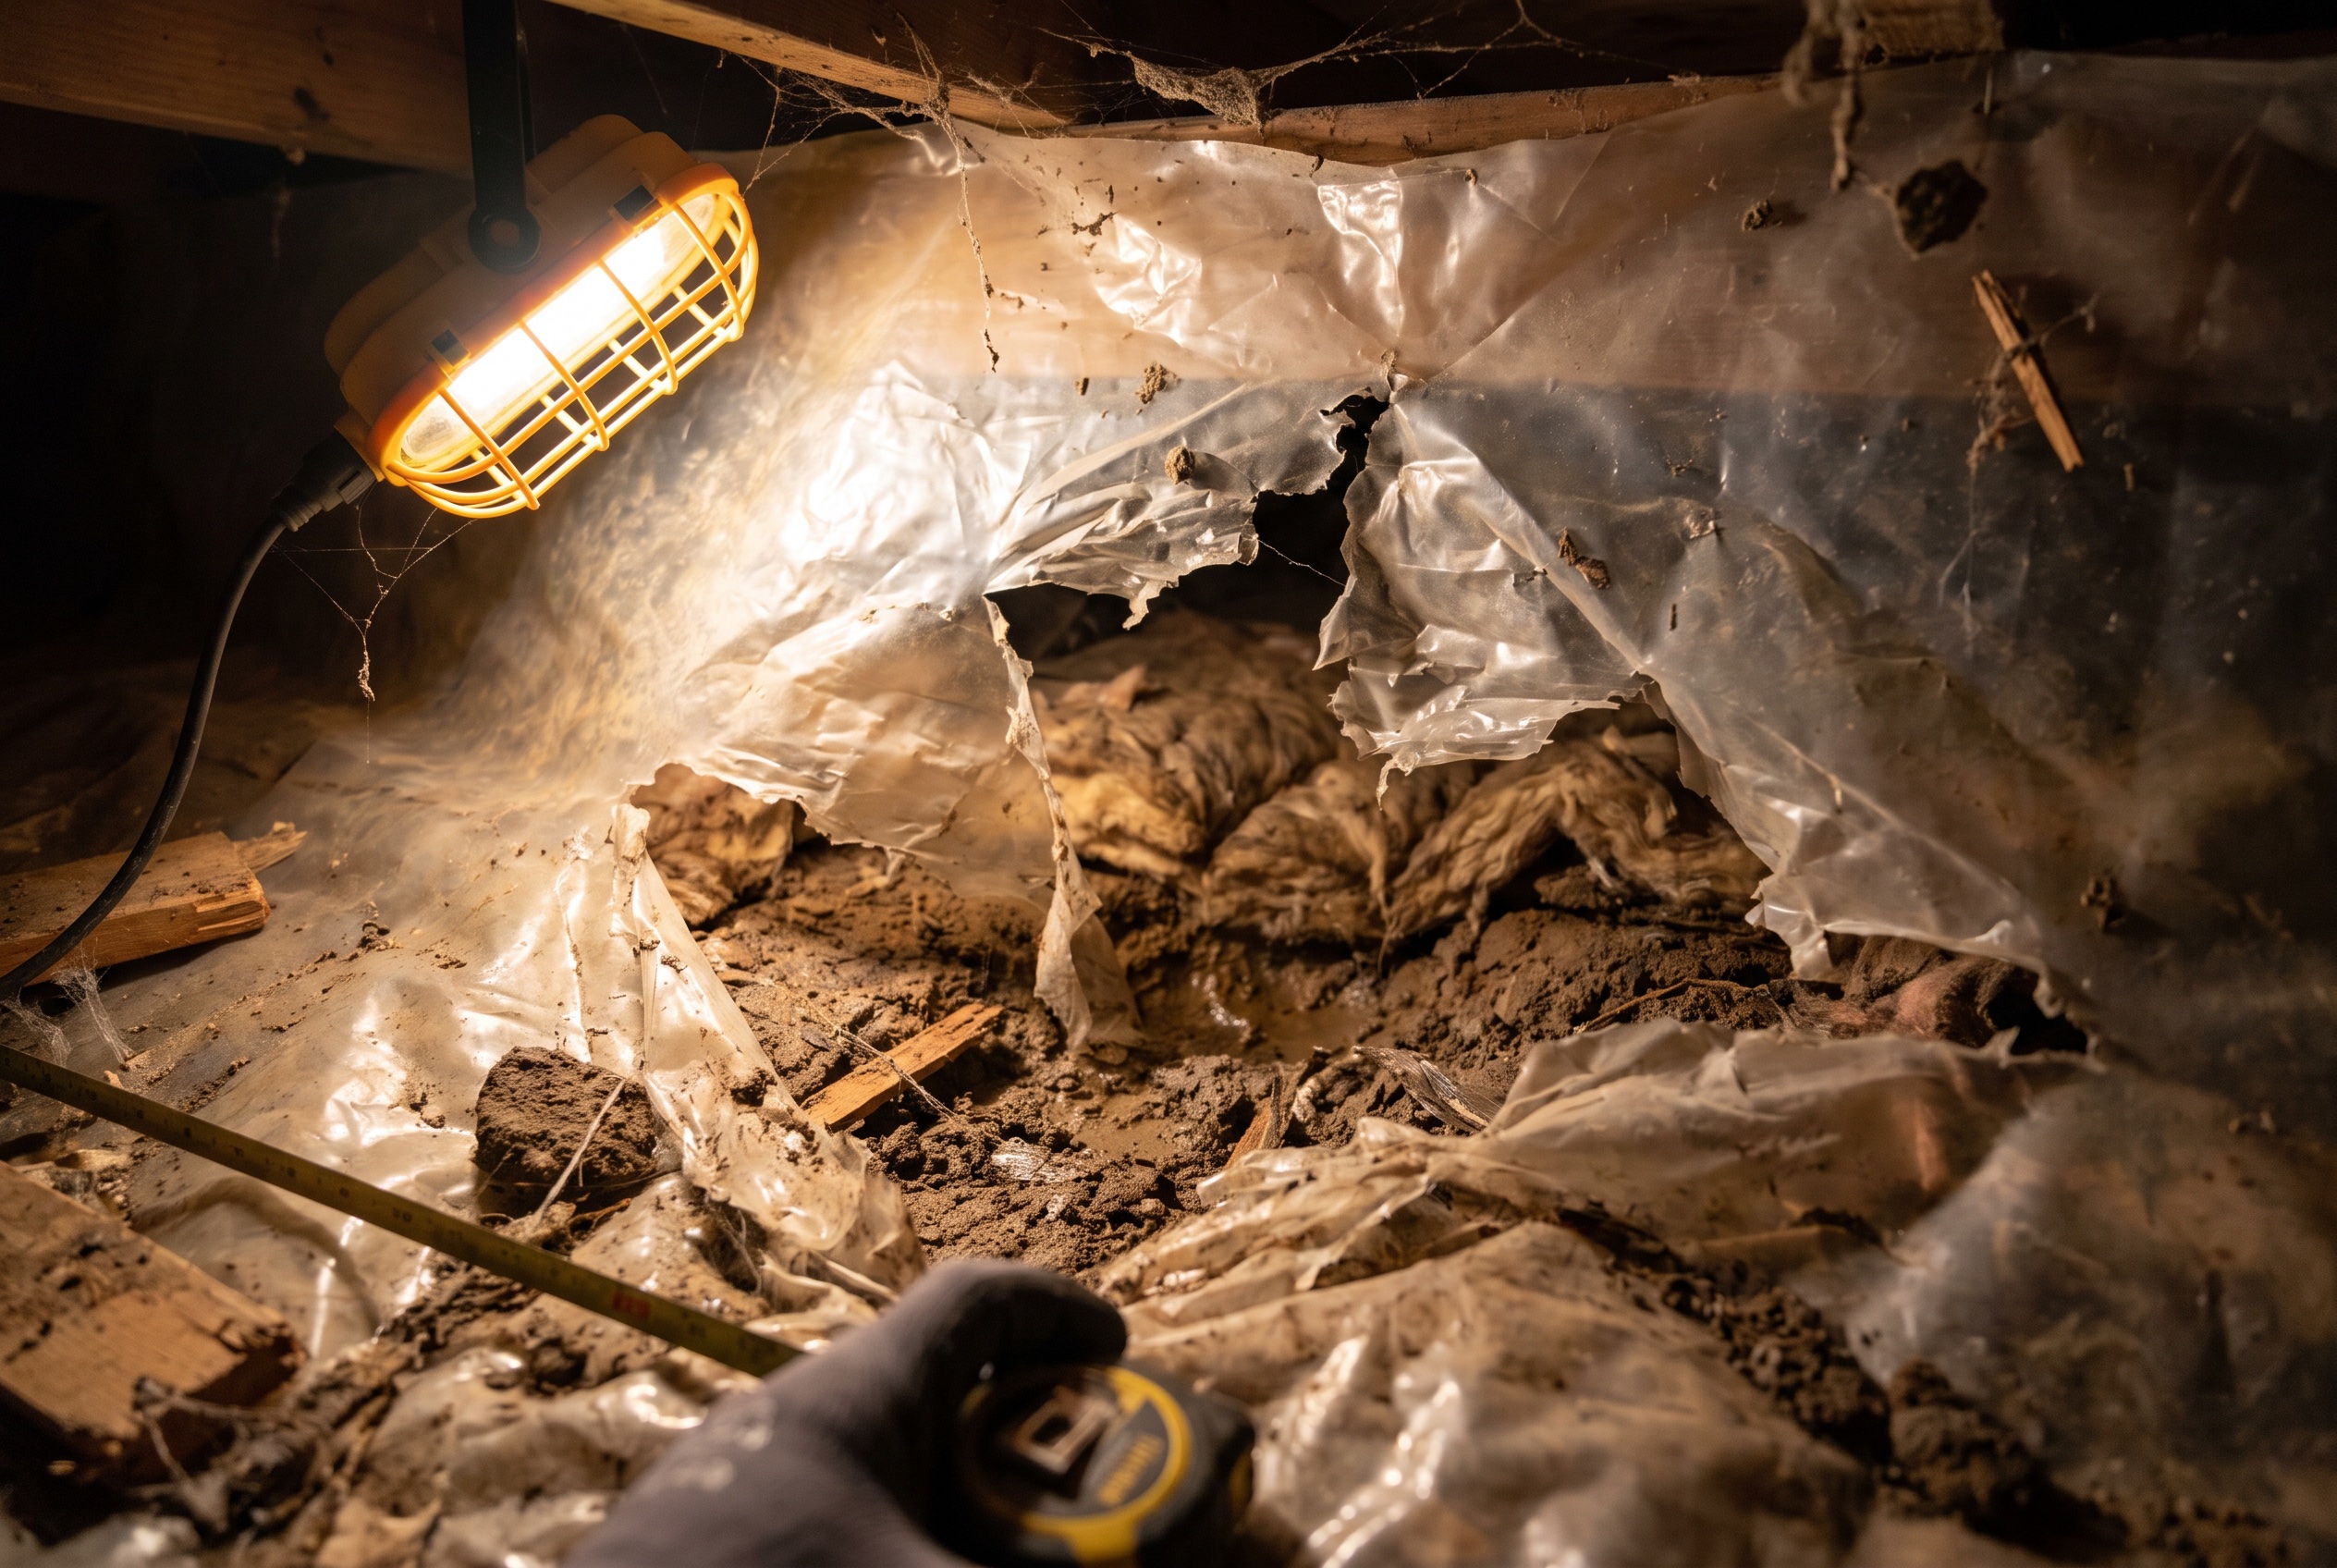
Removal of contaminated materials. Any materials that can’t be effectively cleaned have to come out. Insulation is the most common example. Fiberglass batt insulation that has mold growth in it cannot be remediated in place, it has to be removed and disposed of. The same applies to any vapor barrier material that’s contaminated. Trying to clean these materials rather than remove them is a shortcut that doesn’t work.

Treatment of affected wood surfaces. The wood framing itself is treated using antimicrobial agents designed for porous surfaces. This typically involves wire brushing or mechanical abrasion to remove surface mold growth, followed by application of a biocide or encapsulant rated for wood remediation. The goal is to kill active mold and prevent regrowth on the treated surfaces. In cases where wood decay has gone beyond surface contamination, the damaged structural members may need to be replaced entirely, which is a separate but related scope of work that ties into crawl space structural repair.

Addressing the moisture source. This is the part that separates a real fix from a temporary one. If the crawl space is still getting wet, still has open vents pumping in humid summer air, or still has a failed vapor barrier letting ground moisture evaporate into the space, the mold will return. Remediation that doesn’t include a plan for moisture control is incomplete by definition. Depending on what the inspection found, this might mean installing or replacing a vapor barrier, adding a dehumidifier, improving drainage, or moving forward with full crawl space encapsulation. In Hampton Roads, where the baseline humidity is high and many crawl spaces deal with groundwater pressure from a high water table, encapsulation is often the right long-term answer rather than a partial fix.

How Bad Does It Have to Be Before It’s a Professional Job?

The EPA’s general guidance is that mold covering more than ten square feet warrants professional remediation. In a crawl space, that threshold is almost always exceeded by the time someone actually notices the problem, because crawl spaces go uninspected for years and mold spreads along joist bays continuously once it establishes. It’s not unusual to find growth spanning most of the accessible framing in a home that’s had uncontrolled moisture for a few seasons.

Beyond square footage, the type of surfaces involved matters. Mold on wood framing in a confined space with limited air circulation is not a DIY job for most homeowners. The exposure risk during disturbance is real, the equipment needed to do it properly, respirators rated for mold remediation, protective suits, negative air machines, is specialized, and the likelihood of missing areas or leaving conditions that allow regrowth is high without professional training and experience.

If you’ve found what looks like a small isolated patch, it’s still worth having it assessed before doing anything. What looks small from the access point often extends further than it appears once someone is fully inside the space.

What to Ask Before Hiring a Mold Remediation Contractor

Not every contractor who offers crawl space mold removal approaches it the same way. A few questions worth asking before you commit to anyone:

Do they inspect the moisture source before starting, and does their proposal include a plan to address it? If the answer is that they’ll just treat the mold and leave the moisture situation for you to figure out separately, that’s a flag.

What do they do with contaminated insulation and vapor barrier material? If the answer is clean it in place rather than remove it, ask why.

What treatment products are they using on the wood, and are those products rated for mold remediation on porous surfaces? Bleach, which is what a lot of DIY guides recommend, doesn’t penetrate wood effectively and isn’t a substitute for professional-grade biocides on structural framing.

Do they offer any follow-up or warranty on the work? A contractor confident in their process should be willing to stand behind it.

At Hawk, our crawl space mold removal process includes a thorough inspection, proper containment, removal of contaminated materials, treatment of affected framing, and a clear recommendation for what moisture control measures need to follow. We don’t treat the symptom and leave the cause. Schedule a free inspection here and we’ll give you a straight assessment of what’s in your crawl space and what it would take to fix it properly.

Frequently Asked Questions

How quickly does mold grow in a crawl space?

Under the right conditions, mold can begin establishing itself within 24 to 48 hours of a moisture event. A crawl space that flooded during a storm and didn’t dry out quickly is at real risk of mold growth within days. The open, unfinished surfaces of wood framing provide exactly the organic material mold needs, and a humid, poorly ventilated crawl space provides the moisture and temperature conditions. This is part of why addressing water intrusion quickly after a storm matters beyond just the immediate water damage.

Can mold in the crawl space make my family sick?

It can, particularly for people with respiratory conditions, allergies, or sensitivities to mold. The stack effect means crawl space air circulates into the living space continuously, carrying mold spores and mycotoxins with it. Symptoms associated with mold exposure include respiratory irritation, worsening asthma, chronic congestion, headaches, and fatigue. Not everyone in the same house will react the same way, but children, elderly individuals, and anyone with existing respiratory issues are generally more vulnerable. If household members are experiencing unexplained respiratory symptoms and the crawl space hasn’t been inspected recently, it’s worth putting those two things together.

Do I need to leave my home during crawl space mold remediation?

For minor remediation with proper containment, it’s often not necessary. For significant mold growth requiring extensive work and disturbance of large areas of contaminated material, temporarily vacating during the active work is the safer option, particularly for anyone with respiratory sensitivities. A professional contractor should give you a clear recommendation based on the scope of work before the job starts, not after.

Will mold come back after remediation?

It will if the moisture problem that caused it isn’t fixed. Mold remediation removes the existing growth and treats the surfaces, but mold spores are present everywhere in the environment. Given the right conditions, specifically sustained moisture above roughly 60 percent relative humidity, mold will re-establish on any organic surface. A properly remediated crawl space paired with effective moisture control, whether that’s encapsulation, a dehumidifier, improved drainage, or some combination, creates an environment where mold can’t get a foothold again. The remediation and the moisture fix are two parts of the same solution.

Why Crawl Space Moisture Is Driving Up Your Energy Bills

Why Crawl Space Moisture Is Driving Up Your Energy Bills

If your energy bills have been climbing and you can’t figure out why, the answer might be under your feet. Most homeowners think about insulation, windows, and HVAC efficiency when they’re trying to understand high energy costs. The crawl space rarely comes to mind. But in Hampton Roads, where homes sit on crawl space foundations and the humidity is relentless for most of the year, what’s happening below the first floor has a direct and measurable effect on how hard your heating and cooling system has to work.

This isn’t a minor factor. A crawl space with uncontrolled moisture can add meaningfully to your monthly energy costs, and the mechanism behind it is worth understanding because it explains why surface-level fixes like a programmable thermostat or new weatherstripping don’t move the needle the way you’d hope.

The Stack Effect: Why Your Crawl Space Air Ends Up in Your Living Room

The reason crawl space conditions affect the rest of the house comes down to a thermodynamic principle called the stack effect. As warm air rises through your home and escapes through the upper levels, it creates a pressure difference that draws air upward from the lowest point in the structure. In a home with a crawl space, that lowest point is the crawl space itself.

Research from building science organizations suggests that in a typical crawl space home, a significant share of the air circulating on the first floor originates from below. The exact percentage varies by construction and season, but the principle is consistent: your crawl space is actively feeding air into your living space whether you want it to or not. The U.S. Department of Energy recognizes crawl space moisture control as a meaningful factor in home energy performance, specifically because of this air movement dynamic.

In an unencapsulated crawl space, that air is loaded with moisture. When it gets pulled up into the living space, your HVAC system has to work harder to condition it. In the summer, that means dehumidifying and cooling air that’s already hot and saturated. In the winter, damp air is harder to heat efficiently than dry air. Either way, your system is fighting the crawl space every single day.

How Crawl Space Humidity Makes Your HVAC Work Harder

Humidity and temperature are connected in ways that matter for energy use. Humid air feels warmer than dry air at the same temperature, which is why a 90-degree day in Hampton Roads feels so much more oppressive than a 90-degree day in a drier climate. Your body’s cooling mechanism relies on evaporation, and that works less effectively when the air is already saturated with moisture.

Your HVAC system faces the same challenge. An air conditioner doesn’t just cool air, it also removes moisture from it. When the air coming into the system is consistently more humid than it should be, the system has to run longer cycles to bring both the temperature and the humidity down to a comfortable level. Those longer cycles translate directly into higher energy consumption. In a coastal Virginia summer, where outdoor humidity is already high and an uncontrolled crawl space is adding to the load, this effect compounds quickly.

There’s also the insulation factor. Most crawl space homes have insulation installed between the floor joists, typically fiberglass batts. Fiberglass insulation loses a significant portion of its rated R-value when it absorbs moisture. A crawl space with high humidity is a crawl space where the floor insulation is chronically underperforming, which means conditioned air from your living space is losing more energy through the floor than it should. In winter that means heat escaping downward. In summer it means heat from the crawl space transmitting upward. Either way, the HVAC system compensates by running more.

The Signs That Your Crawl Space Is Affecting Your Energy Use

Some of these are subtle and some are more obvious, but taken together they build a picture worth paying attention to.

Energy bills that have climbed gradually over a few years without a clear explanation are worth investigating. If your usage habits haven’t changed, your appliances are the same, and your HVAC system has been serviced regularly, but your bills keep going up, the building envelope is usually where the answer lives. The crawl space is part of that envelope and often the least examined part of it.

Floors that feel cold in winter even with the heat running are a sign that the thermal boundary between the crawl space and the living space is compromised. If the insulation between the joists is damp, sagging, or has fallen down entirely, which is common in humid crawl spaces where the insulation eventually loses its grip on the joist faces, the floor is essentially uninsulated.

A house that feels humid inside even with the air conditioning running is another indicator. If you’re running the AC on a normal summer day and the indoor humidity still feels uncomfortable, the system may be fighting a moisture load it can’t fully overcome. A crawl space pulling damp air into the house continuously is a common culprit.

Higher than expected HVAC maintenance needs, systems that need servicing more often, coils that ice up, or equipment that runs constantly without reaching the set temperature, can all be downstream effects of a moisture problem the system is trying and failing to compensate for.

What Fixing the Crawl Space Actually Does for Energy Costs

Crawl space encapsulation addresses the energy efficiency problem at the source. By sealing the ground and walls with a heavy-duty liner, closing off the foundation vents, and adding active dehumidification, encapsulation takes the crawl space out of the equation as a source of humid, uncontrolled air. The stack effect doesn’t go away, but instead of pulling damp crawl space air into the house, it’s pulling from a sealed, conditioned space.

The practical effects on energy use are real. When the HVAC system isn’t fighting crawl space humidity, it can reach and maintain target temperatures and humidity levels more efficiently. Shorter run cycles, less strain on the equipment, and more consistent indoor comfort are the typical results. The floor insulation also performs closer to its rated value when it’s not absorbing moisture, which improves the thermal boundary between the crawl space and the first floor.

Building Science Corporation’s research on crawl space conditioning has consistently shown that sealed, conditioned crawl spaces outperform vented crawl spaces on moisture control and energy performance in humid climates, which describes Hampton Roads precisely. The data supports what contractors in this region have observed in practice for years: venting a crawl space in a humid coastal climate doesn’t dry it out, it keeps it wet.

A full crawl space encapsulation is the most comprehensive fix, but even targeted improvements, better vapor barrier coverage, sealing obvious air gaps, or adding a properly sized dehumidifier, can move the needle on energy performance. The right approach depends on the current condition of the crawl space and what’s driving the moisture. That’s what a professional inspection is for.

If your energy bills have been nagging at you and you haven’t looked at your crawl space recently, it’s worth putting on the list. At Hawk we offer free inspections with no obligation. We’ll assess the moisture situation, the condition of the vapor barrier and insulation, and give you a straight read on whether what’s happening below your house is contributing to what you’re seeing on your energy bill. Schedule your free inspection here.

Frequently Asked Questions

How much can crawl space encapsulation actually reduce energy bills?

The honest answer is that it varies depending on the baseline condition of the crawl space, the size of the home, and how much the moisture problem was affecting HVAC performance to begin with. Homes with severely compromised crawl spaces in humid climates have seen meaningful reductions in energy use after encapsulation, but it’s not a uniform number and anyone quoting you a specific percentage upfront is guessing. What’s more consistent is the improvement in comfort and the reduction in HVAC runtime, which translates to lower bills and less wear on the equipment over time.

Will a crawl space dehumidifier alone fix the energy efficiency problem?

A dehumidifier helps, but it’s working harder than it needs to if the crawl space isn’t sealed. Running a dehumidifier in a vented crawl space in a Hampton Roads summer is a bit like trying to cool a room with the windows open. The unit will run constantly trying to keep up with the moisture load coming in through the vents and the ground. Pairing the dehumidifier with proper encapsulation, sealed vents and a quality liner, gives it a controlled environment to manage rather than an open-ended battle against outdoor humidity.

Does crawl space moisture affect the HVAC equipment itself, not just its efficiency?

Yes, over time it can. High humidity in and around HVAC equipment in the crawl space contributes to corrosion on metal components, mold growth on coils and in ductwork, and degradation of insulation on duct runs. Ducts that run through a humid crawl space and aren’t well sealed are also subject to condensation on the exterior, which adds moisture to the crawl space environment and can degrade the duct insulation from the outside. Reducing crawl space humidity benefits the equipment and the ductwork, not just the energy bills.

My house has a vented crawl space. Is that the problem?

It might be contributing to it. Vented crawl spaces made sense as a design standard when most homes were in drier climates and the thinking was that airflow would carry moisture out. In a humid coastal environment like Hampton Roads, the opposite tends to happen: vents let in outdoor air that’s already saturated, and that air condenses on cooler surfaces inside the crawl space rather than drying anything out. Sealing the vents as part of an encapsulation system is standard practice for this region. You can read more about how the full system works on our crawl space services page.

Signs Your Crawl Space Vapor Barrier Needs Replacement

Signs Your Crawl Space Vapor Barrier Needs Replacement

If you’ve gotten into your crawl space recently, or had someone else do it, and found a mess of torn plastic sheeting, you’re not alone. Vapor barriers don’t last forever, and in a climate like Hampton Roads, they tend to fail faster than homeowners expect. The problem is that most people don’t know what a failing barrier looks like, or how to tell whether what they’re seeing is minor or worth fixing soon. This post walks through the specific signs that a crawl space vapor barrier needs replacement, why barriers fail in coastal Virginia conditions, and what the decision looks like between a simple barrier swap and a full encapsulation.

What a Vapor Barrier Is Actually Supposed to Do

Before getting into failure signs, it helps to be clear on what the barrier is doing in the first place. A crawl space vapor barrier is a layer of plastic sheeting installed on the ground beneath your home. Its job is to block moisture vapor from rising out of the soil and into the crawl space environment above it. Soil holds water, and even when there’s no standing water present, that moisture evaporates upward constantly. Without a barrier, that vapor saturates the air in the crawl space, condenses on the wood framing, and creates the conditions for mold growth and wood decay.

In Hampton Roads, where the soil holds moisture aggressively and the water table in many neighborhoods sits close to the surface, that upward vapor pressure is significant. A barrier that’s intact and properly installed manages it. A barrier that’s torn, degraded, or incomplete leaves the framing above it exposed to ongoing moisture. The EPA notes that controlling moisture at the source is the most effective way to prevent mold growth, and in a crawl space, the vapor barrier is that first line of control.

Signs Your Crawl Space Vapor Barrier Needs Replacement

Tears, holes, and gaps in the material. This is the most obvious sign and the one homeowners most commonly find when they actually look. Plastic sheeting in a crawl space takes a beating over time. HVAC technicians, plumbers, and pest control crews walk on it. Pests chew through it. Settling of the ground beneath it causes it to bunch, pull away from the walls, and crack along fold lines. Any gap in the barrier, no matter how small it looks, is an opening for moisture vapor to pass through unobstructed. If the barrier looks like it’s been patched together from several pieces with open seams between them, or if sections have been pushed aside and never replaced, it’s not doing its job.

Visible mold on the barrier surface or on the framing above it. Mold on the top surface of the vapor barrier means moisture is condensing there, which usually indicates the barrier has failed in enough places that the overall humidity in the crawl space has climbed. Mold on the joists or sill plates above is more serious and means the moisture has been elevated long enough to establish growth on the wood. Either situation calls for remediation and a fresh barrier at minimum, and often a full encapsulation to actually bring the humidity under control.

The barrier is thin, brittle, or degraded. Older homes sometimes have the original vapor barrier that was installed during construction, which may be decades old. Standard builder-grade barriers are typically 6-mil polyethylene, which is the minimum required by most building codes. At 6-mil thickness, the material breaks down faster under UV exposure, foot traffic, and the acidic soil conditions common in coastal Virginia. A barrier that crumbles or tears easily when touched has lost most of its effectiveness regardless of whether it looks intact from a distance.

Standing water on or under the barrier. Water pooling on top of the barrier after rain is actually the barrier working as intended in one sense, it’s catching water rather than letting it go straight into the soil. But if that water has nowhere to go and sits there, it creates a humidity problem above the barrier and can push the sheeting up off the ground, creating air gaps that defeat the purpose. Water consistently getting under the barrier, pooling between the plastic and the soil, usually means the barrier isn’t sealed at the edges and water is finding its way in from the sides. That’s a drainage and sealing problem, not just a material problem.

Persistent musty smell in the house. You may not need to go into the crawl space to notice this one. If the first floor of your home has a musty or earthy smell that doesn’t go away, especially in summer when the house is closed up and the stack effect is pulling air upward from below, that’s often crawl space air finding its way into the living space. A failing vapor barrier that’s allowing moisture to accumulate below is a primary driver of that smell. If you’ve tried everything else and can’t find the source, the crawl space is usually worth checking.

The barrier isn’t covering the full ground surface or the walls. A vapor barrier that only covers part of the crawl space floor is only solving part of the problem. Moisture doesn’t check whether the other half of the ground is covered before it evaporates. If the existing barrier stops short of the foundation walls, or if it was installed only under certain sections of the house, it’s incomplete by definition. Proper installation means full ground coverage with the barrier running up and secured to the foundation walls, so there’s no exposed soil anywhere in the space.

Why Vapor Barriers Fail Faster in Hampton Roads

The coastal Virginia environment is harder on crawl space materials than most homeowners realize. The combination of high ambient humidity, acidic coastal plain soils, and temperature swings between seasons breaks down standard polyethylene sheeting faster than it would in a drier inland climate. Homes near waterways or in low-lying neighborhoods with high water tables are dealing with additional moisture pressure that thin barriers simply weren’t designed to handle long-term.

Pest activity is another factor that’s more pronounced here. Subterranean termites, rodents, and other pests that access crawl spaces regularly damage vapor barriers in the process. A pest control treatment that doesn’t include repairing the barrier afterward leaves openings that persist indefinitely.

The physical access that comes with routine maintenance also takes a toll. Every time someone crawls through the space to service HVAC equipment, check ductwork, or address a plumbing issue, the barrier takes some damage. Over ten or fifteen years of normal home maintenance, a 6-mil barrier in a Hampton Roads crawl space is likely in significantly worse shape than it was when it was installed. The Department of Energy recommends heavier-duty vapor retarder materials for crawl spaces that experience regular access or challenging moisture conditions, both of which apply to most homes in this region.

Vapor Barrier Replacement vs. Full Encapsulation

This is the question that comes up most often once a homeowner realizes their barrier is failing: do I just replace the plastic, or do I need a full encapsulation?

The honest answer is that it depends on what’s causing the moisture problem and how well the rest of the crawl space is set up. A straight barrier replacement makes sense when the existing system was working reasonably well, the foundation vents are appropriate for the conditions, there’s no active water intrusion, and the main issue is just that the old material has degraded. Swapping in a heavier-duty liner, something in the 12-mil range or above, and making sure it’s properly lapped and taped at seams addresses the immediate problem.

Full encapsulation is the better answer when the crawl space has chronic moisture issues, when the foundation vents are letting in humid summer air that’s causing condensation, when there’s any history of standing water, or when the wood framing shows signs of past or ongoing moisture damage. Encapsulation goes further than barrier replacement: it seals the vents, runs the liner up and mechanically fastens it to the walls, and pairs the system with active dehumidification to maintain humidity below the threshold where mold and decay can establish. In Hampton Roads conditions, a lot of homes that thought they just needed a new vapor barrier actually needed the fuller system to get the crawl space genuinely under control.

If you’re not sure which situation you’re in, that’s exactly what an inspection is for. Our crawl space encapsulation page explains what a complete system looks like and how it compares to a basic vapor barrier. And if you’ve got damaged framing alongside a failing barrier, the structural repair side of crawl space work often needs to happen at the same time.

At Hawk, we offer free crawl space inspections with no obligation. We’ll take a look at the existing barrier, the condition of the framing, and the overall moisture situation, and give you a straight answer on what we’d recommend and why. Schedule your free inspection here.

Frequently Asked Questions

How long should a crawl space vapor barrier last?

A standard 6-mil polyethylene barrier in a typical crawl space might last 10 to 15 years under good conditions. In Hampton Roads, with the moisture levels, soil acidity, and pest activity common to the region, expect the lower end of that range, especially if the crawl space sees regular foot traffic from maintenance work. Heavier-duty reinforced liners in the 12-mil to 20-mil range last considerably longer and hold up better to the conditions that degrade thinner material faster.

Can I replace a vapor barrier myself?

The physical task of laying new plastic sheeting is something a handy homeowner can do. The challenge is getting it right: cutting and lapping the material properly at seams, running it up the walls and securing it correctly, making sure there’s no exposed soil anywhere in the space, and making sure any drainage or moisture issues that caused the old barrier to fail are addressed at the same time. A new barrier installed on top of the same conditions that destroyed the old one is going to have the same lifespan. If there’s any water intrusion, mold, or framing damage involved, professional assessment before doing anything is the right move.

Does a vapor barrier eliminate the need for a dehumidifier?

Not entirely. A vapor barrier controls moisture coming up through the soil, which is a major source, but it doesn’t address moisture that enters through foundation vents, gaps around penetrations, or through the walls themselves. In an unencapsulated crawl space with open vents, humid summer air is still getting in regardless of what’s on the ground. A dehumidifier in that situation is working against an active source rather than maintaining a controlled environment. In a fully encapsulated crawl space where the vents are sealed and the liner runs up the walls, a dehumidifier manages residual moisture and keeps humidity consistently below the level where problems develop. The two work together as a system.

What thickness vapor barrier do I need for my crawl space?

Building codes in Virginia require a minimum of 6-mil polyethylene for crawl space vapor barriers, but that’s a floor, not a recommendation. For Hampton Roads conditions, most professional installations use a reinforced liner in the 12-mil range or heavier. The thicker material resists tearing under foot traffic, holds up better against pests and acidic soil, and maintains its integrity longer between inspections. If a contractor is quoting a 6-mil barrier for a Hampton Roads crawl space, it’s worth asking why they’re not going heavier given the regional conditions.

How Summer Storms Affect Your Foundation

How Summer Storms Affect Your Foundation

Summer in Hampton Roads means heat, humidity, and storms that can drop two or three inches of rain in under an hour. Most homeowners watch the weather, wait for it to pass, and move on. But what’s happening under and around your house during those storms, and in the days after, is worth paying attention to. Foundations in this region take a beating from the seasonal weather cycle, and the damage tends to be cumulative rather than dramatic. You won’t usually see a storm crack your foundation in one shot. You’ll see the effects of five years of storms that nobody addressed.

What Summer Storms Actually Do to the Soil Around Your Foundation

The soil in Chesapeake and the surrounding area is the starting point for most storm-related foundation issues. A significant portion of it is clay-heavy, and clay behaves in ways that put real stress on foundations over time. When rain saturates clay soil, it expands. When it dries out, it contracts and pulls away. That cycle happens every season, and every cycle puts some amount of movement and pressure on whatever is sitting in or on that soil.

During a heavy summer storm, saturated soil becomes heavy and exerts lateral pressure against foundation walls. This is hydrostatic pressure, and it’s not trivial. Water weighs about 62 pounds per cubic foot, and when the soil around your foundation is holding that water against your walls, the force adds up quickly. Over time, that pressure is what causes foundation walls to crack, bow inward, and in serious cases, fail structurally.

The flip side happens when things dry out. After the storm passes and a dry stretch follows, that same clay soil shrinks back. If it shrinks unevenly, which it usually does, the foundation loses support in some spots and not others. That differential movement is what produces the diagonal cracks in brick and drywall that are so common in older Hampton Roads homes. The USGS has documented ongoing land subsidence in the Hampton Roads region, which compounds the natural movement already happening from soil expansion and contraction.

Drainage Problems That Make It Worse

A well-drained yard handles storm water before it ever becomes a foundation problem. The issue is that a lot of homes in this area, especially older ones, have grading or drainage situations that work against them. If the ground slopes toward the house, water from a heavy storm funnels directly toward the foundation. If gutters are dumping runoff at the base of the wall rather than carrying it away, every storm is adding water to the soil right where you don’t want it.

Clogged or undersized gutters are a surprisingly common contributor to foundation issues. When gutters overflow, water pours down the exterior wall and saturates the soil at the foundation line repeatedly. It’s easy to overlook because the damage is invisible and slow, but the soil right next to the footing is getting soaked storm after storm while the rest of the yard drains normally. Over a few years that adds up.

French drains and proper perimeter grading are what address this at the source. A French drain intercepts water before it reaches the foundation and redirects it away from the house. It’s not the most exciting solution, but it’s one of the more effective ones for homes dealing with repeated storm-related water intrusion. Combined with downspout extensions that carry water at least six feet from the foundation, the drainage situation around a home can usually be improved significantly without major work. You can read more about foundation drainage and stabilization services and how they apply to storm-related issues.

What to Look For After a Major Storm

You don’t need to be a contractor to do a useful post-storm check. There are a few things worth looking at after any storm that brought significant rainfall.

Walk the perimeter of the house and look for pooling water, especially near the foundation. Note any areas where water seems to be sitting longer than the rest of the yard. Check your gutters and downspouts to make sure they’re clear and directing water away from the house. Look at the foundation walls themselves for any new cracking or for efflorescence, the white chalky mineral deposits that show up where water has been moving through concrete or block repeatedly.

Inside, pay attention to doors and windows that suddenly feel harder to operate than they did before the storm. A door that racked slightly, meaning the frame shifted just enough that the door no longer closes cleanly, can indicate foundation movement. Check the basement or crawl space for water intrusion, new cracks in the walls, or any change in how the space looks or smells. A musty odor that wasn’t there before a storm is often the first sign that water got in somewhere.

None of these signs on their own necessarily mean something catastrophic is happening. But patterns matter. If you’re noticing the same things after every major storm, or if something that was minor last summer is visibly worse this year, that’s worth having looked at. FEMA’s coastal construction guidance specifically identifies drainage management and soil behavior as central concerns for foundations in coastal plain environments like Hampton Roads, not secondary considerations.

When Storm Damage Becomes a Foundation Repair Problem

The line between “keep an eye on it” and “get this fixed” comes down to whether the symptoms are active and progressing. Stable cracks that have been the same for years are usually just evidence of past settling. Cracks that are widening, walls that are visibly bowing, or floors that have changed noticeably over a season are signs of ongoing movement that isn’t going to stop on its own.

Repeated storm flooding in a crawl space is in the same category. One flood that dries up quickly is different from a crawl space that holds water for days after every major rain. The second situation means the framing is getting repeatedly wetted and dried, which is exactly the cycle that leads to rot, mold, and eventually structural damage to the floor system. A proper crawl space encapsulation with drainage addresses this at the source rather than just cleaning up after each event.

For foundation walls dealing with cracking or movement from hydrostatic pressure, the repair approach depends on severity. Minor cracking with no active movement can often be monitored. Bowing walls or cracks that are widening need stabilization before the next storm season adds more pressure to an already stressed wall. Waiting on those tends to make the eventual repair more involved and more expensive.

If you’ve had a rough storm season and want to know where your foundation and crawl space actually stand, a free inspection is the most straightforward way to find out. At Hawk we’ll get under the house, check the foundation, and give you a straight read on what we find. Schedule yours here.

Frequently Asked Questions

Can a single storm cause serious foundation damage?

It’s possible but not common. Most foundation damage from storms is cumulative, the result of repeated wetting and drying cycles over several seasons rather than one catastrophic event. A major storm can accelerate existing issues or make underlying problems visible for the first time, but it rarely creates a serious structural problem in a foundation that was otherwise in good shape. The exception would be extreme flooding or erosion that removes soil support from beneath the footing, which is less common in most residential situations.

How do I know if my foundation cracks are from storm damage or something else?

Context and pattern help a lot here. Cracks that appeared or visibly widened after a wet season, especially diagonal cracks near corners of windows and doors or stair-step cracks in brick, are consistent with differential settlement driven by soil movement. Horizontal cracks in a basement or crawl space wall are more associated with lateral pressure from saturated soil. A professional inspection can usually tell you whether a crack is active, what’s causing it, and whether it needs repair or just monitoring. You can read more about what to watch for in our post on signs of foundation problems.

Should I fill foundation cracks myself after a storm?

Filling a crack without understanding why it appeared doesn’t fix anything, and it can actually make it harder to track whether the crack is still growing. Hydraulic cement or epoxy injection has its place as part of a proper repair, but slapping something in a crack to make it look better doesn’t address the soil or drainage conditions causing it. If a crack is new or has changed recently, get it looked at before doing anything to it.

How does storm season in Hampton Roads compare to other regions for foundation risk?

Hampton Roads is genuinely one of the more challenging environments for foundations in the mid-Atlantic. The combination of expansive clay soils, a water table that’s close to the surface in many neighborhoods, regular tropical storm activity, and high baseline humidity creates conditions that put consistent stress on foundations throughout the year. The storm season just intensifies a moisture environment that’s already working on homes year-round, which is why proactive drainage and crawl space management matters here more than it would in a drier or more geologically stable region.