
Signs Your Crawl Space Vapor Barrier Needs Replacement
If you’ve gotten into your crawl space recently, or had someone else do it, and found a mess of torn plastic sheeting, you’re not alone. Vapor barriers don’t last forever, and in a climate like Hampton Roads, they tend to fail faster than homeowners expect. The problem is that most people don’t know what a failing barrier looks like, or how to tell whether what they’re seeing is minor or worth fixing soon. This post walks through the specific signs that a crawl space vapor barrier needs replacement, why barriers fail in coastal Virginia conditions, and what the decision looks like between a simple barrier swap and a full encapsulation.
What a Vapor Barrier Is Actually Supposed to Do
Before getting into failure signs, it helps to be clear on what the barrier is doing in the first place. A crawl space vapor barrier is a layer of plastic sheeting installed on the ground beneath your home. Its job is to block moisture vapor from rising out of the soil and into the crawl space environment above it. Soil holds water, and even when there’s no standing water present, that moisture evaporates upward constantly. Without a barrier, that vapor saturates the air in the crawl space, condenses on the wood framing, and creates the conditions for mold growth and wood decay.
In Hampton Roads, where the soil holds moisture aggressively and the water table in many neighborhoods sits close to the surface, that upward vapor pressure is significant. A barrier that’s intact and properly installed manages it. A barrier that’s torn, degraded, or incomplete leaves the framing above it exposed to ongoing moisture. The EPA notes that controlling moisture at the source is the most effective way to prevent mold growth, and in a crawl space, the vapor barrier is that first line of control.
Signs Your Crawl Space Vapor Barrier Needs Replacement
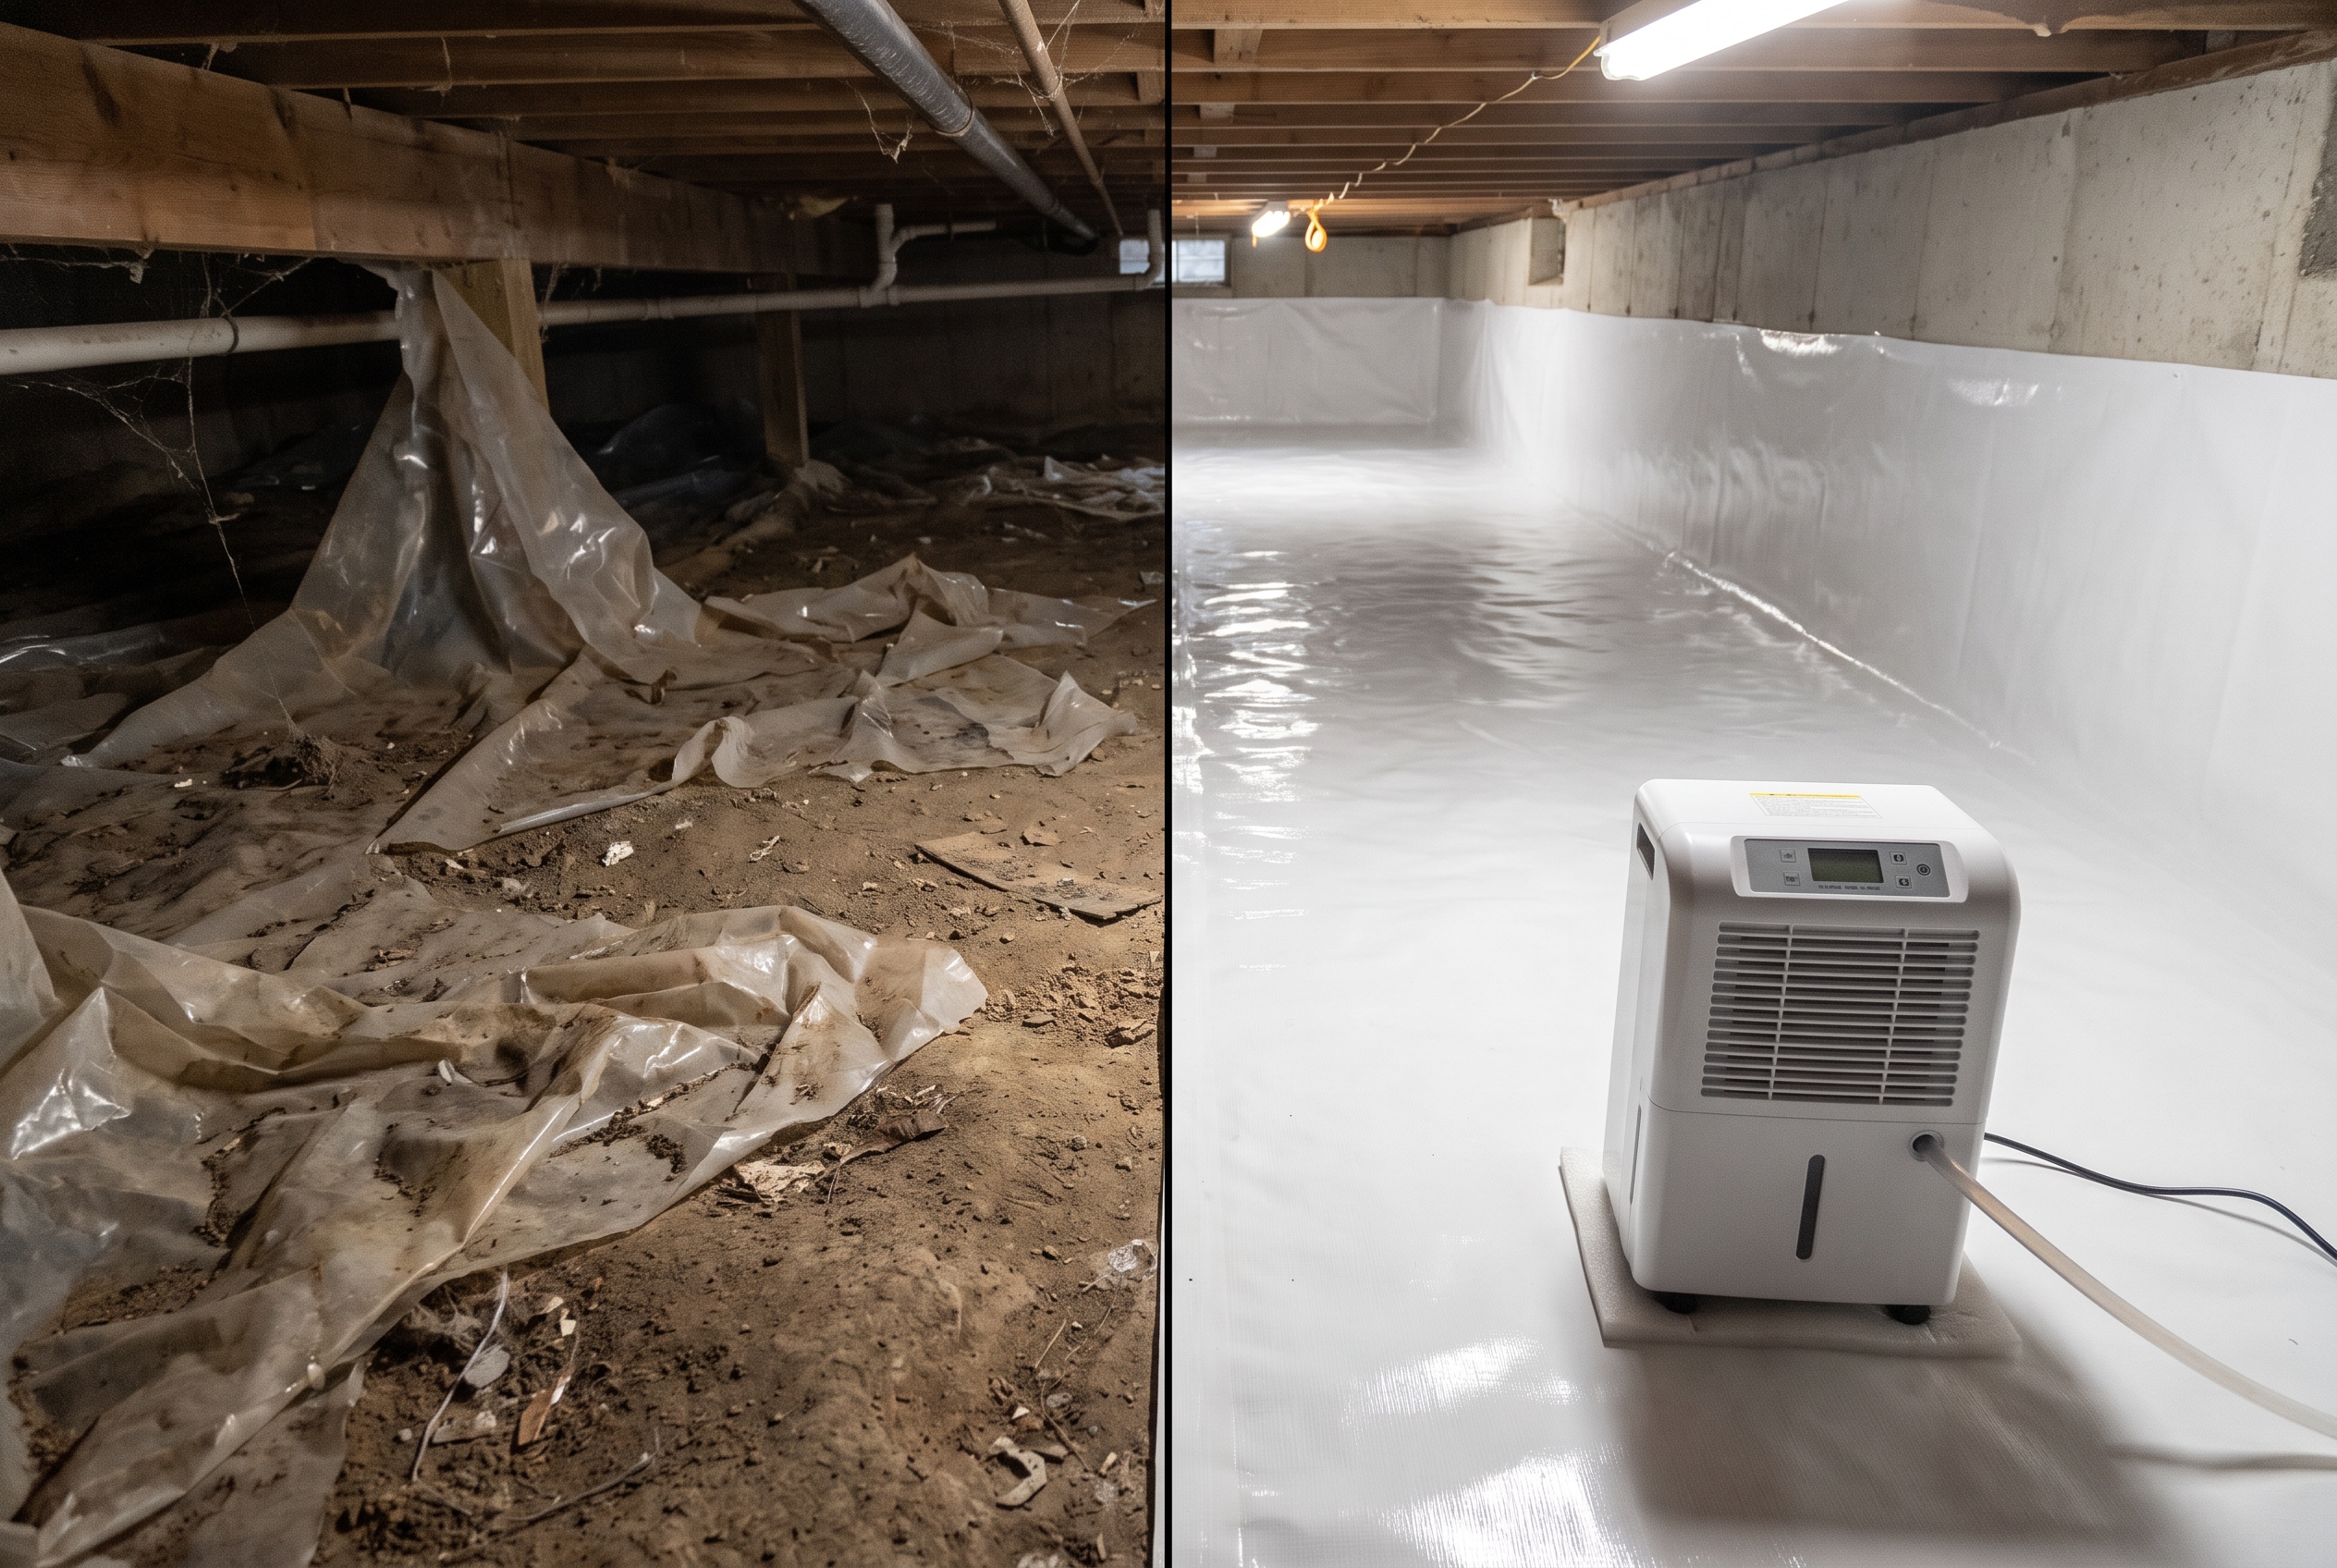
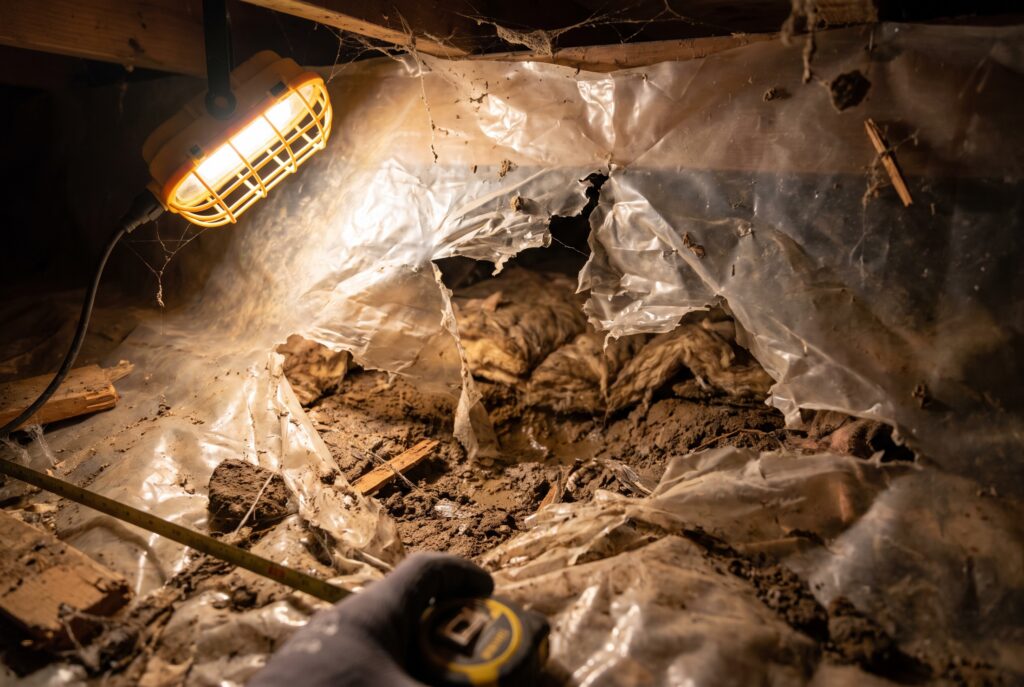
Tears, holes, and gaps in the material. This is the most obvious sign and the one homeowners most commonly find when they actually look. Plastic sheeting in a crawl space takes a beating over time. HVAC technicians, plumbers, and pest control crews walk on it. Pests chew through it. Settling of the ground beneath it causes it to bunch, pull away from the walls, and crack along fold lines. Any gap in the barrier, no matter how small it looks, is an opening for moisture vapor to pass through unobstructed. If the barrier looks like it’s been patched together from several pieces with open seams between them, or if sections have been pushed aside and never replaced, it’s not doing its job.
Visible mold on the barrier surface or on the framing above it. Mold on the top surface of the vapor barrier means moisture is condensing there, which usually indicates the barrier has failed in enough places that the overall humidity in the crawl space has climbed. Mold on the joists or sill plates above is more serious and means the moisture has been elevated long enough to establish growth on the wood. Either situation calls for remediation and a fresh barrier at minimum, and often a full encapsulation to actually bring the humidity under control.
The barrier is thin, brittle, or degraded. Older homes sometimes have the original vapor barrier that was installed during construction, which may be decades old. Standard builder-grade barriers are typically 6-mil polyethylene, which is the minimum required by most building codes. At 6-mil thickness, the material breaks down faster under UV exposure, foot traffic, and the acidic soil conditions common in coastal Virginia. A barrier that crumbles or tears easily when touched has lost most of its effectiveness regardless of whether it looks intact from a distance.
Standing water on or under the barrier. Water pooling on top of the barrier after rain is actually the barrier working as intended in one sense, it’s catching water rather than letting it go straight into the soil. But if that water has nowhere to go and sits there, it creates a humidity problem above the barrier and can push the sheeting up off the ground, creating air gaps that defeat the purpose. Water consistently getting under the barrier, pooling between the plastic and the soil, usually means the barrier isn’t sealed at the edges and water is finding its way in from the sides. That’s a drainage and sealing problem, not just a material problem.
Persistent musty smell in the house. You may not need to go into the crawl space to notice this one. If the first floor of your home has a musty or earthy smell that doesn’t go away, especially in summer when the house is closed up and the stack effect is pulling air upward from below, that’s often crawl space air finding its way into the living space. A failing vapor barrier that’s allowing moisture to accumulate below is a primary driver of that smell. If you’ve tried everything else and can’t find the source, the crawl space is usually worth checking.
The barrier isn’t covering the full ground surface or the walls. A vapor barrier that only covers part of the crawl space floor is only solving part of the problem. Moisture doesn’t check whether the other half of the ground is covered before it evaporates. If the existing barrier stops short of the foundation walls, or if it was installed only under certain sections of the house, it’s incomplete by definition. Proper installation means full ground coverage with the barrier running up and secured to the foundation walls, so there’s no exposed soil anywhere in the space.
Why Vapor Barriers Fail Faster in Hampton Roads
The coastal Virginia environment is harder on crawl space materials than most homeowners realize. The combination of high ambient humidity, acidic coastal plain soils, and temperature swings between seasons breaks down standard polyethylene sheeting faster than it would in a drier inland climate. Homes near waterways or in low-lying neighborhoods with high water tables are dealing with additional moisture pressure that thin barriers simply weren’t designed to handle long-term.
Pest activity is another factor that’s more pronounced here. Subterranean termites, rodents, and other pests that access crawl spaces regularly damage vapor barriers in the process. A pest control treatment that doesn’t include repairing the barrier afterward leaves openings that persist indefinitely.
The physical access that comes with routine maintenance also takes a toll. Every time someone crawls through the space to service HVAC equipment, check ductwork, or address a plumbing issue, the barrier takes some damage. Over ten or fifteen years of normal home maintenance, a 6-mil barrier in a Hampton Roads crawl space is likely in significantly worse shape than it was when it was installed. The Department of Energy recommends heavier-duty vapor retarder materials for crawl spaces that experience regular access or challenging moisture conditions, both of which apply to most homes in this region.
Vapor Barrier Replacement vs. Full Encapsulation
This is the question that comes up most often once a homeowner realizes their barrier is failing: do I just replace the plastic, or do I need a full encapsulation?
The honest answer is that it depends on what’s causing the moisture problem and how well the rest of the crawl space is set up. A straight barrier replacement makes sense when the existing system was working reasonably well, the foundation vents are appropriate for the conditions, there’s no active water intrusion, and the main issue is just that the old material has degraded. Swapping in a heavier-duty liner, something in the 12-mil range or above, and making sure it’s properly lapped and taped at seams addresses the immediate problem.
Full encapsulation is the better answer when the crawl space has chronic moisture issues, when the foundation vents are letting in humid summer air that’s causing condensation, when there’s any history of standing water, or when the wood framing shows signs of past or ongoing moisture damage. Encapsulation goes further than barrier replacement: it seals the vents, runs the liner up and mechanically fastens it to the walls, and pairs the system with active dehumidification to maintain humidity below the threshold where mold and decay can establish. In Hampton Roads conditions, a lot of homes that thought they just needed a new vapor barrier actually needed the fuller system to get the crawl space genuinely under control.
If you’re not sure which situation you’re in, that’s exactly what an inspection is for. Our crawl space encapsulation page explains what a complete system looks like and how it compares to a basic vapor barrier. And if you’ve got damaged framing alongside a failing barrier, the structural repair side of crawl space work often needs to happen at the same time.
At Hawk, we offer free crawl space inspections with no obligation. We’ll take a look at the existing barrier, the condition of the framing, and the overall moisture situation, and give you a straight answer on what we’d recommend and why. Schedule your free inspection here.
Frequently Asked Questions
How long should a crawl space vapor barrier last?
A standard 6-mil polyethylene barrier in a typical crawl space might last 10 to 15 years under good conditions. In Hampton Roads, with the moisture levels, soil acidity, and pest activity common to the region, expect the lower end of that range, especially if the crawl space sees regular foot traffic from maintenance work. Heavier-duty reinforced liners in the 12-mil to 20-mil range last considerably longer and hold up better to the conditions that degrade thinner material faster.
Can I replace a vapor barrier myself?
The physical task of laying new plastic sheeting is something a handy homeowner can do. The challenge is getting it right: cutting and lapping the material properly at seams, running it up the walls and securing it correctly, making sure there’s no exposed soil anywhere in the space, and making sure any drainage or moisture issues that caused the old barrier to fail are addressed at the same time. A new barrier installed on top of the same conditions that destroyed the old one is going to have the same lifespan. If there’s any water intrusion, mold, or framing damage involved, professional assessment before doing anything is the right move.
Does a vapor barrier eliminate the need for a dehumidifier?
Not entirely. A vapor barrier controls moisture coming up through the soil, which is a major source, but it doesn’t address moisture that enters through foundation vents, gaps around penetrations, or through the walls themselves. In an unencapsulated crawl space with open vents, humid summer air is still getting in regardless of what’s on the ground. A dehumidifier in that situation is working against an active source rather than maintaining a controlled environment. In a fully encapsulated crawl space where the vents are sealed and the liner runs up the walls, a dehumidifier manages residual moisture and keeps humidity consistently below the level where problems develop. The two work together as a system.
What thickness vapor barrier do I need for my crawl space?
Building codes in Virginia require a minimum of 6-mil polyethylene for crawl space vapor barriers, but that’s a floor, not a recommendation. For Hampton Roads conditions, most professional installations use a reinforced liner in the 12-mil range or heavier. The thicker material resists tearing under foot traffic, holds up better against pests and acidic soil, and maintains its integrity longer between inspections. If a contractor is quoting a 6-mil barrier for a Hampton Roads crawl space, it’s worth asking why they’re not going heavier given the regional conditions.
Share with others

Contact Forever Guard Today!
Forever Guard will do everything we can to ensure your experience with us is excellent.