2530 Centerville Turnpike S, Chesapeake, VA 23322

Signs Your Crawl Space Vapor Barrier Needs Replacement

Signs Your Crawl Space Vapor Barrier Needs Replacement

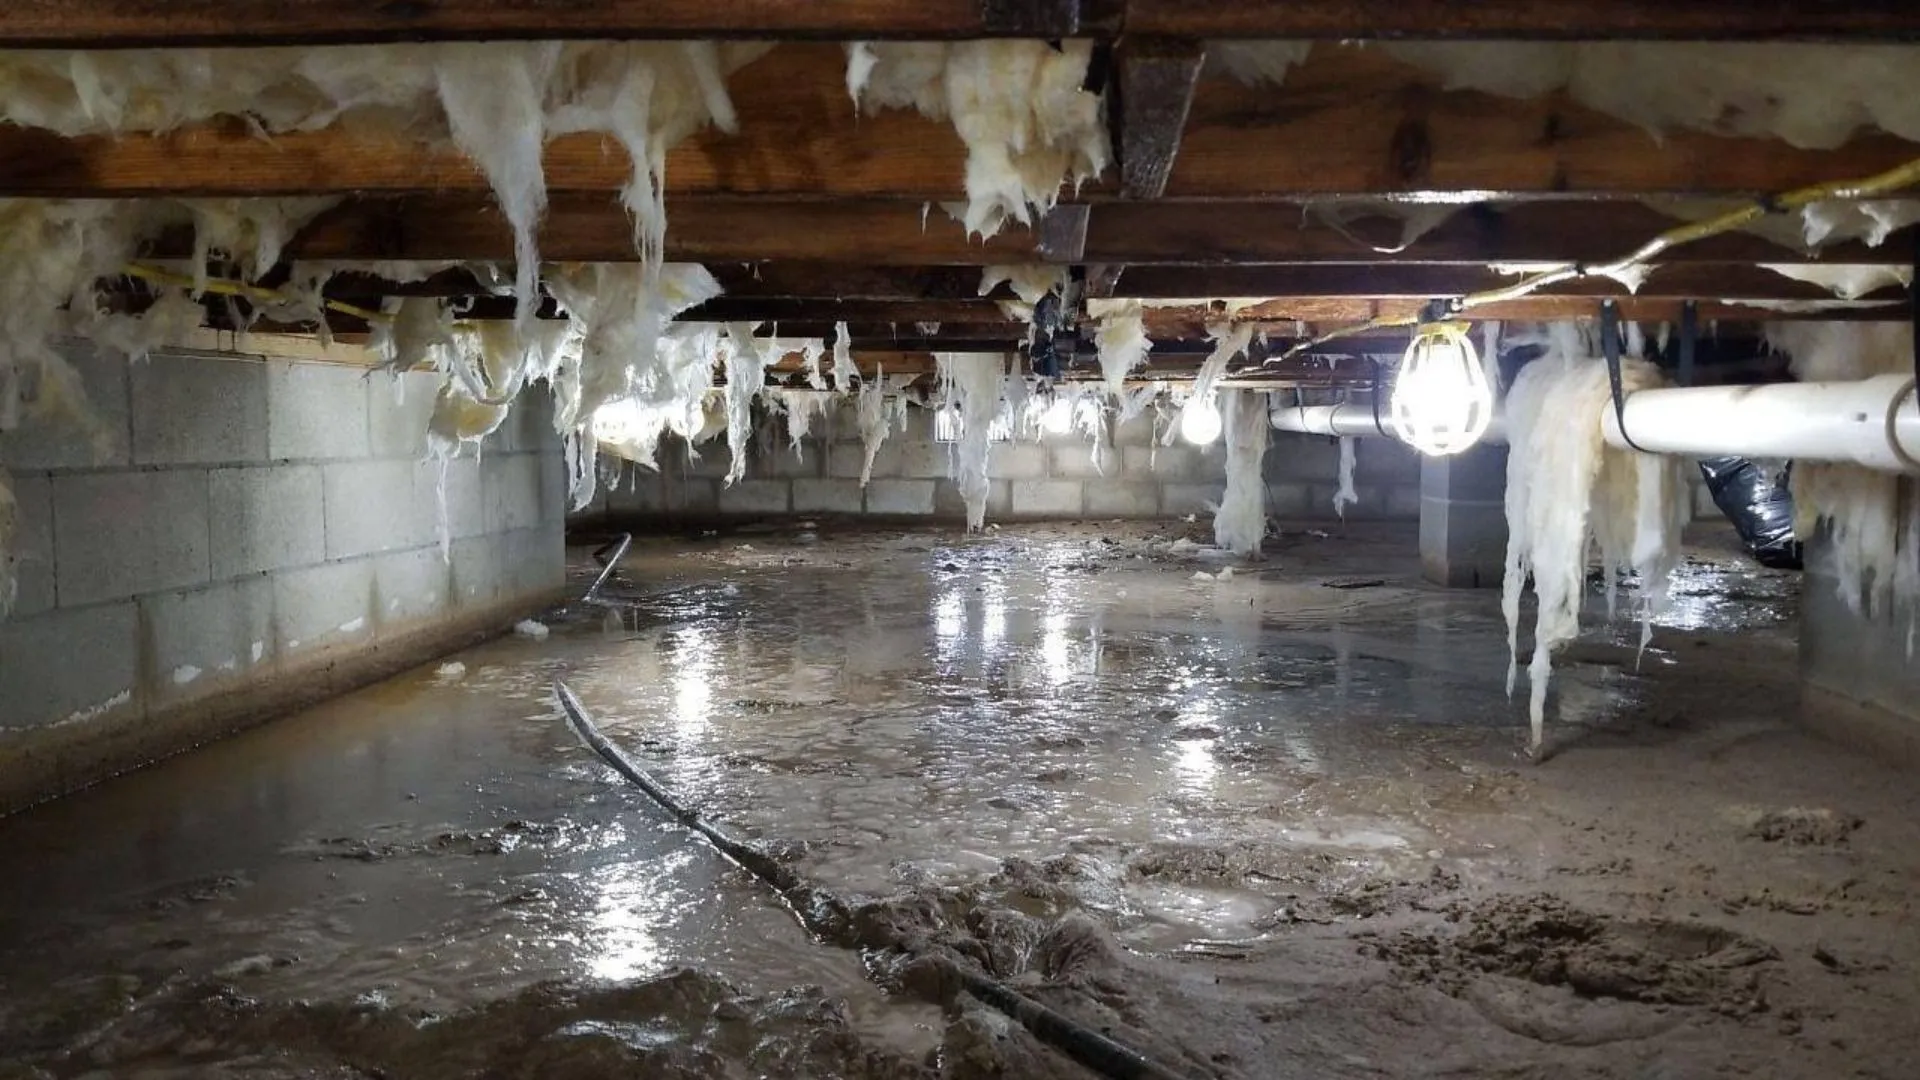
If you’ve gotten into your crawl space recently, or had someone else do it, and found a mess of torn plastic sheeting, you’re not alone. Vapor barriers don’t last forever, and in a climate like Hampton Roads, they tend to fail faster than homeowners expect. The problem is that most people don’t know what a failing barrier looks like, or how to tell whether what they’re seeing is minor or worth fixing soon. This post walks through the specific signs that a crawl space vapor barrier needs replacement, why barriers fail in coastal Virginia conditions, and what the decision looks like between a simple barrier swap and a full encapsulation.

What a Vapor Barrier Is Actually Supposed to Do

Before getting into failure signs, it helps to be clear on what the barrier is doing in the first place. A crawl space vapor barrier is a layer of plastic sheeting installed on the ground beneath your home. Its job is to block moisture vapor from rising out of the soil and into the crawl space environment above it. Soil holds water, and even when there’s no standing water present, that moisture evaporates upward constantly. Without a barrier, that vapor saturates the air in the crawl space, condenses on the wood framing, and creates the conditions for mold growth and wood decay.

In Hampton Roads, where the soil holds moisture aggressively and the water table in many neighborhoods sits close to the surface, that upward vapor pressure is significant. A barrier that’s intact and properly installed manages it. A barrier that’s torn, degraded, or incomplete leaves the framing above it exposed to ongoing moisture. The EPA notes that controlling moisture at the source is the most effective way to prevent mold growth, and in a crawl space, the vapor barrier is that first line of control.

Signs Your Crawl Space Vapor Barrier Needs Replacement

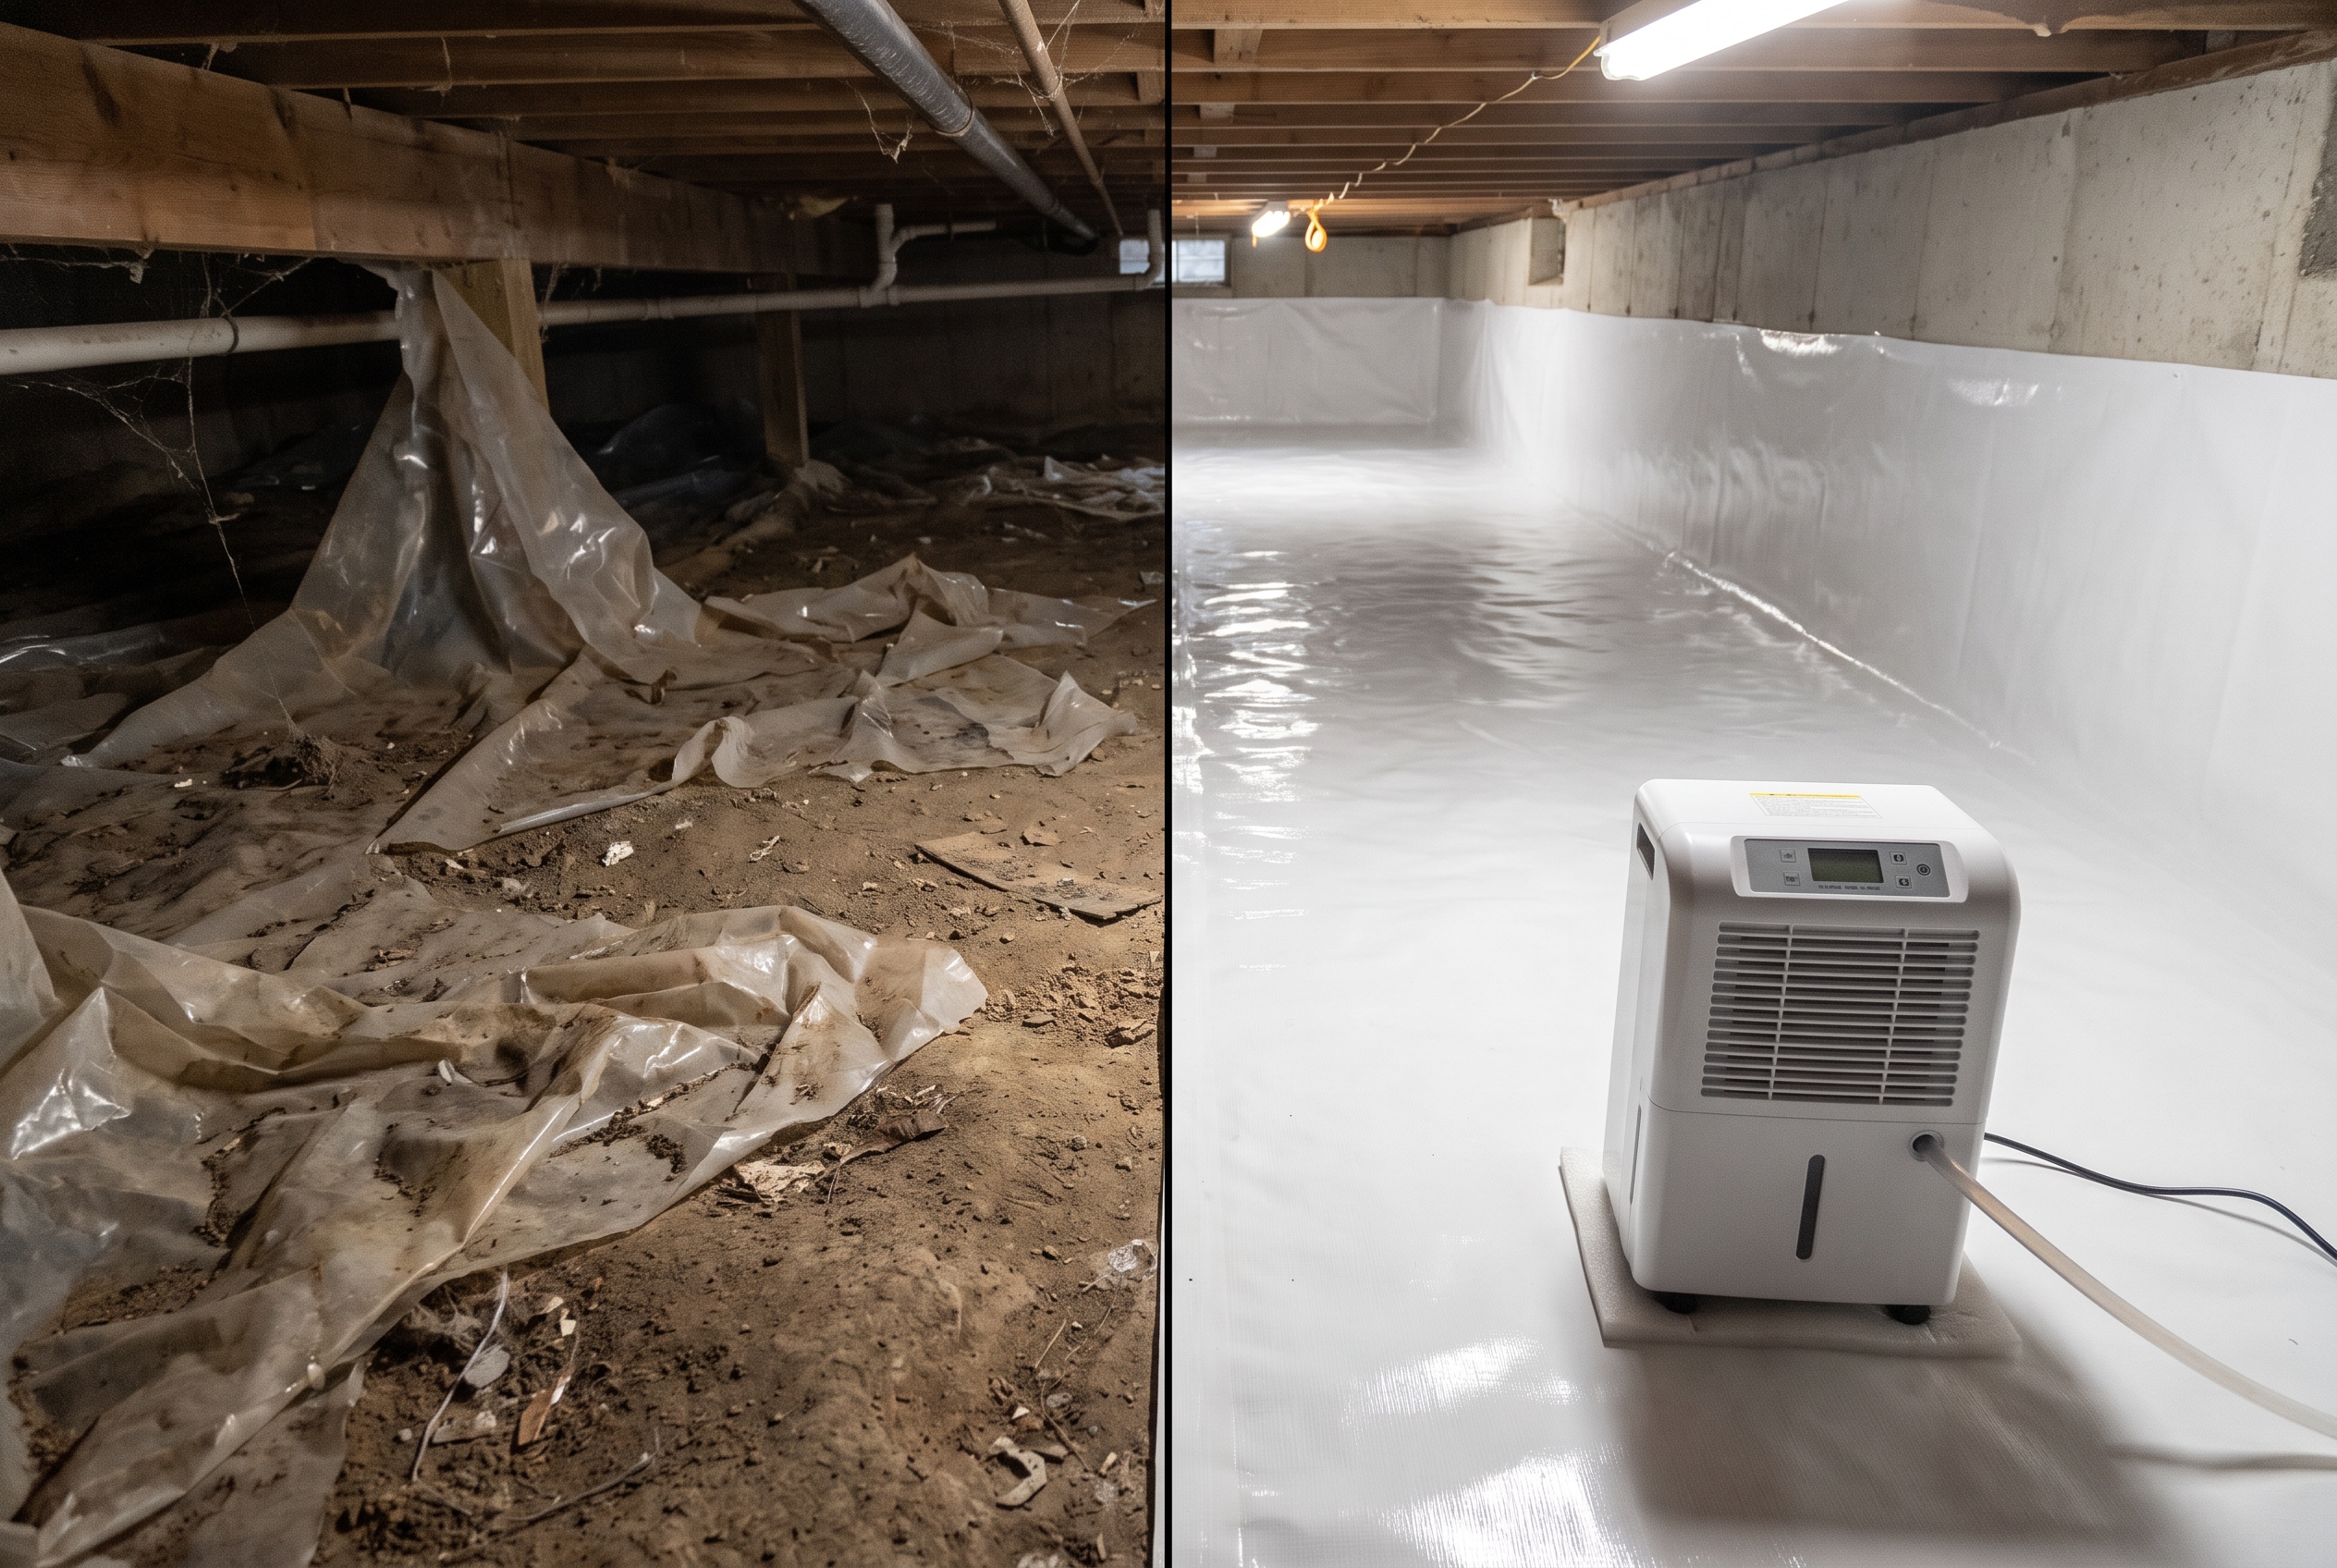
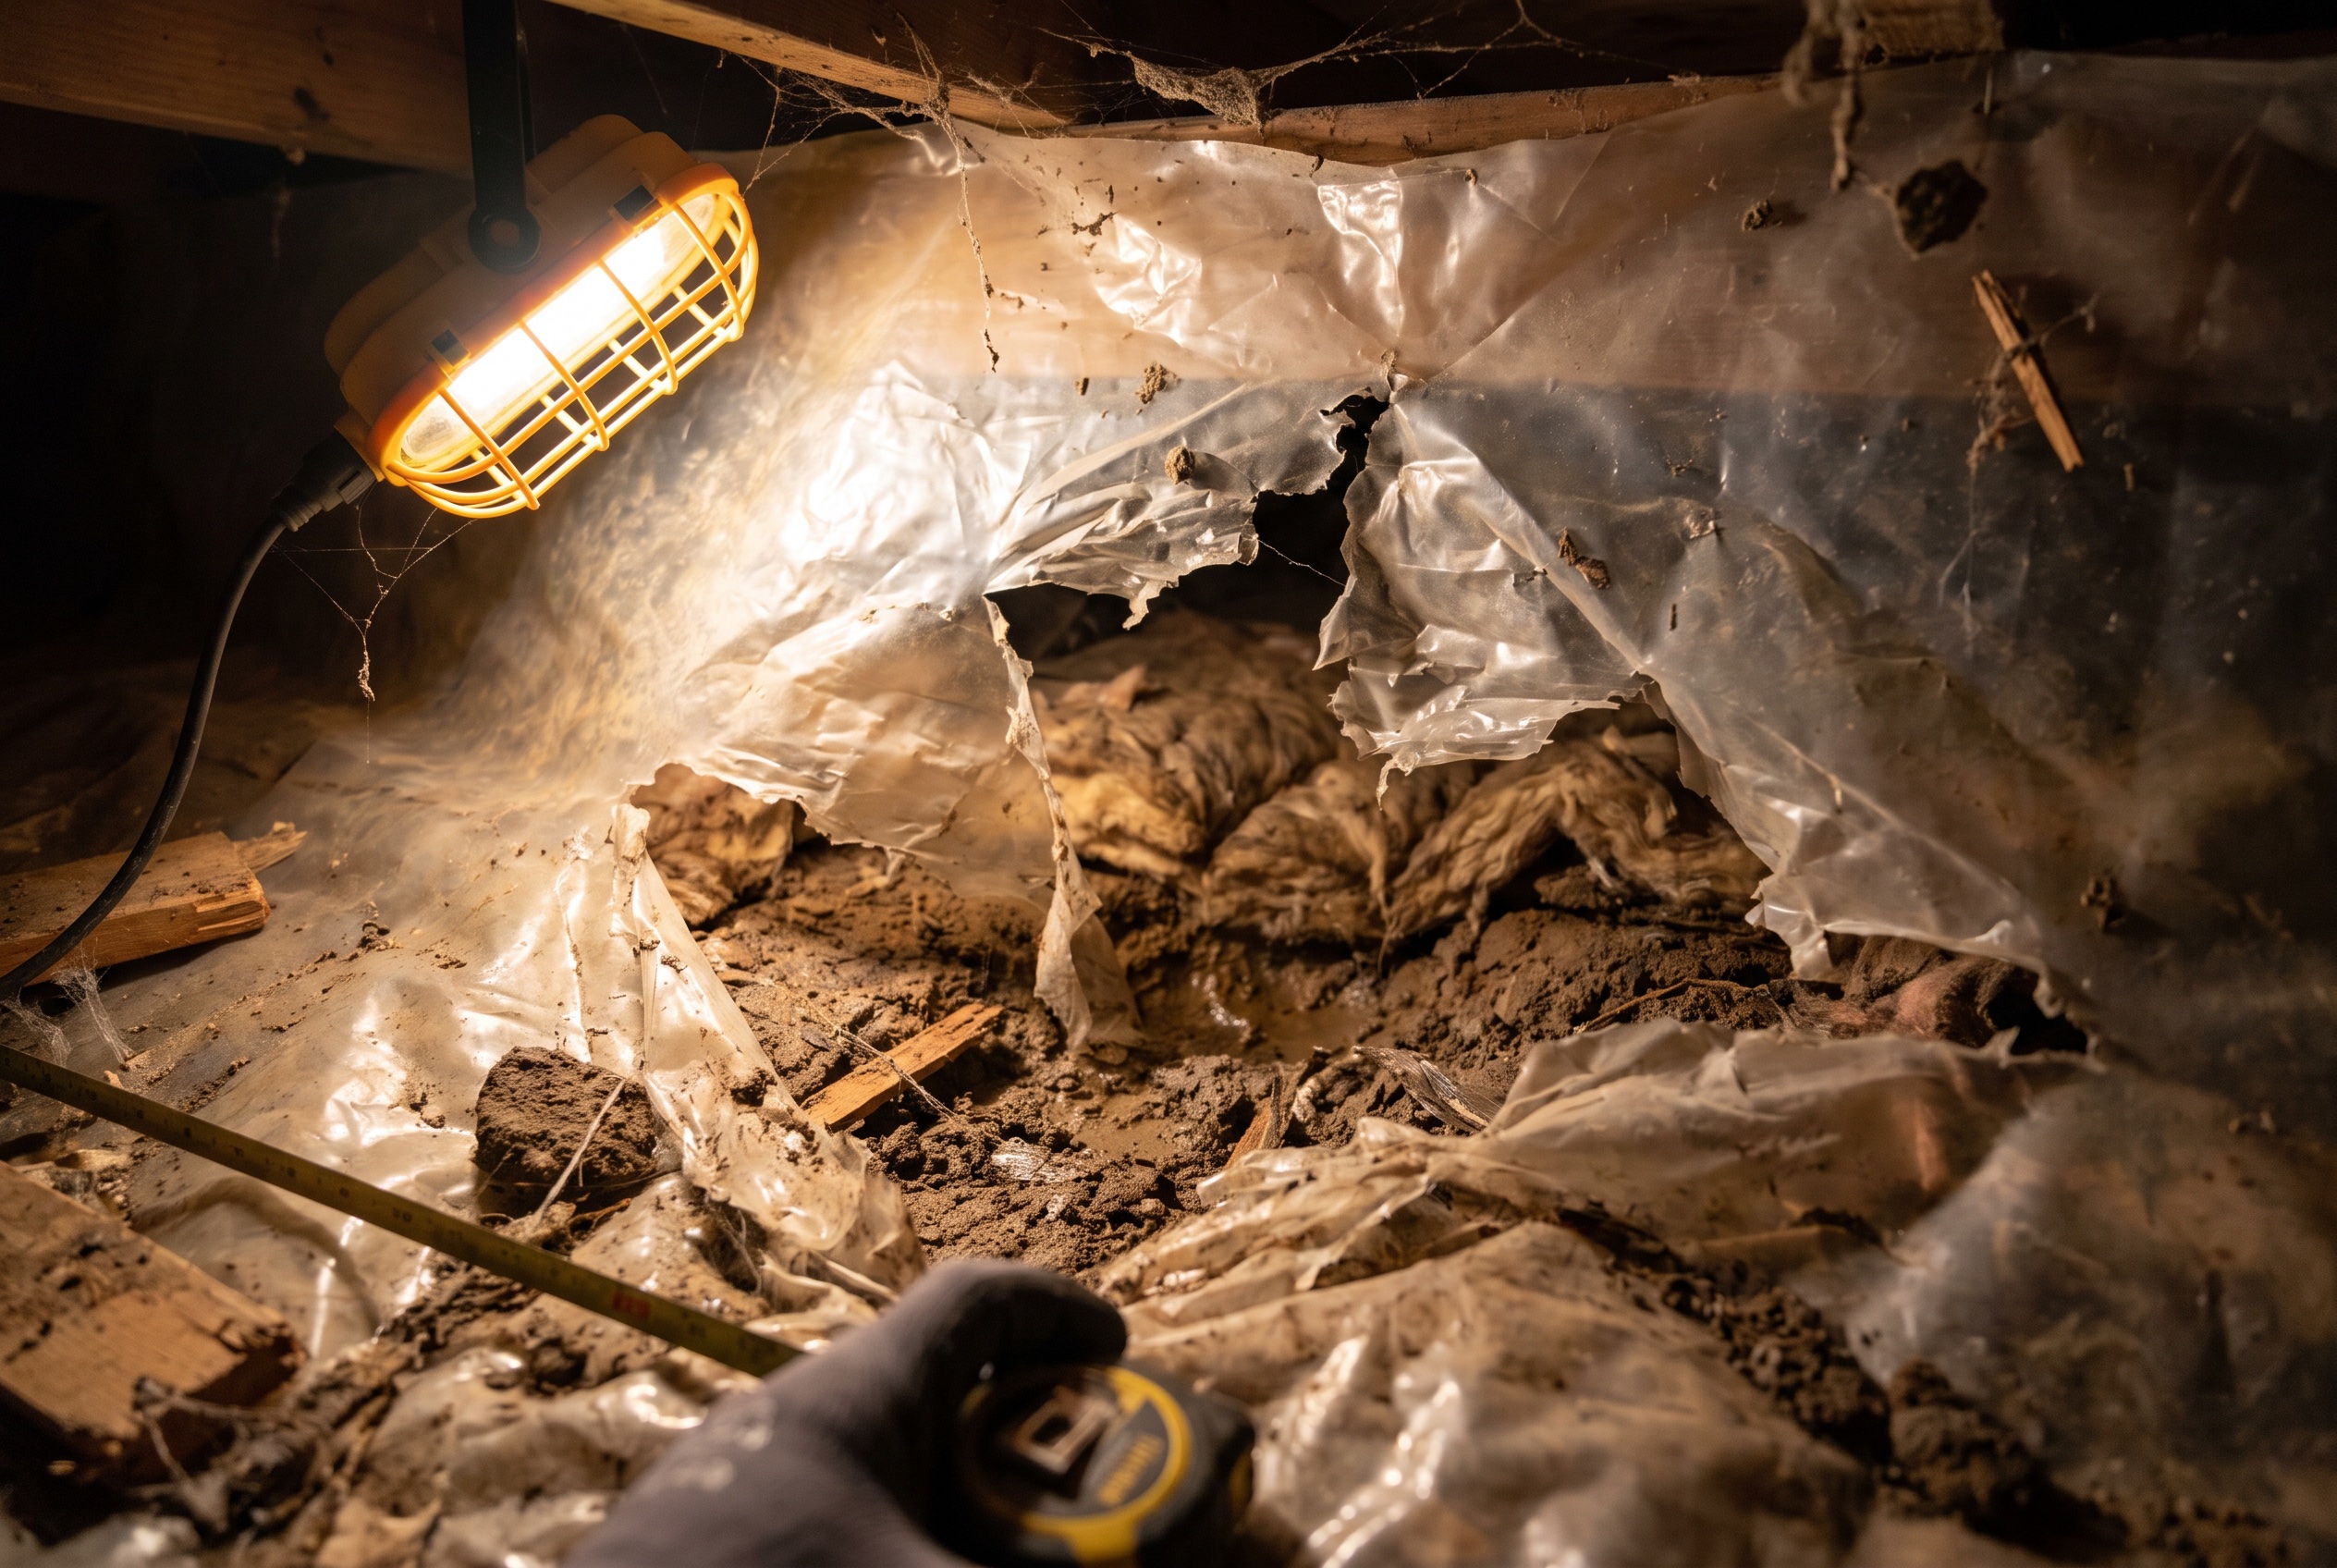
Tears, holes, and gaps in the material. This is the most obvious sign and the one homeowners most commonly find when they actually look. Plastic sheeting in a crawl space takes a beating over time. HVAC technicians, plumbers, and pest control crews walk on it. Pests chew through it. Settling of the ground beneath it causes it to bunch, pull away from the walls, and crack along fold lines. Any gap in the barrier, no matter how small it looks, is an opening for moisture vapor to pass through unobstructed. If the barrier looks like it’s been patched together from several pieces with open seams between them, or if sections have been pushed aside and never replaced, it’s not doing its job.

Visible mold on the barrier surface or on the framing above it. Mold on the top surface of the vapor barrier means moisture is condensing there, which usually indicates the barrier has failed in enough places that the overall humidity in the crawl space has climbed. Mold on the joists or sill plates above is more serious and means the moisture has been elevated long enough to establish growth on the wood. Either situation calls for remediation and a fresh barrier at minimum, and often a full encapsulation to actually bring the humidity under control.

The barrier is thin, brittle, or degraded. Older homes sometimes have the original vapor barrier that was installed during construction, which may be decades old. Standard builder-grade barriers are typically 6-mil polyethylene, which is the minimum required by most building codes. At 6-mil thickness, the material breaks down faster under UV exposure, foot traffic, and the acidic soil conditions common in coastal Virginia. A barrier that crumbles or tears easily when touched has lost most of its effectiveness regardless of whether it looks intact from a distance.

Standing water on or under the barrier. Water pooling on top of the barrier after rain is actually the barrier working as intended in one sense, it’s catching water rather than letting it go straight into the soil. But if that water has nowhere to go and sits there, it creates a humidity problem above the barrier and can push the sheeting up off the ground, creating air gaps that defeat the purpose. Water consistently getting under the barrier, pooling between the plastic and the soil, usually means the barrier isn’t sealed at the edges and water is finding its way in from the sides. That’s a drainage and sealing problem, not just a material problem.

Persistent musty smell in the house. You may not need to go into the crawl space to notice this one. If the first floor of your home has a musty or earthy smell that doesn’t go away, especially in summer when the house is closed up and the stack effect is pulling air upward from below, that’s often crawl space air finding its way into the living space. A failing vapor barrier that’s allowing moisture to accumulate below is a primary driver of that smell. If you’ve tried everything else and can’t find the source, the crawl space is usually worth checking.

The barrier isn’t covering the full ground surface or the walls. A vapor barrier that only covers part of the crawl space floor is only solving part of the problem. Moisture doesn’t check whether the other half of the ground is covered before it evaporates. If the existing barrier stops short of the foundation walls, or if it was installed only under certain sections of the house, it’s incomplete by definition. Proper installation means full ground coverage with the barrier running up and secured to the foundation walls, so there’s no exposed soil anywhere in the space.

Why Vapor Barriers Fail Faster in Hampton Roads

The coastal Virginia environment is harder on crawl space materials than most homeowners realize. The combination of high ambient humidity, acidic coastal plain soils, and temperature swings between seasons breaks down standard polyethylene sheeting faster than it would in a drier inland climate. Homes near waterways or in low-lying neighborhoods with high water tables are dealing with additional moisture pressure that thin barriers simply weren’t designed to handle long-term.

Pest activity is another factor that’s more pronounced here. Subterranean termites, rodents, and other pests that access crawl spaces regularly damage vapor barriers in the process. A pest control treatment that doesn’t include repairing the barrier afterward leaves openings that persist indefinitely.

The physical access that comes with routine maintenance also takes a toll. Every time someone crawls through the space to service HVAC equipment, check ductwork, or address a plumbing issue, the barrier takes some damage. Over ten or fifteen years of normal home maintenance, a 6-mil barrier in a Hampton Roads crawl space is likely in significantly worse shape than it was when it was installed. The Department of Energy recommends heavier-duty vapor retarder materials for crawl spaces that experience regular access or challenging moisture conditions, both of which apply to most homes in this region.

Vapor Barrier Replacement vs. Full Encapsulation

This is the question that comes up most often once a homeowner realizes their barrier is failing: do I just replace the plastic, or do I need a full encapsulation?

The honest answer is that it depends on what’s causing the moisture problem and how well the rest of the crawl space is set up. A straight barrier replacement makes sense when the existing system was working reasonably well, the foundation vents are appropriate for the conditions, there’s no active water intrusion, and the main issue is just that the old material has degraded. Swapping in a heavier-duty liner, something in the 12-mil range or above, and making sure it’s properly lapped and taped at seams addresses the immediate problem.

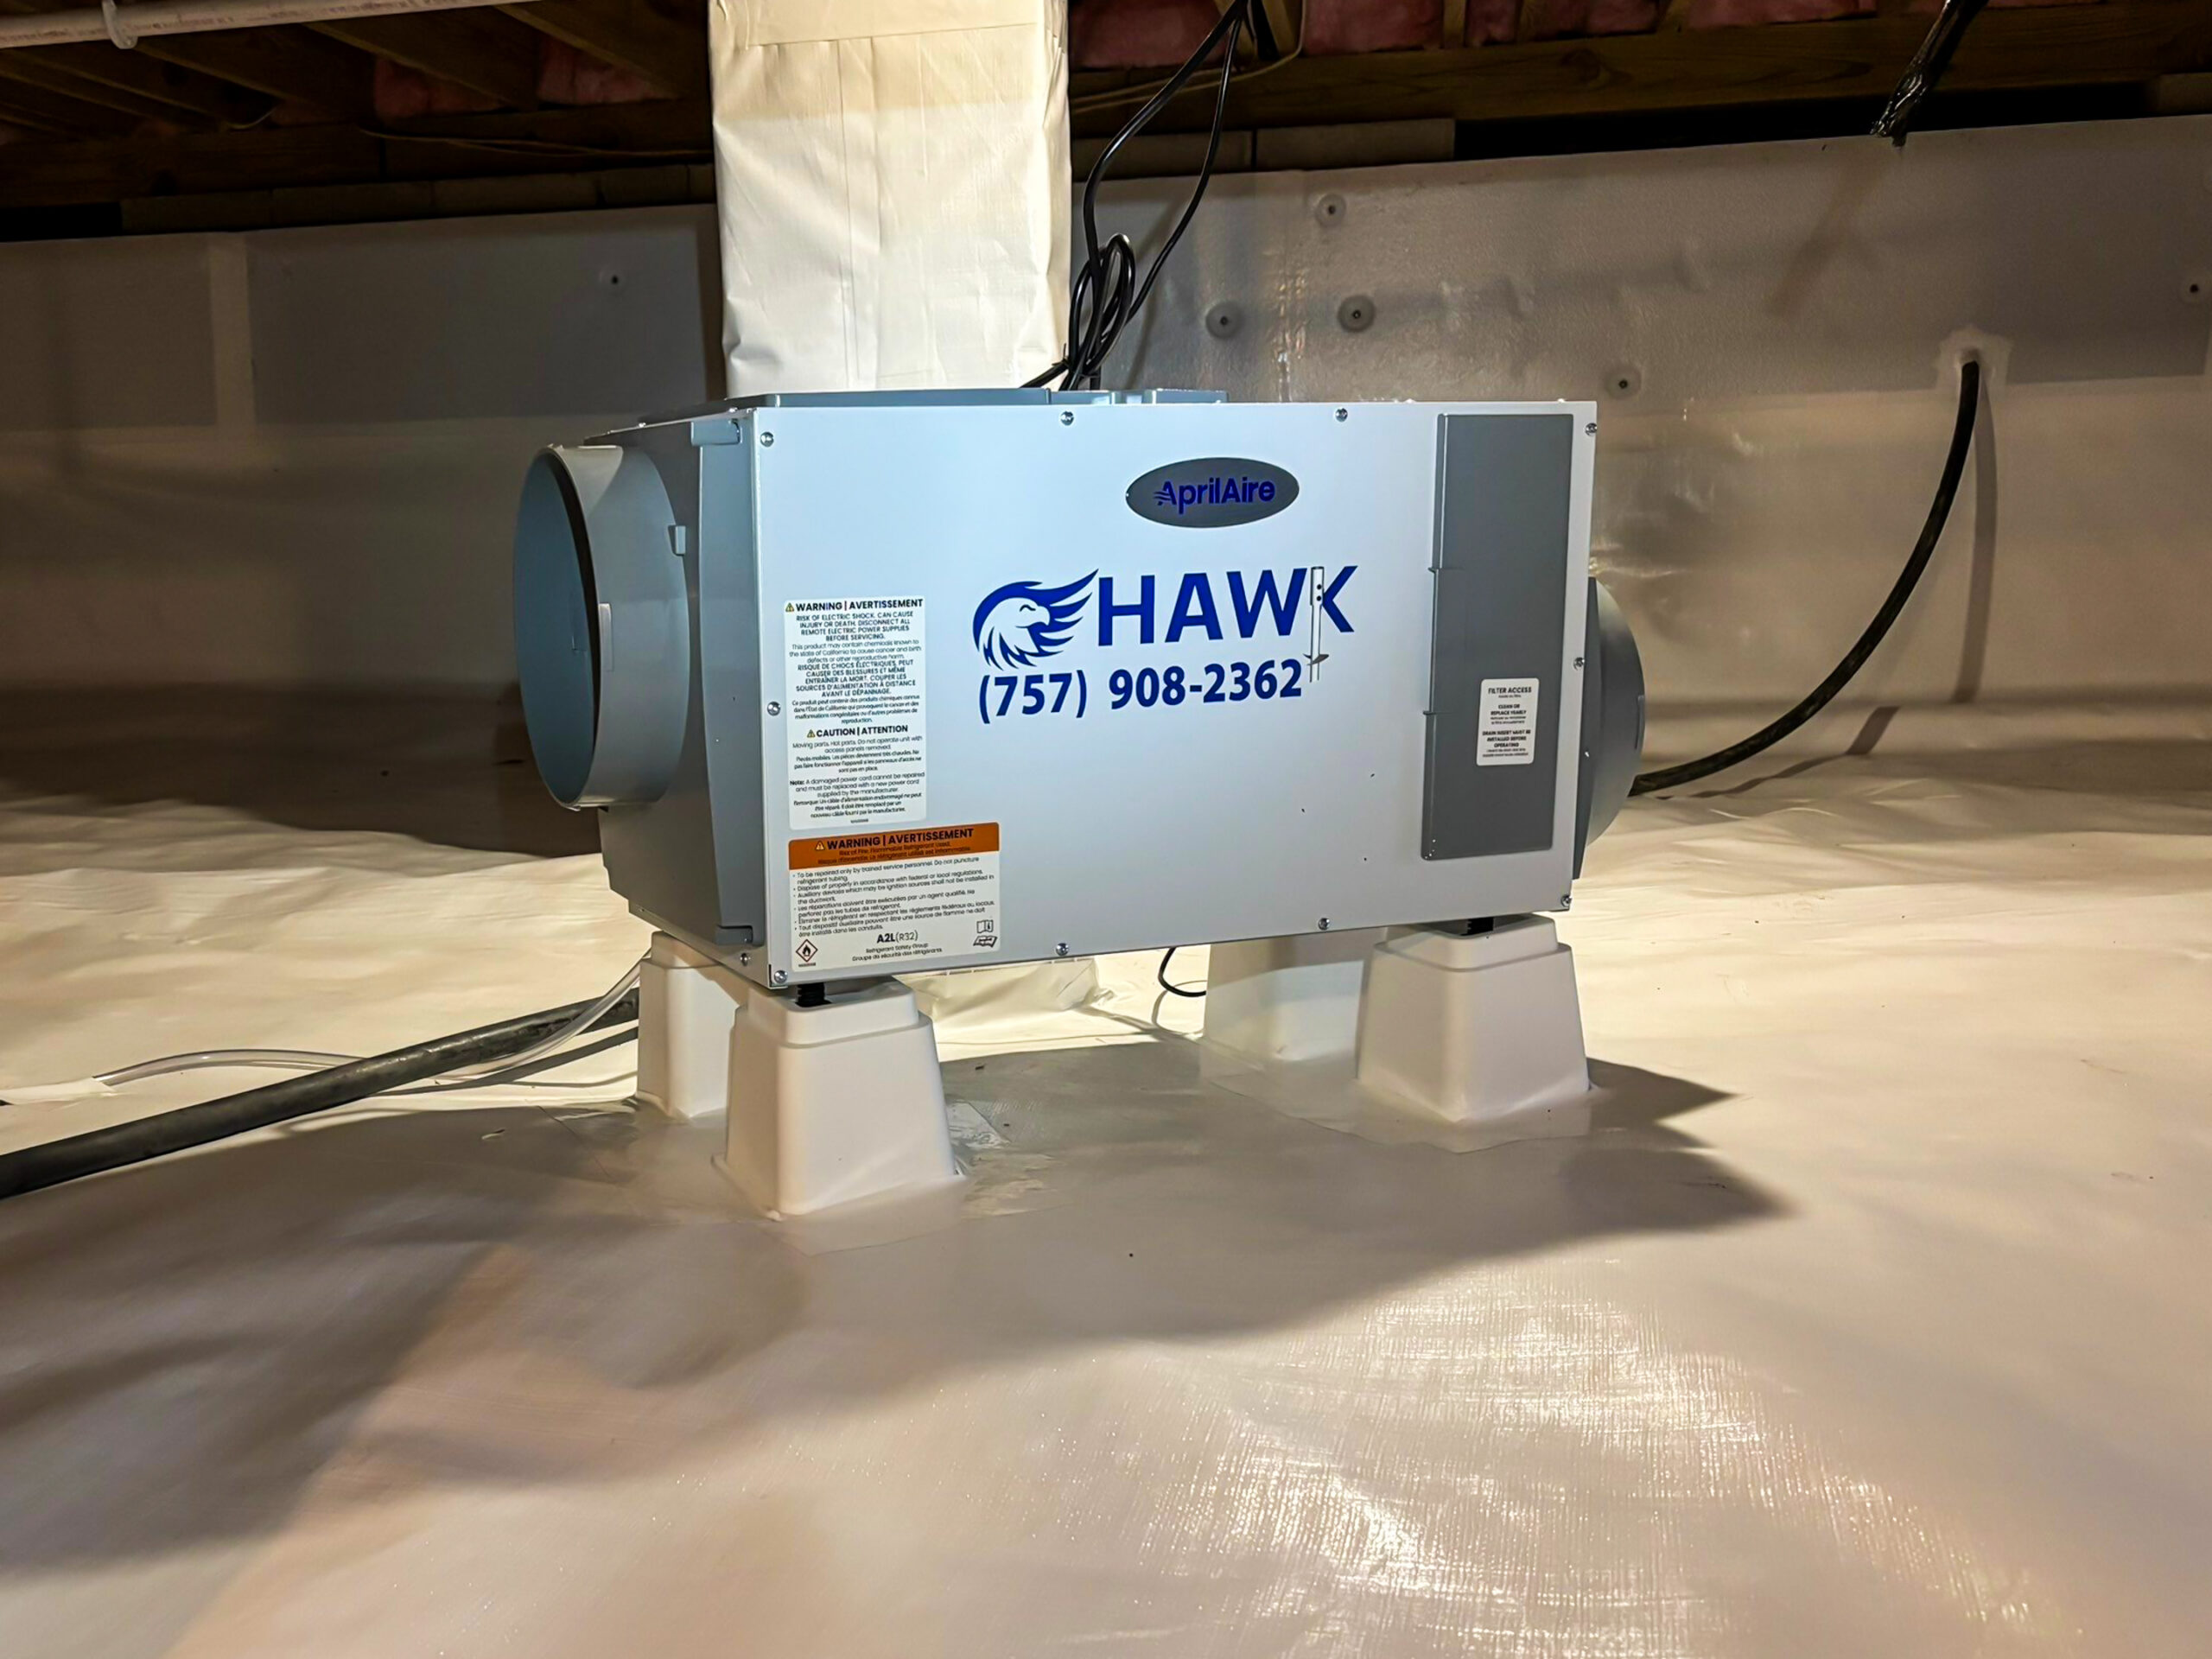
Full encapsulation is the better answer when the crawl space has chronic moisture issues, when the foundation vents are letting in humid summer air that’s causing condensation, when there’s any history of standing water, or when the wood framing shows signs of past or ongoing moisture damage. Encapsulation goes further than barrier replacement: it seals the vents, runs the liner up and mechanically fastens it to the walls, and pairs the system with active dehumidification to maintain humidity below the threshold where mold and decay can establish. In Hampton Roads conditions, a lot of homes that thought they just needed a new vapor barrier actually needed the fuller system to get the crawl space genuinely under control.

If you’re not sure which situation you’re in, that’s exactly what an inspection is for. Our crawl space encapsulation page explains what a complete system looks like and how it compares to a basic vapor barrier. And if you’ve got damaged framing alongside a failing barrier, the structural repair side of crawl space work often needs to happen at the same time.

At Hawk, we offer free crawl space inspections with no obligation. We’ll take a look at the existing barrier, the condition of the framing, and the overall moisture situation, and give you a straight answer on what we’d recommend and why. Schedule your free inspection here.

Frequently Asked Questions

How long should a crawl space vapor barrier last?

A standard 6-mil polyethylene barrier in a typical crawl space might last 10 to 15 years under good conditions. In Hampton Roads, with the moisture levels, soil acidity, and pest activity common to the region, expect the lower end of that range, especially if the crawl space sees regular foot traffic from maintenance work. Heavier-duty reinforced liners in the 12-mil to 20-mil range last considerably longer and hold up better to the conditions that degrade thinner material faster.

Can I replace a vapor barrier myself?

The physical task of laying new plastic sheeting is something a handy homeowner can do. The challenge is getting it right: cutting and lapping the material properly at seams, running it up the walls and securing it correctly, making sure there’s no exposed soil anywhere in the space, and making sure any drainage or moisture issues that caused the old barrier to fail are addressed at the same time. A new barrier installed on top of the same conditions that destroyed the old one is going to have the same lifespan. If there’s any water intrusion, mold, or framing damage involved, professional assessment before doing anything is the right move.

Does a vapor barrier eliminate the need for a dehumidifier?

Not entirely. A vapor barrier controls moisture coming up through the soil, which is a major source, but it doesn’t address moisture that enters through foundation vents, gaps around penetrations, or through the walls themselves. In an unencapsulated crawl space with open vents, humid summer air is still getting in regardless of what’s on the ground. A dehumidifier in that situation is working against an active source rather than maintaining a controlled environment. In a fully encapsulated crawl space where the vents are sealed and the liner runs up the walls, a dehumidifier manages residual moisture and keeps humidity consistently below the level where problems develop. The two work together as a system.

What thickness vapor barrier do I need for my crawl space?

Building codes in Virginia require a minimum of 6-mil polyethylene for crawl space vapor barriers, but that’s a floor, not a recommendation. For Hampton Roads conditions, most professional installations use a reinforced liner in the 12-mil range or heavier. The thicker material resists tearing under foot traffic, holds up better against pests and acidic soil, and maintains its integrity longer between inspections. If a contractor is quoting a 6-mil barrier for a Hampton Roads crawl space, it’s worth asking why they’re not going heavier given the regional conditions.

Floor Joist Repair: What It Involves and When Your Home Needs It

Floor Joist Repair: What It Involves and When Your Home Needs It

If you’ve already had someone look at your crawl space, or you’ve gotten under there yourself, and the word “joists” came up, you’re past the point of wondering whether something is wrong. You’re trying to figure out how bad it is, what fixing it actually means, and what happens if you put it off. This post is aimed at that stage of the process.

Floor joist repair is more specific than general sagging floor work. The joists are the horizontal framing members that span between your foundation walls and support beams, and they carry the load of everything above them: the subfloor, the finish floor, the furniture, and the people walking around on it. When they’re compromised, the floor loses the support it needs, and the longer that goes unaddressed, the more the damage tends to spread.

What Damages Floor Joists in Coastal Virginia Homes

In Hampton Roads, the two most common culprits are moisture-driven wood decay and termite damage. Both are largely invisible until they’ve been developing for a while, and both are directly connected to crawl space conditions.

Wood rot and fungal decay. Wood rot isn’t caused by moisture directly. It’s caused by wood-destroying fungi that need sustained moisture to grow and spread. When a crawl space stays humid, whether because it’s unencapsulated, poorly vented, or dealing with groundwater intrusion, the framing above it stays damp. Over time that dampness creates exactly the environment those fungi need. The decay starts at the surface and works inward, progressively reducing the structural cross-section of the joist. A joist that looks intact from below might have lost a significant portion of its load-carrying capacity to internal decay.

Chesapeake and the surrounding area are particularly prone to this because of the region’s consistently high humidity and the high water table in many neighborhoods. Homes in low-lying areas near Deep Creek, Great Bridge, or coastal parts of Virginia Beach deal with moisture pressure that doesn’t let up seasonally the way it might in drier parts of the state.

Termite damage. Subterranean termites are common throughout Hampton Roads, and floor joists are a frequent target. They feed on wood from the inside out, hollowing out the interior while leaving the outer shell mostly intact. This is part of what makes termite damage so insidious in a crawl space context: a joist can look fine from a quick visual inspection while being structurally hollow. The EPA notes that termite damage in the U.S. causes billions of dollars in structural damage annually, much of it in crawl space framing that goes uninspected for years. By the time floors start showing symptoms, the damage is usually well established.

Improper modifications. This one is less common but worth mentioning. Notches and holes cut into joists for plumbing or electrical runs, done without following proper guidelines, can significantly weaken them. A joist notched too deeply at midspan loses a disproportionate amount of its bending strength. If previous work was done under the house without much care for the framing, that’s sometimes part of what an inspection turns up.

How to Tell If Your Floor Joists Need Attention

Some of these signs overlap with general sagging floor symptoms, but a few point more specifically toward joist-level damage rather than failing support posts or foundation issues.

Floors that feel soft or spongy in a specific area, particularly if the subfloor material itself feels like it has some give, often indicate joist damage in that zone. The subfloor is only as solid as the joists beneath it. A floor that bounces noticeably when you walk across it, especially in an older home that didn’t always feel that way, is worth investigating.

Visible damage during a crawl space inspection is the most direct indicator. Joists with dark staining, a soft or crumbling surface texture, obvious checking or splitting along the grain, or hollowed sections where termites have been active are all clear signs of compromised framing. A screwdriver test is a common field method: if a probe can be pushed into the wood with minimal resistance, the wood has lost structural integrity regardless of how it looks from the outside.

Squeaky floors that have gotten noticeably worse over time, as opposed to the occasional squeak that’s always been there, can also point to movement in the framing below. As joists weaken and deflect more under load, the connections between subfloor and framing start to work loose.

What Floor Joist Repair Actually Involves

The right approach depends on how much of the joist is damaged and how many joists are affected. There’s a spectrum of options, and a thorough inspection is what determines where on that spectrum your situation falls.

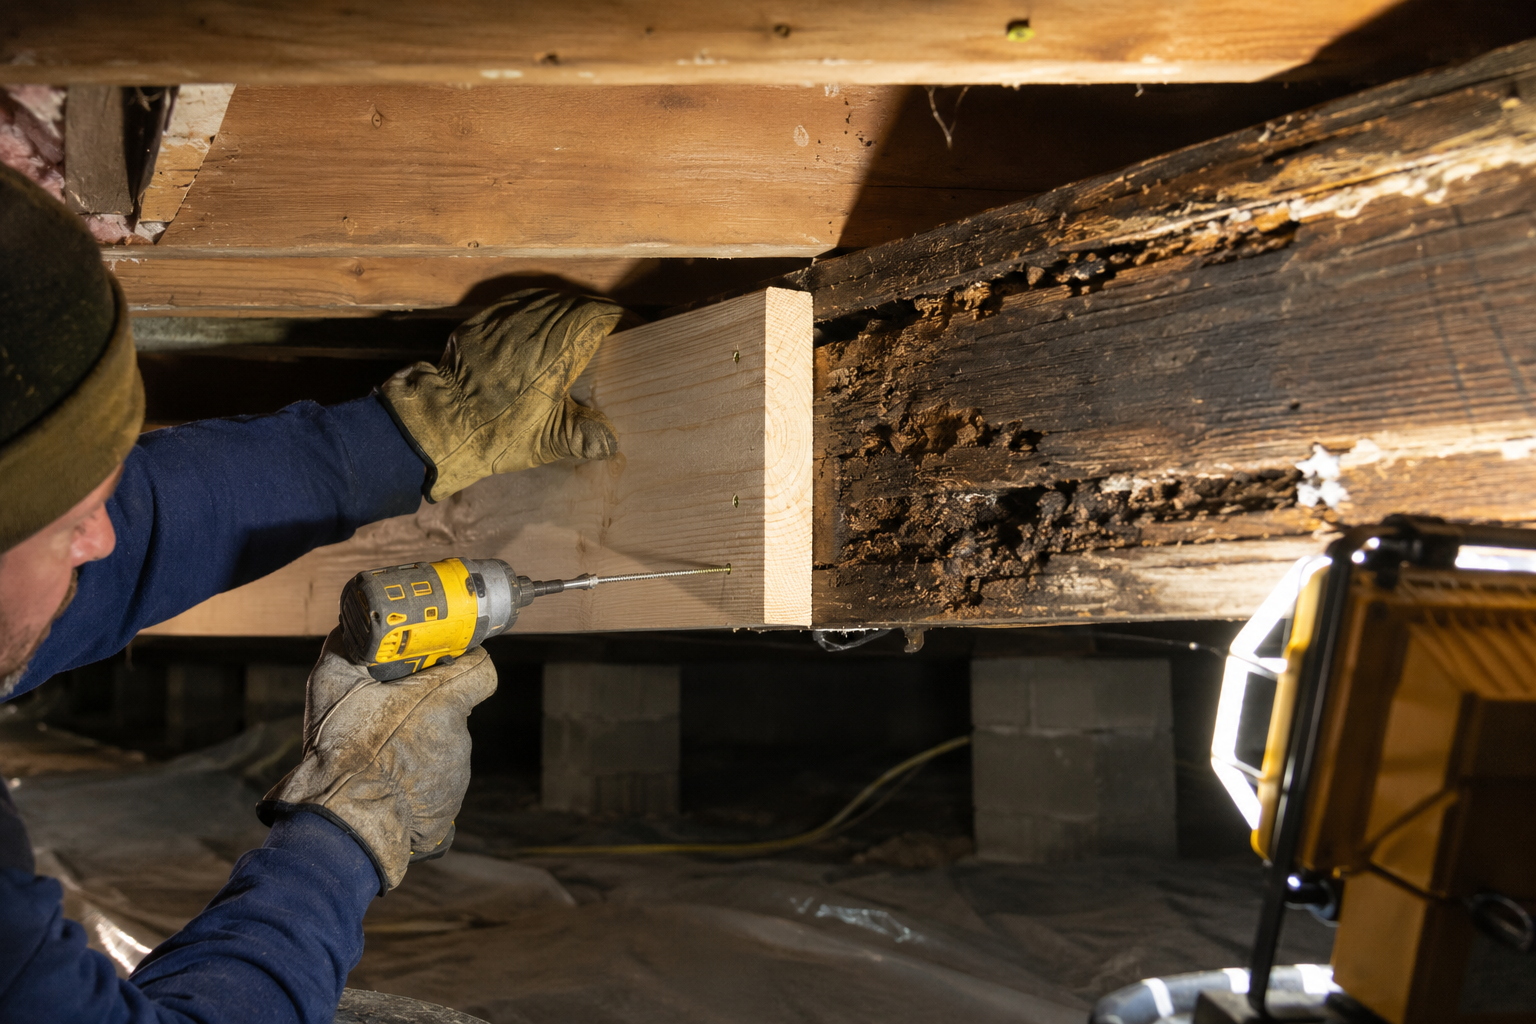
Sistering. When a joist has localized damage that doesn’t run its full length, sistering is often the preferred repair. A new joist of the same dimensions gets fastened alongside the damaged one, spanning the full length from bearing point to bearing point. The new joist carries the load the damaged one can no longer handle. This is a relatively efficient repair when the damage is limited and the surrounding framing is in decent shape. The key is that the sister joist has to make full contact at both ends where it bears on the beam or foundation wall, otherwise the repair doesn’t transfer load the way it needs to.

Full joist replacement. When a joist is damaged along most of its length, or when termite damage has hollowed out the core, sistering isn’t sufficient. The damaged joist has to be removed entirely and replaced with new material. This is more labor-intensive, especially in tight crawl spaces, but it’s the right call when the original framing is too far gone to be supplemented.

Replacing sill plates and rim joists. The sill plate is the piece of wood that sits directly on top of the foundation wall, and the rim joist runs along the perimeter of the floor system. Both are highly exposed to moisture and are common sites for rot and termite damage. When these members are compromised, they affect the entire floor system because every joist ultimately bears on them. Replacing sill plates and rim joists is detailed work but often necessary before the rest of the floor framing can be properly supported. You can see more about the full scope of crawl space structural repair services we provide.

Addressing the cause alongside the repair. This point is worth repeating because it’s where a lot of repairs fall short. New framing installed in a wet, uncontrolled crawl space is going to face the same conditions that damaged the original framing. A proper floor joist repair in a Hampton Roads home almost always needs to be paired with moisture remediation: crawl space encapsulation, improved drainage, a dehumidifier, or some combination. The structural work and the environmental work belong in the same project scope. The U.S. Department of Energy recognizes that sealing and conditioning a crawl space is one of the more impactful steps a homeowner can take for both energy efficiency and long-term structural performance.

Getting a Clear Picture of What You’re Working With

Floor joist damage isn’t something that tends to sit still. Moisture and termites don’t stop because a repair hasn’t been scheduled yet, and framing that’s already weakened is more vulnerable to further damage. The practical implication is that getting an inspection sooner rather than later usually means a smaller scope of repair and a lower cost.

At Hawk, we offer free crawl space inspections with no obligation. We’ll get under the house, document what we find, and give you a straight assessment of what’s there and what we’d recommend. You don’t need to be home for us to take a look. Reach out here to schedule yours.

Frequently Asked Questions

How many floor joists need to be damaged before it becomes a serious problem?

There’s no clean threshold, because it depends on which joists are damaged and how severely. A single joist with significant rot in a high-load area, directly beneath a load-bearing wall or a heavy fixture, can be more consequential than several joists with minor surface damage in a low-traffic area. The severity of the damage matters as much as the count. An inspection that maps out where the damage is and how deep it goes gives you a much clearer picture than a number alone.

Can floor joists be repaired without replacing the subfloor?

Often yes. Joist repair or sistering happens from below, in the crawl space, and in many cases the subfloor above doesn’t need to be disturbed. If the subfloor itself has been damaged by the same moisture that got the joists, that’s a separate issue that might need to be addressed from above, but it’s evaluated independently. A good inspection will tell you whether the damage is limited to the framing or whether it extends into the subfloor material as well.

Is floor joist repair covered by homeowner’s insurance?

Generally not, unless the damage was caused by a specific covered event like a burst pipe. Damage from long-term moisture, wood rot, or termites is typically treated as a maintenance issue and excluded from standard homeowner’s policies. It’s worth reviewing your specific policy and asking your insurer directly, but most homeowners in this situation are paying out of pocket. That’s another reason catching it early, before the scope has grown, tends to make a meaningful difference in overall cost.

What’s the difference between floor joist repair and sagging floor repair?

They overlap significantly but aren’t identical. Sagging floor repair is the broader category and includes issues with support posts, beams, and foundation conditions, not just the joists themselves. Floor joist repair specifically addresses damage to the horizontal framing members that span between supports. In practice, a sagging floor is often caused at least in part by joist damage, but it can also be caused by failing posts or inadequate support with joists that are otherwise in fine shape. An inspection is what tells you which you’re actually dealing with. If you want more context on the broader picture, our sagging floor repair blog post covers what that scope of work typically looks like.

Sagging Floor Repair: What’s Causing It and How It Gets Fixed

Sagging Floor Repair: What’s Causing It and How It Gets Fixed

A floor that feels soft underfoot, bounces when you walk across it, or has developed a noticeable slope is one of those home problems that’s easy to dismiss at first. Maybe it’s subtle enough that you chalk it up to the age of the house. But in coastal Virginia, where moisture is persistent and the soil under a home is constantly moving, a sagging floor is usually telling you something real about what’s happening in the crawl space below it.

Sagging floor repair isn’t one specific fix. It’s a category of work that depends on what’s actually causing the floor to drop, and getting that diagnosis right is the whole game. The wrong repair on the wrong cause is money spent that doesn’t solve anything.

What Causes Sagging Floors in Hampton Roads Homes

The vast majority of sagging floor issues in this region trace back to the crawl space. Most homes in Chesapeake, Norfolk, Portsmouth, and the surrounding areas were built on crawl space foundations, and crawl spaces in coastal Virginia deal with a moisture environment that’s genuinely difficult. High humidity, a water table that sits close to the surface in many neighborhoods, and soil that expands and contracts with seasonal moisture changes all work together to create conditions that take a toll on the wood framing sitting just above the ground.

The most common causes break down like this:

Wood rot in the floor joists or sill plates. When a crawl space stays consistently damp, the wood framing absorbs moisture over time. That moisture creates the conditions for fungal decay, which slowly breaks down the structural integrity of the wood. A joist that’s lost significant cross-section to rot can’t carry the load it was designed to carry, and the floor above it starts to drop. This process is gradual and largely invisible until the floor starts showing symptoms. The EPA notes that wood decay fungi require sustained moisture to develop, which is why crawl space moisture control is directly connected to the structural condition of the framing above it.

Failing support posts or columns. Crawl space foundations rely on a grid of support posts or columns, often set on concrete pads, to carry the load of the floor system down to the ground. These posts can fail for a few reasons: the concrete pad beneath them settles or shifts in unstable soil, the post itself rots if it’s wood, or the original installation simply wasn’t adequate for the load. When a post fails or shifts, the beam it was supporting drops, and the floor above follows.

Termite damage. Termites are a real problem in Hampton Roads, and they often do their worst work in the crawl space where nobody’s looking. They hollow out floor joists and sill plates from the inside, leaving a shell that looks intact from the outside but has almost no structural capacity left. By the time floors start sagging from termite damage, the infestation has typically been active for years. If termite damage is part of the picture, the structural repair and the pest treatment have to happen together.

Undersized or overspanned framing. Some homes, particularly older ones, were built with framing that was marginal to begin with. Joists that span too far without adequate support in the middle will deflect under load over time. This is less about damage and more about the original design not having enough structural redundancy. Adding support in the right places addresses it.

Warning Signs Worth Taking Seriously

Floors don’t usually sag overnight. The process is gradual, and the early signs are easy to explain away. Here’s what to watch for:

A floor that feels springy or soft in a specific area, especially near the center of a room, is a common early indicator. Floors are supposed to feel solid. Any noticeable give underfoot is worth paying attention to. Similarly, a floor with a visible slope, one where furniture doesn’t sit level or where you can feel yourself walking slightly uphill or downhill, suggests that part of the support structure has dropped relative to the rest.

Gaps opening up between the baseboard and the floor, or between the floor and a door threshold, can indicate that the floor has moved downward in that area. Doors that suddenly start dragging on the floor, or that used to close cleanly and now don’t, sometimes point to the same thing. Interior wall cracks that appear near the floor, particularly diagonal ones, can also be a sign that the framing below has shifted enough to stress the structure above it.

If you’ve got any of these symptoms and your home has a crawl space, the next step is getting someone under there to look. A lot of what causes sagging floors is completely invisible from inside the house.

How Sagging Floor Repair Actually Works

The repair approach depends on what the inspection finds. There’s no universal fix, but most sagging floor repairs in crawl space homes involve some combination of the following:

Replacing damaged framing. If joists or sill plates have rot or termite damage, that material has to come out and be replaced with new, sound wood before any structural support work makes sense. You can’t jack up a floor and expect the repair to hold if the wood you’re jacking against is compromised. This part of the work is labor-intensive because it’s happening in a confined space, but it’s not optional when the framing is genuinely damaged.

Installing adjustable steel support jacks. Once the framing is in good shape, or if the framing is intact and the issue is failing posts, heavy-duty adjustable steel jacks get installed at intervals beneath the main support beams. These are a significant upgrade over the older concrete block or wood post systems they often replace. Steel jacks are rated for high load capacity, and critically, they’re adjustable, meaning they can be incrementally raised over time rather than trying to lift everything at once, which reduces the risk of cracking interior drywall as the floor comes back up. Our crawl space services include jack installation as part of a full structural assessment.

Addressing the moisture problem. This part gets skipped more often than it should, and it’s why some sagging floor repairs don’t stay fixed. If the crawl space conditions that caused the rot or post failure in the first place aren’t corrected, the new materials are going to face the same environment the old ones did. A proper repair almost always includes some level of moisture remediation, whether that’s a full crawl space encapsulation, improved drainage, a dehumidifier, or some combination of all three. The structural fix and the moisture fix belong together.

What to Expect from the Process

Most of the work happens in the crawl space, which means minimal disruption inside the house. You might hear equipment and there’ll be activity outside around the crawl space access, but day-to-day life in the home generally continues without much interruption.

The timeline depends on scope. A straightforward jack installation without significant framing damage might be completed in a day. A project that involves replacing damaged joists, treating for mold or termites, and adding encapsulation is a multi-day job. A good contractor will walk you through the timeline after the inspection, once they know what they’re actually dealing with.

One thing worth knowing: if floors have sagged significantly, they often can’t be returned to perfectly level in one shot. Lifting a floor that’s been down for years too aggressively can crack interior drywall and stress the framing above. Most experienced contractors will raise the floor incrementally over time rather than all at once, which is another reason adjustable jacks are the preferred tool for this kind of work.

If you’ve got floors that are giving you pause, the most useful thing you can do is get a professional set of eyes in the crawl space. At Hawk, our inspections are free and there’s no pressure, and you don’t have to be home for us to take a look. Schedule yours here and we’ll tell you straight what we find.

Frequently Asked Questions

Is a sagging floor a structural emergency?

It depends on the severity and the cause. A floor with significant sag, one where the drop is visually obvious or where the underlying framing has severe rot or termite damage, warrants prompt attention. A floor that’s slightly soft or has a minor slope that’s been stable for years is less urgent but still worth having inspected. The concern with waiting is that the conditions causing the sag, usually moisture and the damage it enables, continue the whole time. What’s a moderate repair today can become a more involved one a few years from now.

Can I repair a sagging floor myself?

Some homeowners do attempt DIY crawl space jack installations, and there’s a fair amount of information online about it. The challenge is that without knowing why the floor is sagging, you risk adding support to damaged framing that can’t actually hold it, missing rot or termite damage that will continue to worsen, or lifting too aggressively and cracking drywall upstairs. A professional inspection at minimum is worth it before attempting anything structural, even if you end up doing some of the work yourself.

How long does sagging floor repair last?

When the repair addresses both the structural issue and the underlying moisture cause, a properly done job should be long-lasting. Adjustable steel jacks don’t rot and don’t shift the way older wood or concrete post systems do. New framing installed in a properly controlled crawl space environment, one that’s been encapsulated and dehumidified, is not going to face the same deterioration the original framing did. The durability of the repair is closely tied to whether the moisture problem was fixed at the same time.

What’s the difference between a sagging floor and a foundation problem?

They’re related but not the same thing. A sagging floor in a crawl space home is usually a problem with the support structure between the foundation and the floor, the posts, beams, and joists, rather than the foundation itself. That said, the two often show up together because the same moisture conditions that damage wood framing can also affect the foundation. An inspection will usually clarify which is which. You can read more about foundation repair services if you suspect the issue goes deeper than the crawl space framing.

Say Goodbye to Water Damage: Basement Sump Pump Installation by Hawk Crawl Space & Foundation Repair

Water damage in your basement can be a nightmare—damaging your foundation, belongings, and indoor air quality. If you’ve experienced basement flooding or live in an area prone to heavy rains and rising groundwater, it’s time to take action. At Hawk Crawl Space & Foundation Repair, we provide professional basement sump pump installation that helps protect your home and gives you peace of mind.

What Is a Basement Sump Pump and Why Do You Need One?

A basement sump pump installation in the lowest part of your basement or crawl space. It automatically collects and pumps out excess groundwater or rainwater, preventing it from accumulating and causing flooding or moisture issues.

Without a sump pump, even minor water intrusion can lead to:

  • Mold and mildew growth
  • Structural damage to walls and floors
  • Damage to stored items or HVAC systems
  • Musty odors and poor air quality
  • Increased risk of costly repairs

Installing a sump pump is one of the most effective and affordable ways to prevent basement water damage long-term.

Benefits of Professional Basement Sump Pump Installation

At Hawk Crawl Space & Foundation Repair, we’ve helped countless homeowners keep their basements dry, safe, and functional. Our expert basement sump pump installation services offer several key benefits:

Flood Prevention

Our sump pumps quickly remove excess water before it can accumulate, keeping your basement dry even during heavy storms or seasonal flooding.

Mold and Mildew Control

By reducing moisture levels, sump pumps help prevent the growth of mold and mildew, which thrive in damp environments.

Foundation Protection

Standing water and soil pressure can damage your foundation. A sump pump helps relieve hydrostatic pressure, extending the life of your home’s structure.

Increased Property Value

A dry, mold-free basement is a major selling point. Sump pump installation boosts your home’s marketability and value.

Peace of Mind

With a properly installed and maintained sump pump, you can rest easy knowing your home is protected 24/7.

Our Proven Sump Pump Installation Process

When you choose Hawk Crawl Space & Foundation Repair, you’re getting top-quality service backed by years of experience. Here’s what to expect:

  1. Free On-Site Evaluation
    We inspect your basement or crawl space and assess the best sump pump location and setup for your needs. 
  2. High-Quality Equipment
    We install trusted, durable sump pumps that perform reliably—even in extreme conditions. 
  3. Expert Installation
    Our trained technicians ensure your sump pump is installed correctly, with proper drainage and power backup options. 
  4. Optional Battery Backup Systems
    In case of a power outage, we offer battery-powered backups to keep your pump working when you need it most. 
  5. Follow-Up Support and Maintenance Plans
    We stand behind our work and offer continued service and maintenance to keep your sump pump operating at peak performance.

Why Choose Hawk Crawl Space & Foundation Repair?

Homeowners across the region trust Hawk Crawl Space & Foundation Repair for a reason. We bring:

  • Years of local experience 
  • Honest, upfront pricing 
  • Fast, clean, and professional installations 
  • Long-lasting solutions backed by warranties 
  • Outstanding customer service and support

Protect Your Basement Before the Next Storm Hits

Don’t wait for water damage to strike. Trust the professionals at Hawk Crawl Space & Foundation Repair for dependable basement sump pump installation that keeps your home safe and dry—rain or shine.